Apple has released its regular weekly update to XProtect for all versions of macOS, bringing it to version 5346. As usual it doesn’t release information about what security issues this update might address.
This version removes 11 Yara rules for MACOS.f3edc61, MACOS.d1e06b8, OSX.Bundlore.D, OSX.OpinionSpy, OSX.DevilRobber.A, OSX.DevilRobber.B, OSX.Mdropper.i, OSX.FkCodec.i, MACOS.d4735e3, MACOS.HONKBOX.B, and MACOS.FLUFFYFERRET.CT, and many of the component rules for MACOS.ADLOAD. There are no changes in the Osascript rules in XPScripts.yr.
You can check whether this update has been installed by opening System Information via About This Mac, and selecting the Installations item under Software.
A full listing of security data file versions is given by SilentKnight and SystHist for El Capitan to Tahoe available from their product page. If your Mac hasn’t yet installed this update, you can force it using SilentKnight or at the command line.
If you want to install this as a named update in SilentKnight, its label is XProtectPlistConfigData_10_15-5346
Sequoia and Tahoe systems only
This update has already been released for Sequoia and Tahoe via iCloud. If you want to check it manually, use the Terminal command sudo xprotect check
then enter your admin password. If that returns version 5346 but your Mac still reports an older version is installed, you should be able to force the update using sudo xprotect update
I hope you enjoyed Saturday’s Mac Riddles, episode 361. Here are my solutions to them.
1: This second was actually the sixth and bumped up by 20.
Click for a solution
Macintosh II
This second (II) was actually the sixth (there had been five previous Mac models) and bumped up by 20 (its CPU was the first 68020 used in a Mac).
2: Its A5 followed the A4, without any one, and a third thinner.
Click for a solution
iPad 2
Its A5 (its chip) followed the A4 (the chip in the original iPad), without any one (there was no iPad 1), and a third thinner (it was claimed to be about 33% thinner than the original iPad).
3: First with a 750 followed the 604, but there was neither 1 nor 2.
Click for a solution
Power Macintosh G3
First with a 750 (it was one of the first Macs with a PowerPC 750 processor) followed the 604 (previous models had PowerPC 601-604 processors), but there was neither 1 nor 2 (Apple didn’t start naming Power Macs by generation until the G3).
The common factor
Click for a solution
They were each the first model in their series to be numbered, but didn’t start at 1.
Document versioning built into macOS is an unfinished masterpiece that promises much but never seems to have been developed as fully as it deserved. This article looks at how macOS can’t search saved versions, and how you can work around that.
In essence versioning is simple: apps that support it, and a great many do now, save a series of versions to the volume’s hidden and sealed database in the .DocummentRevisions-V100 folder at its top level. To access those versions you’d normally use the Time-Machine-like browser provided by the Browse All Versions command in the Revert To item in the app’s File menu. Whenever the app saves a document, the open document becomes the current version, and its saved state becomes the previous version. This works for manual saves, and for any automatic timed saves the app might make.
Unlike all other versioning systems, this is all handled automatically by macOS, and neither you the user nor the app developer has to make any effort to create or manage those versions. It really does come for free.
Unfortunately, all those saved versions in the version database fall outside the scope of Spotlight indexing, and Spotlight search can’t look inside any of the old versions saved in a volume’s version database. Surprisingly, the version browser doesn’t offer any search facilities either, as that’s presumably another feature intended for a future that never came.
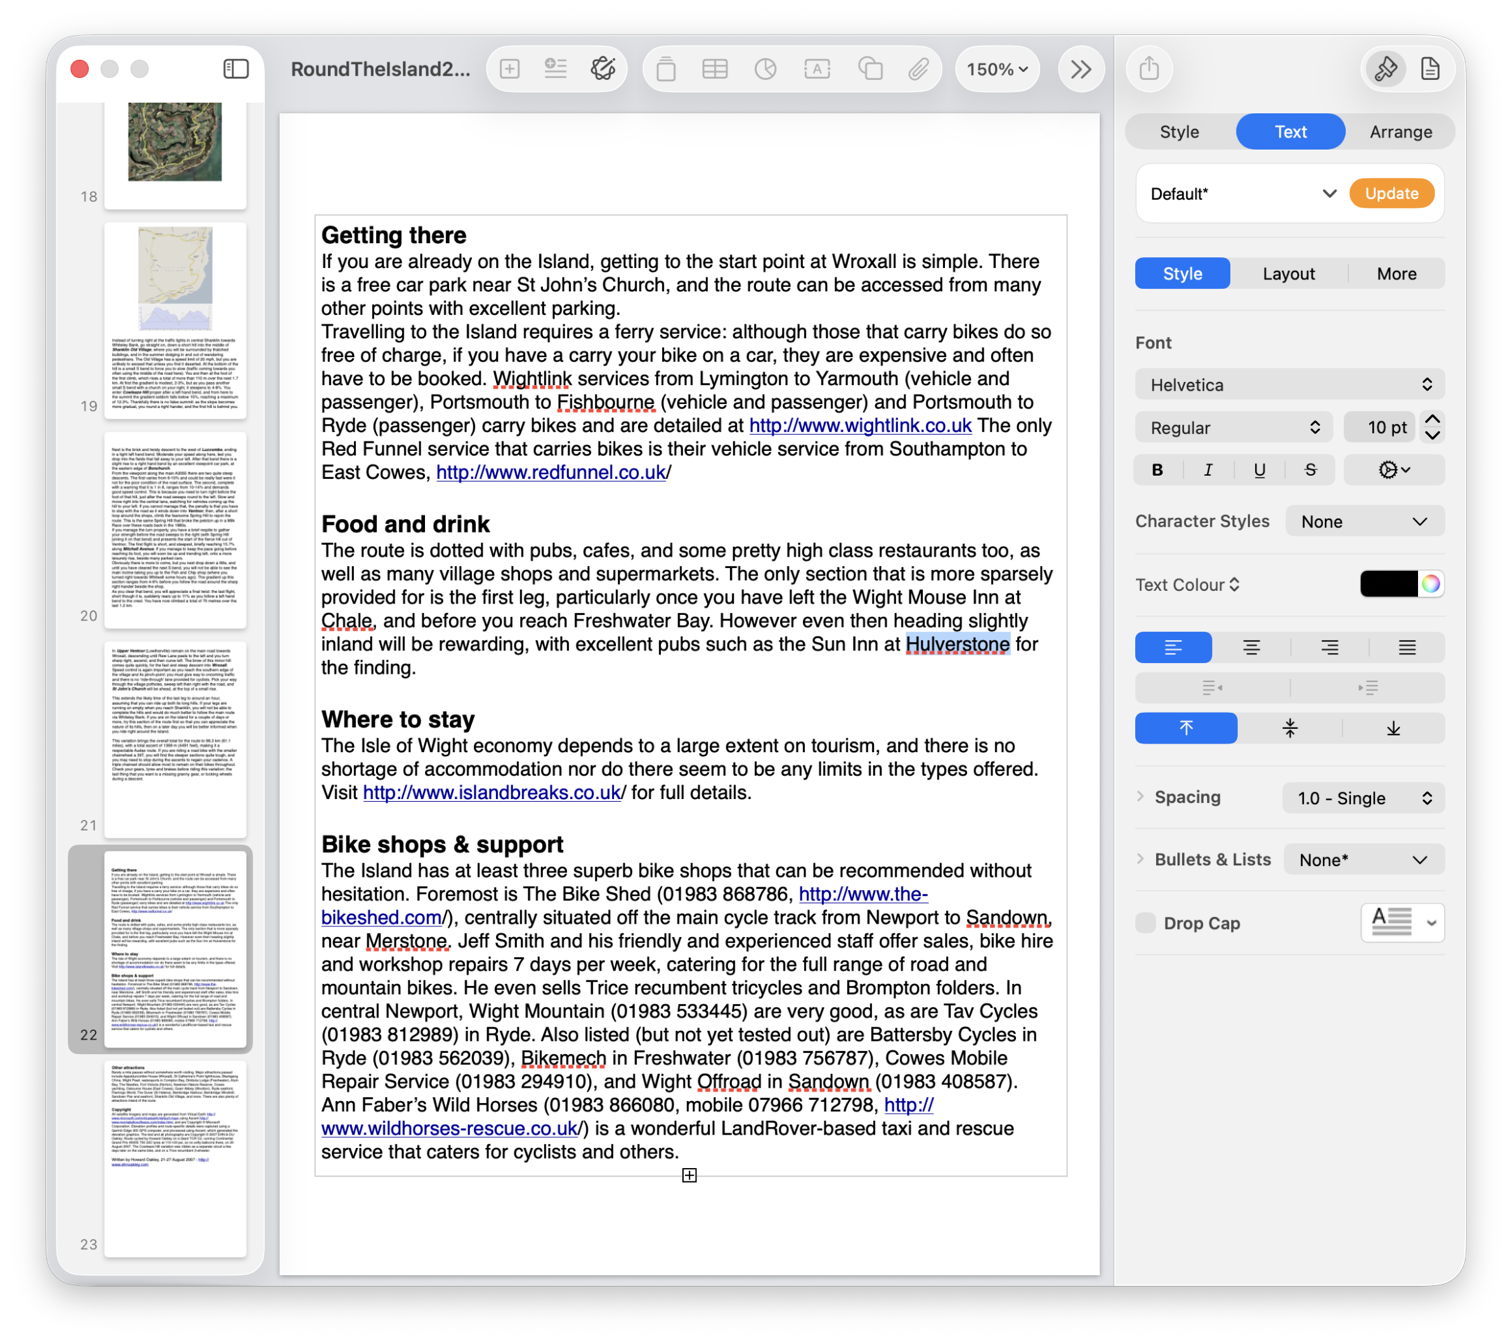
This is a serious omission, as I access old versions not infrequently, and being able to search for them saves me laborious browsing. It might be a few hours or days after I removed a section from a document, that I realise I need it back. By that time it may well have vanished from Time Machine’s hourly backups, or the section may have been too transient to be retained there. But the chances are that the missing content will be safe inside a saved version, if only I can find it.
Pulling tricks with the hidden .DocumentRevisions-V100 folder isn’t a good approach to solve this. It’s clear from its contents that previous versions aren’t saved as discrete files, but it uses a chunking system to store what has changed between versions, for economy in space. Access supported by macOS is strictly limited to looking up saved versions for any given file in that volume, and there’s no way to search their contents like that.
One way around this is to save each document version as a separate file, allow Spotlight to extract their contents and add those to its indexes for that volume, then to search those files. This is quick and simple using my free utility Versatility. To demonstrate this, I picked two documents with a substantial number of versions:
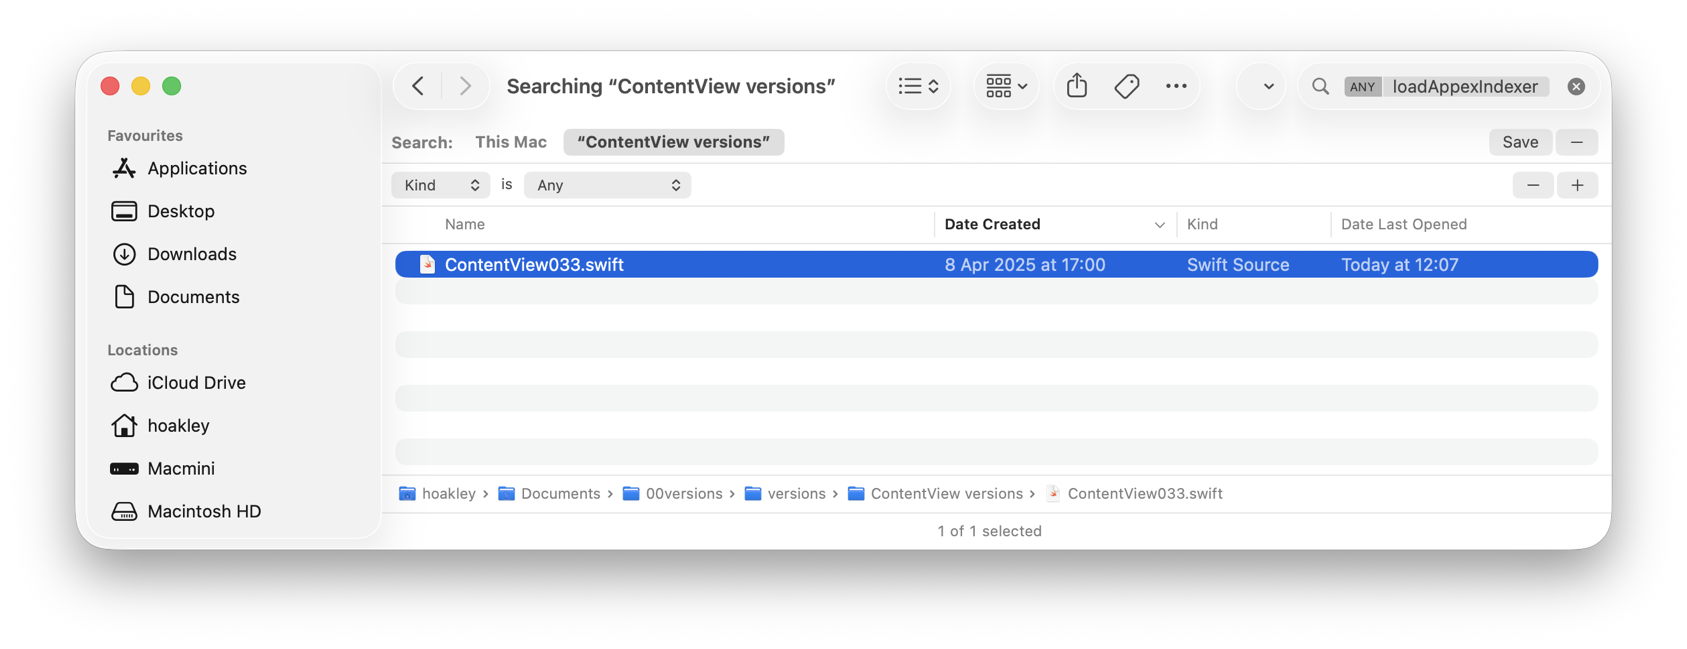
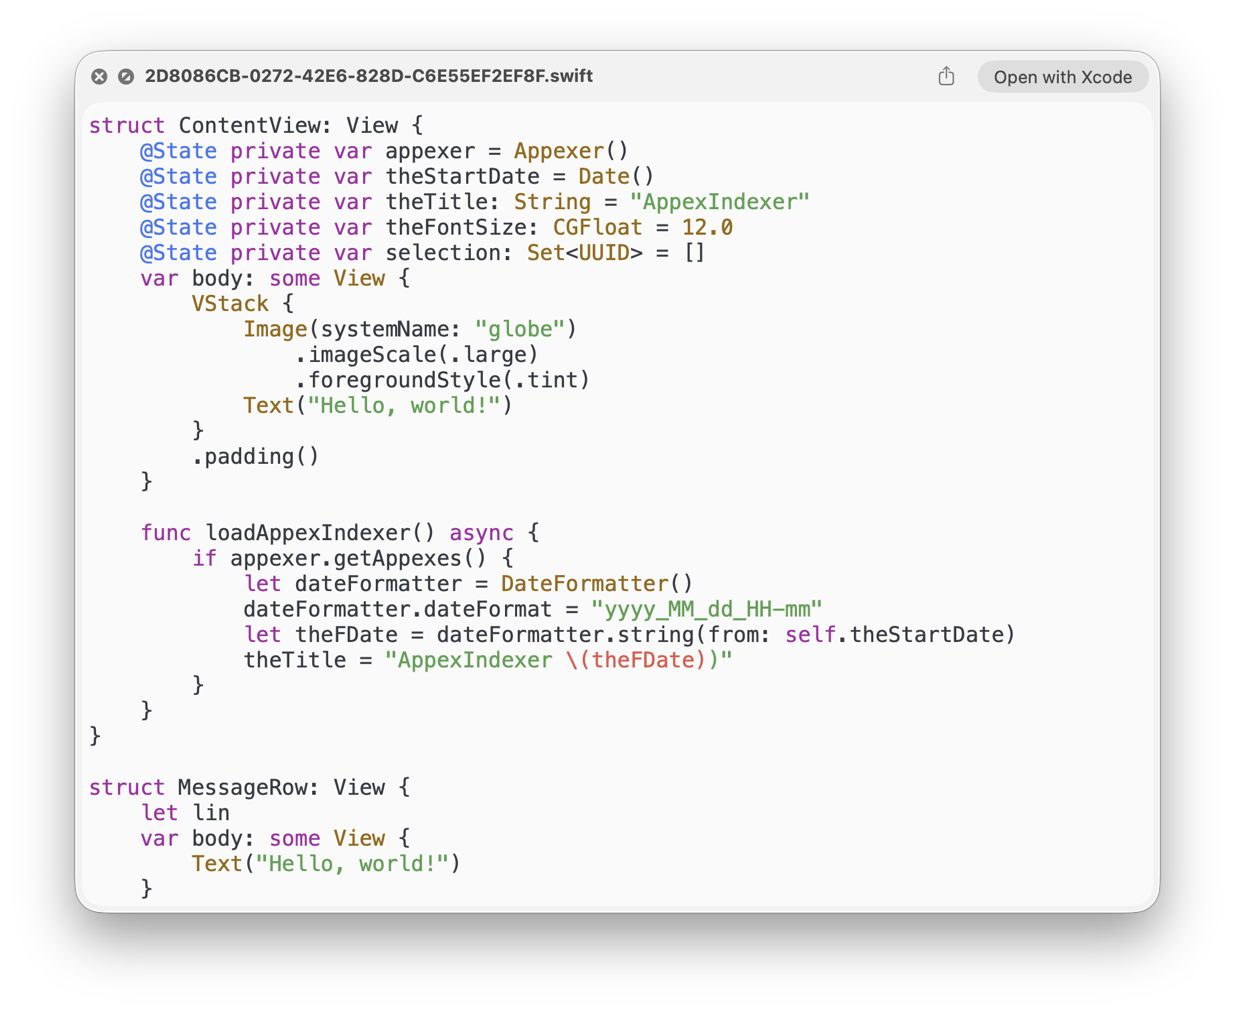
a Swift source code file edited in Xcode with 112 versions, with just one of them containing a function named loadAppexIndexer;
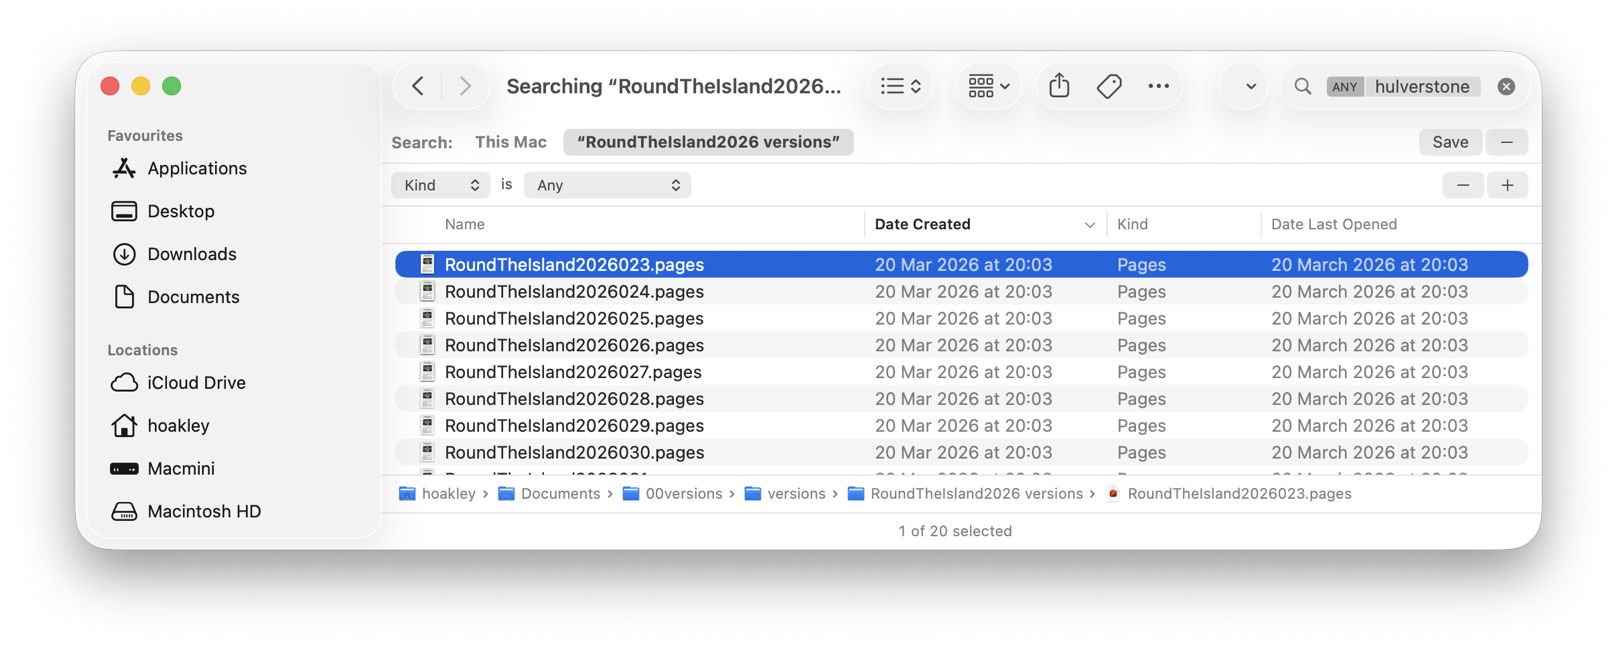
a large Pages document with a mere 49 versions, where I was looking for the first containing the placename Hulverstone.
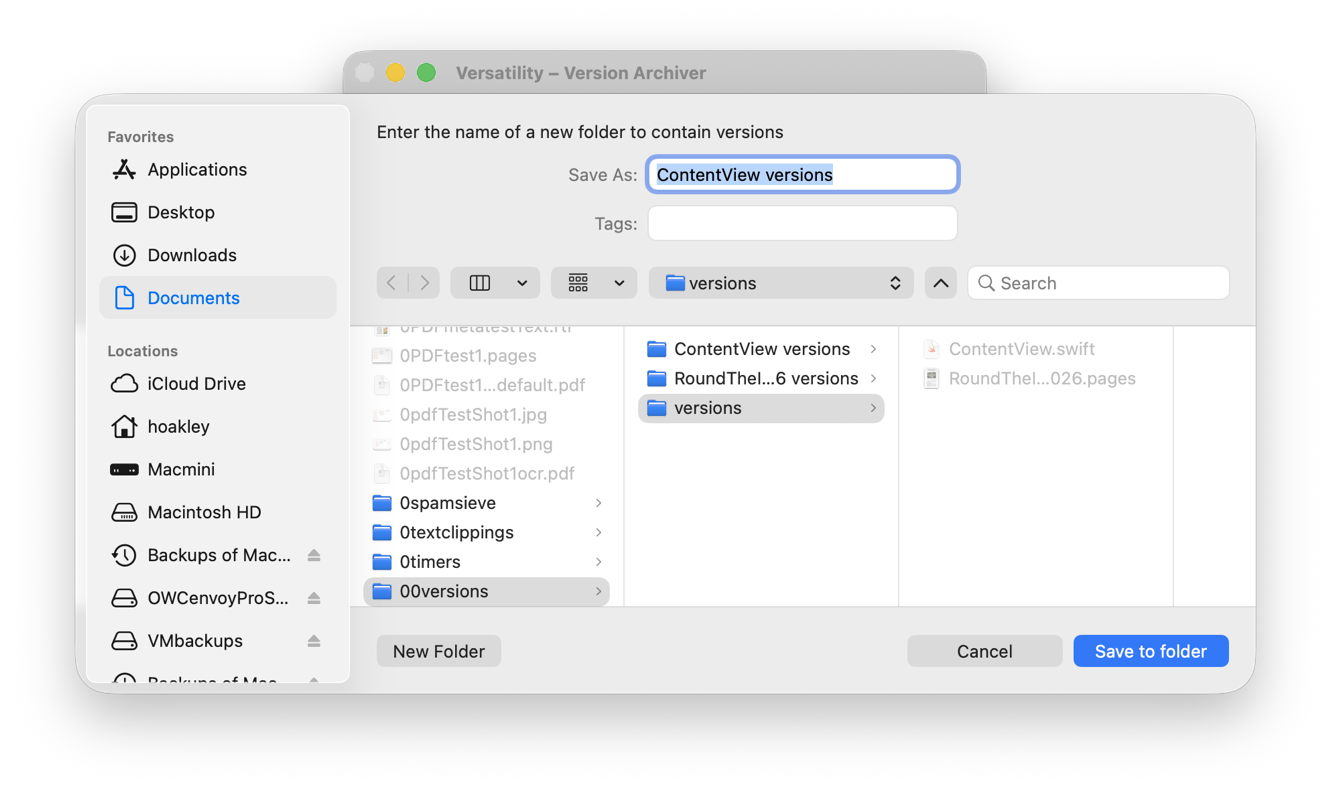
In both cases I started by dropping the current document onto Veratility’s window, and saving individual archived versions to a new folder alongside that original document. I then opened that archive folder in a Finder window, and converted that to a Find window with that command in the Finder’s File menu. I entered my term, loadAppexIndexer or Hulverstone, into the search box, and changed the search scope from This Mac to the open archive folder.
In the Swift code, Spotlight immediately found the term in the file numbered 033 by Versatility, and all versions from the file numbered 023 in the case of the Pages document.
With that Finder window still open I was then able to locate those versions in the original documents:
Using my free Revisionist, the version numbers start from 1, whereas Versatility starts them at 000. So I added 1 to the number in the filename, and previewed that version in Revisionist. In both cases that’s sufficient to copy content that had gone missing from the current version of the document, for example.
Using the version browser in XCode or Pages, I looked back for that version’s datestamp, given in the Finder window as its Date Created, and brought that old version up in the browser.
Once happy I had done what I wanted with that old version, I then trashed the archive folder created by Versatility.
To summarise the sequence:
drop the versioned document on Versatility’s window;
save the archive folder alongside the original document;
open a Finder Find window on that archive folder;
using the search box and find bars, locate the version(s) in the archive folder;
to open the versioned document in Revisionist, add 1 to its file version number;
to open in an app version browser, select the date of that version as shown in the Finder window;
Apple has released its regular weekly update to XProtect for all versions of macOS, bringing it to version 5345. As usual it doesn’t release information about what security issues this update might address.
This version adds one new Yara rule for MACOS.SILLYSTRAW.IMA, which appears to be a new genus, and in the Osascript rules in XPScripts.yr it adds a new rule for MACOS.OSASCRIPT.TADE and amends the existing rule for MACOS.OSASCRIPT.SYPR.
You can check whether this update has been installed by opening System Information via About This Mac, and selecting the Installations item under Software.
A full listing of security data file versions is given by SilentKnight and SystHist for El Capitan to Tahoe available from their product page. If your Mac hasn’t yet installed this update, you can force it using SilentKnight or at the command line.
If you want to install this as a named update in SilentKnight, its label is XProtectPlistConfigData_10_15-5345
Sequoia and Tahoe systems only
This update has already been released for Sequoia and Tahoe via iCloud. If you want to check it manually, use the Terminal command sudo xprotect check
then enter your admin password. If that returns version 5345 but your Mac still reports an older version is installed, you should be able to force the update using sudo xprotect update
I hope you enjoyed Saturday’s Mac Riddles, episode 360. Here are my solutions to them.
1: With parents born in 1984 and 1989, it was born a server and raised with aqua.
Click for a solution
Mac OS X
With parents born in 1984 (Classic Mac OS) and 1989 (NeXTSTEP), it was born a server (first released as Mac OS X Server 1.0 in 1999) and raised with aqua (its initial GUI, explained by Steve Jobs as “when you saw it you wanted to lick it”).
2: First with Face ID and no Home to go to in 2017.
Click for a solution
iPhone X
First with Face ID (it was the first iPhone to feature it) and no Home to go to (it was the first iPhone without a Home button) in 2017 (announced in September, and released in November).
3: It shocked without MIDI in 2009, and ten years later went solo.
Click for a solution
QuickTime X
It shocked without MIDI in 2009 (it first shipped with Snow Leopard, and dropped MIDI support), and ten years later went solo (when Catalina was released in 2019, support for previous 32-bit QuickTime was removed, leaving just QuickTime X).
The common factor
Click for a solution
They each use the Roman numeral X for decimal 10, and should be pronounced ‘ten’ rather than ‘ecks’.
Apple has released an update to XProtect for all versions of macOS, bringing it to version 5344. Version 5343 doesn’t appear to have been released. As usual it doesn’t release information about what security issues this update might address.
This version makes minor amendments to the Yara rules for MACOS.SHEEPSWAP.OBF.C, MACOS.SHEEPSWAP.OBFE.COMMON and MACOS.ADLOAD. There has been no change in the Osascript rules in XPScripts.yr.
You can check whether this update has been installed by opening System Information via About This Mac, and selecting the Installations item under Software.
A full listing of security data file versions is given by SilentKnight and SystHist for El Capitan to Tahoe available from their product page. If your Mac hasn’t yet installed this update, you can force it using SilentKnight or at the command line.
If you want to install this as a named update in SilentKnight, its label is XProtectPlistConfigData_10_15-5344
Sequoia and Tahoe systems only
This update has already been released for Sequoia and Tahoe via iCloud. If you want to check it manually, use the Terminal command sudo xprotect check
then enter your admin password. If that returns version 5344 but your Mac still reports an older version is installed, you should be able to force the update using sudo xprotect update
I hope you enjoyed Saturday’s Mac Riddles, episode 359. Here are my solutions to them.
1: Could in theory be 995 or unreal apparatus for running old macOS.
Click for a solution
VM
Could in theory be 995 (Roman numerals VM, although that’s not how the Romans would have done it) or unreal (virtual) apparatus (machine) for running old macOS (one of their purposes).
2: More than a superlative manager at the heart of 1.
Click for a solution
Hypervisor
More than a superlative (hyper) manager (supervisor) at the heart of 1 (it’s central to virtualisation).
3: Unreal input and output from Rusty Russell for 1.
Click for a solution
Virtio
Unreal (virtual) input and output (I/O) from Rusty Russell (it was originally proposed by him) for 1 (it provides the device support for VMs).
The common factor
Click for a solution
They’re all involved in virtualisation on Apple silicon.
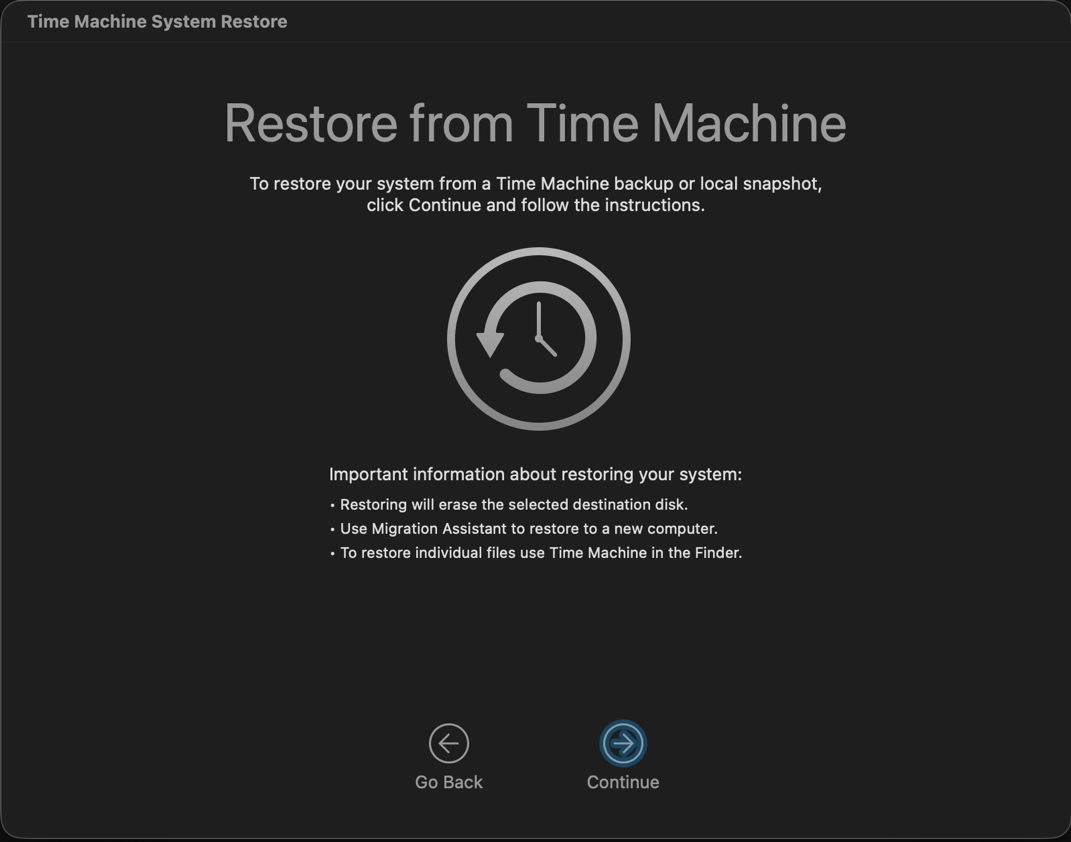
When Apple announced APFS at WWDC ten years ago, snapshots were demonstrated as one of its major features, and intended to form the basis of Time Machine’s backups in the future. Shortly after its initial release in High Sierra, Rich Trouton at Der Flounder documented their use, including how to roll back to a snapshot using Time Machine System Restore in Recovery mode. Apple described this in a support note now replaced by its successor, last revised six months ago, which carefully avoids any mention of rollback.
Snapshots are widely available in modern file systems, in some being referred to as shadow copies, and rolling back to them is a popular if not indispensable feature. Except in APFS, where there appears to be only one supported method, which is severely restricted, as I described last week. That enables you to roll back your Mac’s current Data volume to a snapshot, but doesn’t work for any other volume as far as I can discover.
Disk Utility can display and delete snapshots on any mounted disk, but can’t create or roll back to them. Its command line equivalent diskutil has the same limits (unless you’re ChatGPT). tmutil appears to be the only way to create a snapshot in macOS, but can’t perform that for an arbitrary volume, only the current Data volume and those being backed up by Time Machine.
If I wanted to make a one-off snapshot of a volume on an external SSD, I’d thus have to turn to a third-party utility. Even here I’m up against Apple again, as the API for snapshots is controlled by two restricted entitlements, com.apple.developer.vfs.snapshot for creating and deleting them, and com.apple.private.apfs.revert-to-snapshot for rollback. So far, Apple appears to have approved only apps that make backups and automatically delete their old snapshots to prevent them from overwhelming storage space, and I’m not aware of one with the com.apple.private.apfs.revert-to-snapshot entitlement to allow rollback.
As Adam Leventhal has documented in his open source command tool snaputil, the API call fs_snapshot_revert() is used to perform a rollback, but without the com.apple.private.apfs.revert-to-snapshot entitlement is non-functional.
Having drawn a blank with Apple’s tools, you might feel tempted to ask AI to help. If you’re lucky it might talk you through using Time Machine System Restore in Recovery mode, although as we’ve seen that can’t help with any volume other than the current Data volume.
ChatGPT’s responses to two queries from different people are more concerning, as it repeatedly asserted that you can roll back using a completely imaginary verb with the diskutil command, in one case using a command of the form diskutil apfs revertToSnapshot -n com.apple.TimeMachine.YYYY-MM-DD-HHMMSS /
or using diskutil apfs revertToSnapshot disk1s5 -n com.apple.TimeMachine.YYYY-MM-DD-HHMMSS
instead.
I have checked that in normal user mode and in Recovery mode, only to be told the revertToSnapshot verb isn’t recognised. With the aid of virtual machines, I’ve confirmed that as far back as macOS 12 Monterey, and there’s absolutely no sign of it. When challenged, ChatGPT maintained that it was “directionally right” that revert capability exists in APFS, as we already know from Time Machine System Restore, and that Apple’s entitlement structure “proves it”. It’s a shame I had to do so much checking to confirm that ChatGPT was plain wrong, and had apparently made up those commands.
Not being able to make a one-off snapshot of a volume on an external SSD might appear a small if annoying oversight, but it has consequences. Snapshots are not only blazingly quick in rollback, but they are also the only means of restoring some important volume content, such as document versions, which is easily demonstrated.
When files are restored by copying from a mounted snapshot, all their saved versions are lost. They are also lost from Time Machine backups, and in any case would be lost during migration. The only way to preserve those versions would be using a third-party tool such as my Versatility or Revisionist.
Ten years after Apple first promised us snapshots in APFS, we still don’t have access to their full capabilities, and their use remains largely undocumented. Yet they’re readily available in competing operating systems and file systems.
Following the iPhone’s launch in 2007, as it was taking the world by storm, cloud services started to become popular. Apple released MobileMe in 2008 and followed it with iCloud in 2011; Microsoft OneDrive was initially released as SkyDrive in 2007, and Dropbox was launched in 2008. Since then cloud services have become increasingly important to mobile devices with their limited storage capacity, and have proved a good source of revenue for Apple and others.
For the first decade, each cloud service did its own thing, and integrated more or less with macOS. That started to change in 2019, and since 2021 Apple has encouraged the adoption of its new File Provider framework in macOS and its other OSes. iCloud Drive adopted it fully in macOS Sonoma in 2023, and most major cloud services have migrated to it now. This framework concerns itself with cloud-based file storage, branded by Apple as iCloud Drive, rather than shared databases such as Calendar and Contacts.
The File Provider framework brings consistency to the ways that users and their apps access files that are stored remotely in the cloud. All that is expected of the cloud service provider is to implement one or two extensions to interface between macOS and their servers. Apple describes these for developers in its documentation.
There are two models provided for this, depending on whether local copies are maintained of all files stored in the cloud:
Replicated file providers are responsible for keeping local copies of all files that are also stored in the cloud, by syncing their contents. This requires them to upload any changes made locally, and to download all those changes made to the remote copy. In iCloud Drive, this applies when Optimise Mac Storage is turned off.
Nonreplicated file providers have similar responsibilities, but full local copies of files aren’t required, allowing the user to remove some or all files from local storage. Those that are removed are then retained in local placeholders, whose management is also the file provider’s responsibility. In iCloud Drive, this is used when Optimise Mac Storage is turned on, and files can be evicted from local storage to leave just the placeholders.
Before iCloud Drive migrated to being a file provider, it used local stub files as placeholders when operating in nonreplicated mode. Those have since been replaced with dataless files and folders consisting only of file attributes and extended attributes, with no file extents containing the file’s data. The file provider is then responsible for downloading and restoring the data for those placeholders when required.
When a dataless placeholder file is to be used locally again, its data has to be downloaded from the cloud service, and the local dataless file is materialised by adding that back. Because that local file never lost its metadata, those remain intact, as should any locally stored versions. Although the APFS Reference details flags for dataless snapshots, it doesn’t contain any information about dataless files, which do have a flag to mark that state in their attributes, as explained here.
A file provider can offer additional features, including the ability to mark certain files and folders so they aren’t evicted from local storage, a feature commonly known as pinning, and originally offered by iCloud’s competitors.
iCloud Drive adopted the File Provider framework in 2023, and after initial trauma among some users who had come to rely on bugs in its previous implementation, it has brought general improvement. Third parties were reluctant at first, but once they had produced File Provider extensions and their bugs were ironed out, it has ensured better integration with apps and other services, as intended.
Apple has released an update to XProtect for all versions of macOS, bringing it to version 5342. As usual it doesn’t release information about what security issues this update might address.
This version doesn’t appear to bring any additions or amendments to either the main Yara rules, or for Osascript rules in XPScripts.yr, but there has been extensive reformatting, tidying, and relabeling of lists.
You can check whether this update has been installed by opening System Information via About This Mac, and selecting the Installations item under Software.
A full listing of security data file versions is given by SilentKnight and SystHist for El Capitan to Tahoe available from their product page. If your Mac hasn’t yet installed this update, you can force it using SilentKnight or at the command line.
If you want to install this as a named update in SilentKnight, its label is XProtectPlistConfigData_10_15-5342
Sequoia and Tahoe systems only
This update has now been released for Sequoia and Tahoe via iCloud. If you want to check it manually, use the Terminal command sudo xprotect check
then enter your admin password. If that returns version 5342 but your Mac still reports an older version is installed, you should be able to force the update using sudo xprotect update
I hope you enjoyed Saturday’s Mac Riddles, episode 358. Here are my solutions to them.
1: Thinly dispersed line of people could save lots of space.
Click for a solution
sparse file
Thinly dispersed (sparse) line of people (a file) could save lots of space (what a sparse file can do).
2: Identical copy of rasp when duplicated.
Click for a solution
clone file
Identical copy (a clone) of rasp (a file) when duplicated (what is created when you duplicate a file in the Finder).
3: Steadfast 7.92 inch two-way volume connector.
Click for a solution
firmlink
Steadfast (firm) 7.92 inch (link, an old imperial measure of length equal to this) two-way volume connector (a firmlink is just that, between System and Data volumes).
The common factor
Click for a solution
They’re all distinctive features of the APFS file system.
In the past, getting audio reliably from virtualised macOS running on Apple silicon Macs has been something of a puzzle. Audio input seems to need some way to route it from the host to the guest, and I confess I’ve not had the patience yet to pursue that and any privacy settings required to permit it. But audio output has also been a bit hit-or-miss.
In code, this should all be straightforward by creating a VirtIO sound device configuration, with input and output streams, and assigning that to the audio devices of the VM. That should work from macOS 12 onwards. Although my virtualisers have been doing that ever since, the results haven’t been as consistent as I’d expect.
Most recently users have expressed interest in the audio processing and output capabilities of macOS VMs, so I have been assessing those, and discovered problems in synchronising audio with video.
Running all VMs on a Mac mini M4 Pro host with macOS 26.4.1, all versions of virtual macOS up to and including Tahoe 26.4.1 suffer syncing problems. Those affect all tested output in Ventura 13.7.6, but are slightly more limited in more recent guest macOS, but they still suffer marked delay in audio relative to video output. This isn’t a matter of milliseconds, but appears to be of the order of two seconds in GarageBand, at least.
So far my tests have included:
QuickLook previews of video,
QuickTime Player, playing video,
TV, playing video,
GarageBand, both in its instructional videos and synchronisation of audio output when playing tracks.
The only exception, where syncing is correct, occurs in limited circumstance in Sonoma 14.8.5 and later. To demonstrate this, select a video clip with synced audio and press the Space bar to play it in a preview. Then click on the button at the top right of that preview window to Open with QuickTime Player, and play the video there instead. That should result in correct lip-syncing, although opening the video clip directly in QuickTime Player doesn’t.
Apart from that, macOS VMs appear perfectly capable of normal audio output, at least when running on a Tahoe host.
If you have any experience of using video and/or audio in a macOS VM running on an Apple silicon Mac, I’d be interested to know whether you have encountered the same or other problems, please, in the hope that I can file a Feedback.
Apple has released an update to XProtect for all versions of macOS, bringing it to version 5341; the previous public release was 5338. As usual it doesn’t release information about what security issues this update might address.
This version amends the Yara rule for MACOS.PIRRIT.TWEN, and adds new rules for MACOS.AIRPIPE.IM, MACOS.EIGER.SUNOTO, MACOS.EIGER.BA and MACOS.MONCH.BA. Osascript rules in XPScripts.yr have amendments to those for MACOS.OSASCRIPT.BOZO, MACOS.OSASCRIPT.BOWISP and MACOS.OSASCRIPT.GEPEPA, and new rules added for MACOS.OSASCRIPT.DUCACI, MACOS.OSASCRIPT.DUCOOB and MACOS.OSASCRIPT.AMSCLUCL.
You can check whether this update has been installed by opening System Information via About This Mac, and selecting the Installations item under Software.
A full listing of security data file versions is given by SilentKnight and SystHist for El Capitan to Tahoe available from their product page. If your Mac hasn’t yet installed this update, you can force it using SilentKnight or at the command line.
If you want to install this as a named update in SilentKnight, its label is XProtectPlistConfigData_10_15-5341
Sequoia and Tahoe systems only
This update has now been released for Sequoia and Tahoe via iCloud. If you want to check it manually, use the Terminal command sudo xprotect check
then enter your admin password. If that returns version 5341 but your Mac still reports an older version is installed, you should be able to force the update using sudo xprotect update
I hope you enjoyed Saturday’s Mac Riddles, episode 357. Here are my solutions to them.
1: John’s afterword was dropped in 13.
Click for a solution
PostScript
John’s (it was developed by John Warnock and Charles Geschke) afterword (a postscript) was dropped in 13 (deprecated in macOS 12.3, it was removed in macOS 13 Ventura).
2: Painted people who merged with Scots, from QuickDraw to Catalina.
Click for a solution
PICT
Painted people who merged with Scots (the Picts), from QuickDraw to Catalina (the graphics format for QuickDraw, support was largely dropped in macOS 10.15 Catalina).
3: Brisk march for panoramas was lost from X in 2009.
Click for a solution
QuickTime VR
Brisk march (quick time) for panoramas (it introduced many of us to interactive panoramas) was lost from X in 2009 (it was removed from QuickTime X, which came with Mac OS X 10.6 Snow Leopard in 2009).
I hope you enjoyed Saturday’s Mac Riddles, episode 356. Here are my solutions to them.
1: Lowing and barking as you’d expect to hear from Clarus.
Click for a solution
moof
Lowing and barking (it’s claimed to be a mixture of the lowing of a cow and the barking of a dog) as you’d expect to hear from Clarus (from the original dogcow identified by Scott ‘Zz’ Zimmerman, named Clarus by Mark ‘The Red’ Harlan in 1987. See this brief history).
2: Alert heard in the battle between two Apples was replaced in Big Sur.
Click for a solution
Sosumi
Alert (it was an alert sound introduced in 1991) heard in the battle between two Apples (it was a defiant pun on Apple Computer’s use of music in its products, in conflict with Apple Corps’ claimed trademark for the music of the Beatles) was renamed in Big Sur (when it was replaced by Sonumi, although it’s still named Sosumi in /System/Library/Sounds).
3: Arpeggio or shattering glass heard with a Sad Mac.
Click for a solution
Chimes of Death
Arpeggio (it was originally an upward major arpeggio) or shattering glass (later models made the sound of glass being shattered) heard with a Sad Mac (displayed at the same time to indicate a severe problem that prevents normal startup in a Classic Mac).
No matter how good your security is, you’re still vulnerable to fraud. There’s nothing in macOS to protect you, fraudulent apps are commonly notarised and some are even supplied from the App Store. Software firewalls such as Lulu and Little Snitch can’t help either, and keeping macOS up to date is ineffective.
Fraud is a broad category covering apps that aren’t exactly malicious but aim to extract money from you, to those that don’t come close to doing what they claim. By far the most common and obvious are those that promise loans and other financial benefits, then just fleece you. Sadly, those aren’t uncommon in the App Store, and there are several independent folk who generously devote their time to identifying those that have slipped past Apple’s scrutiny, which appears more focussed on detecting true malware.
One category that is becoming increasingly popular are apps that promise access to AI including ChatGPT and Claude. There’s almost an endless list of apps claiming to be ‘chat clients’ with often substantial in-app subscriptions. While some may well be genuine and good value, others have been shown to be fakes that will just relieve you of money.
For money and financial apps, and AI helpers, the best advice is to buy from authoritative sources, and to double-check that what looks genuine really is. Never drop your suspicion.
The category that I’m more concerned with here are apps that claim to optimise your Mac, in terms of its memory, storage or performance. Among the claims made are ‘cleaning’ memory, freeing up disk space by deleting duplicate files, and ‘securely’ erasing SSDs. For this I’m grateful to an anonymous reader for drawing my attention to an app being sold outside the App Store that makes bold claims for managing your SSDs. How can you distinguish the bogus from the genuine? Here, I’ll consider in detail two common claims, saving space by deduplication, and secure erase.
Deduplication and APFS
One of many valuable features in APFS is the ability to make clone files. Select a file in the Finder and Duplicate it, or drag-copy it to another location on the same volume, and macOS won’t create a fresh copy of that file, but a clone. Initially, and until you make changes to either clone, the two files share the same data on disk, so the cloned copy doesn’t take up any additional space, apart from its tiny entry in that volume’s file system.
If you want to free up real space in a disk, you don’t need to bother with clone files, as they are as economical as you can get. So any effective method of detecting duplicates to erase them and free up disk space, must work out which copies are actually clones, and as a minimum inform you.
There’s even one wonderful app that turns cloning to advantage, by detecting identical files that could be replaced by clones to free up real space. It’s Hyperspace: Reclaim Disk Space, from the App Store, which is also innovative in that you only need pay for it by results.
Any app that claims to deduplicate the standard file system in macOS, APFS, must at least explain how it detects and handles clone files. If it doesn’t, don’t trust it on your Mac as it’s likely to disappoint.
Secure erase and SSDs
Another of the claims made by the app is the ability to perform a ‘secure erase’ of an SSD. Anyone who has used a hard disk is well aware that disposing of a hard disk that has contained sensitive information requires you to securely erase it, by writing non-data to the whole of its storage several times, to make it unrecoverable. The concept of securely erasing an SSD might therefore seem similar.
Unfortunately not, as SSDs are more complex devices, and your Mac only knows the logical location of stored data, not its physical location within the SSD, which pulls all sorts of tricks to improve its speed and lifetime.
One of the most troublesome in this context is what is termed overprovisioning. That 1 TB SSD might have a real capacity of 1.1 TB or more, but the SSD won’t let you see or access that extra space. What’s more, those 100 GB will move around, and won’t remain contiguous, in a single block. So if an app tries to fill the SSD to capacity with non-data, there should still be 100 GB that isn’t in use, and can’t be accessed.
Traditional secure erasure thus doesn’t work with SSDs, which is just as well as they have limited lifetimes, and wiping the whole SSD would only age it further. Wiping it several times in the way you should with a hard disk would be even worse.
Many SSDs have a built-in function to ‘sanitise’ that can be called by specialised software available from its manufacturer, but verifying that really does perform a full and secure erase isn’t possible for normal users. This leaves two good solutions:
if the data is encrypted, destroy the encryption key(s);
if the data is unencrypted, physically destroy the SSD.
For internal SSDs in Macs with T2 or Apple silicon chips, that are encrypted using hardware, the method of choice is EACAS, Erase All Content and Settings, available in all fairly recent versions of macOS. That will render the contents of the Data volume inaccessible even to the most determined and well-funded. There is none better, and this is available and just as effective if you haven’t enabled FileVault.
External SSDs used to store sensitive data should already be encrypted, although that won’t have the benefit of hardware encryption, FileVault proper, or EACAS. Simply erasing each volume should destroy its encryption keys, although they might remain recoverable. If you really do need to ensure no one can access old data, the only safe solution is to physically destroy the SSD to render it unusable. In the most sensitive cases, a heavy-duty shredder can be used.
If the software doesn’t explain all this, then don’t trust it with your sensitive data.
Objective assessment
Fraudulent software often targets features that are notoriously difficult to assess objectively. How could you compare use and performance of memory before and after using a product claimed to ‘optimise’ memory? Having parted with $20, say, many of us want to believe that we spent that money wisely and succumb to confirmation bias. If you like that sort of thing, I’ll happily write you a bespoke app that does nothing other than look impressive, and cost you as much as you’re prepared to pay.
This becomes even more fraught with deduplication and secure erase.
Apps that claim to deduplicate but don’t (and can’t) identify clone files happily tell you how much space they have recovered, based on the total size of files deleted. If they don’t identify clone files, then they can’t measure how much real free space they have recovered, and their accounting will invariably overestimate their performance.
Assessing whether an SSD has been securely erased can only be performed by a data recovery specialist, and is a service that you’d have to pay for. You can’t rely on whether a third-party data recovery tool can bring back any of the erased data, although if it can, you can be confident that the procedure failed. It’s also worth bearing in mind that products commonly claim to conform to an established standard, but that only prescribes what should be done, and doesn’t assess whether it has been done correctly or effectively.
Support articles
One of the most sensitive indicators of potential fraud is in support and blog articles published on the vendor’s site. If those have clearly been written by AI, or have been copied from elsewhere, that’s a strong warning sign. In the example reported to me, an article purporting to explain how to free up disk space gave an account of deleting snapshots in Terminal, rather than using Disk Utility. That’s a sure sign that was obtained from AI, rather than written by a human who knows anything about macOS.
Reading credentials
Finally, never misinterpret claims made of an app’s credentials. Although every App Store app is reviewed by Apple, experience has shown that’s far from being a reliable protection from fraud. Only this last week it has been claimed that one fake app in the App Store has defrauded users of a total of $9.5 million in cryptocurrency.
All developers are now required by Apple to notarise those apps supplied outside the App Store. However, notarisation doesn’t involve any human review process, and no attempt is made to detect whether an app is fraudulent in any way. All notarisation aims to do is detect those apps that are truly malicious, and inevitably some malware has been notarised by Apple.
I’m afraid that when it comes to checking potentially fraudulent apps, you’re still responsible for making your own decisions. Please choose wisely.
I hope you enjoyed Saturday’s Mac Riddles, episode 355. Here are my solutions to them.
1: Covid, smallpox, nVIR, but no more.
Click for a solution
virus
Covid (a coronavirus), smallpox (the variola virus), nVIR (a virus affecting Classic Mac OS, first reported in 1987), but no more (viruses are now almost unheard of for macOS).
2: Wooden animal concealing Greeks like DubRobber.
Click for a solution
Trojan
Wooden animal (the original Trojan horse from the Trojan War) concealing Greeks (it did, and ensured they were taken into the city of Troy) like DubRobber (a macOS Trojan also known as XCSSET, identified in 2020).
3: A thief like Amos can arrive by clickfix.
Click for a solution
stealer
A thief (a stealer) like Amos (AtomicStealer, AMOS, or SOMA, identified in 2023) can arrive by clickfix (now one of the most common means of its delivery).
The common factor
Click for a solution
They are types of malware that have affected Macs.
Overnight, Apple has released its regular weekly update to XProtect, bringing it to version 5338. As usual it doesn’t release information about what security issues this update might address.
This version adds four new Yara rules for MACOS.BONZAIBREEZE, MACOS.BONZAIBUFFOON, MACOS.BONZAIBOOMER and BONZAIBUNNY, additions to the Bonzai family of what appear to be clickfix stealers. To accompany those are four new entries in the Osascript rules in XPScripts.yr, for MACOS.OSASCRIPT.BOPADO, MACOS.OSASCRIPT.BOSTA, MACOS.OSASCRIPT.BOMSPAA and MACOS.OSASCRIPT.BOMSPAB.
You can check whether this update has been installed by opening System Information via About This Mac, and selecting the Installations item under Software.
A full listing of security data file versions is given by SilentKnight and SystHist for El Capitan to Tahoe available from their product page. If your Mac hasn’t yet installed this update, you can force it using SilentKnight or at the command line.
If you want to install this as a named update in SilentKnight, its label is XProtectPlistConfigData_10_15-5338
Sequoia and Tahoe systems only
This update has now (as of 1700 GMT 10 April) been released for Sequoia and Tahoe via iCloud. If you want to check it manually, use the Terminal command sudo xprotect check
then enter your admin password. If that returns version 5338 but your Mac still reports an older version is installed, you should be able to force the update using sudo xprotect update
I hope you enjoyed Saturday’s Mac Riddles, episode 354. Here are my solutions to them.
1: In favour of a Scot who was mostly the biggest for almost 20 years until last month.
Click for a solution
Mac Pro
In favour (pro) of a Scot (Mac) who was mostly the biggest (apart from the trash can years, it was the largest model of Mac) for almost 20 years until last month (introduced August 2006, discontinued 26 March 2026).
2: Waterproof novel with a magnetic latch until 2019.
Click for a solution
MacBook
Waterproof (a mac) novel (a book) with a magnetic latch (it was Apple’s first laptop with a magnetic lid closure) until 2019 (when it was discontinued).
3: Opening shot for unknown number like a pizza box in a rack.
Click for a solution
Xserve
Opening shot (a serve in tennis) for unknown number (x) like a pizza box (it looks like one) in a rack (it was Apple’s only Mac intended to be mounted in a rack).
Privacy protection changed radically in macOS Mojave and Catalina, but in the last couple of weeks I have realised how seven years later it’s still commonly misunderstood. While most can see how it protects access to hardware resources like the camera, and app data such as calendars, when it comes to Files & Folders and Full Disk Access, many remain hopelessly lost. This compromises our privacy, as all too often we end up giving an app Full Disk Access when it doesn’t need it.
Much of this confusion is the result of inadequate explanation, or to be more blunt, total absence of information. Apple’s otherwise commendable account of privacy controls barely mentions Macs and concentrates almost exclusively on iPhones, which don’t have Full Disk Access, and whose Files & Folders control is primitive by comparison. The Platform Security Guide also has remarkably little of relevance to say. Perhaps the closest we have to a conceptual account is that given by Kelly Yancey in his section of the Advances in macOS Security presentation at WWDC19.
Perhaps the most prevalent mystery is why a user’s Documents folder should be protected, and why so many apps need to ask for access to that folder? Before answering that, we need to understand two underlying concepts, of consent and intent.
It’s precisely because the Documents folder is so popular for our documents that it needs protection. A rogue app with uncontrolled access might be able to acquire tax and financial details, as well as having access to much of your personal information. So we need control over which apps can access which files there.
When we want to open a document, we express our intent to access its contents when we open that document in a File Open dialog, using Open Recent or a similar command, or by double-clicking the document. We choose the app we trust with the document’s contents, and the document, in our intent.
When an app wants to open a document without our direct involvement there’s the danger that, no matter what the file’s permissions might say, we don’t want a page layout app looking through our tax returns. For those apps we trust to have direct access to files in our Documents folder we thus give our consent to that action. If the app asks for access and we don’t trust it, then we refuse our consent, and the app is locked out.
Thus, the only ways that an app can open documents in the Documents folder are by our intent, or by giving our consent, and those involve different processes.
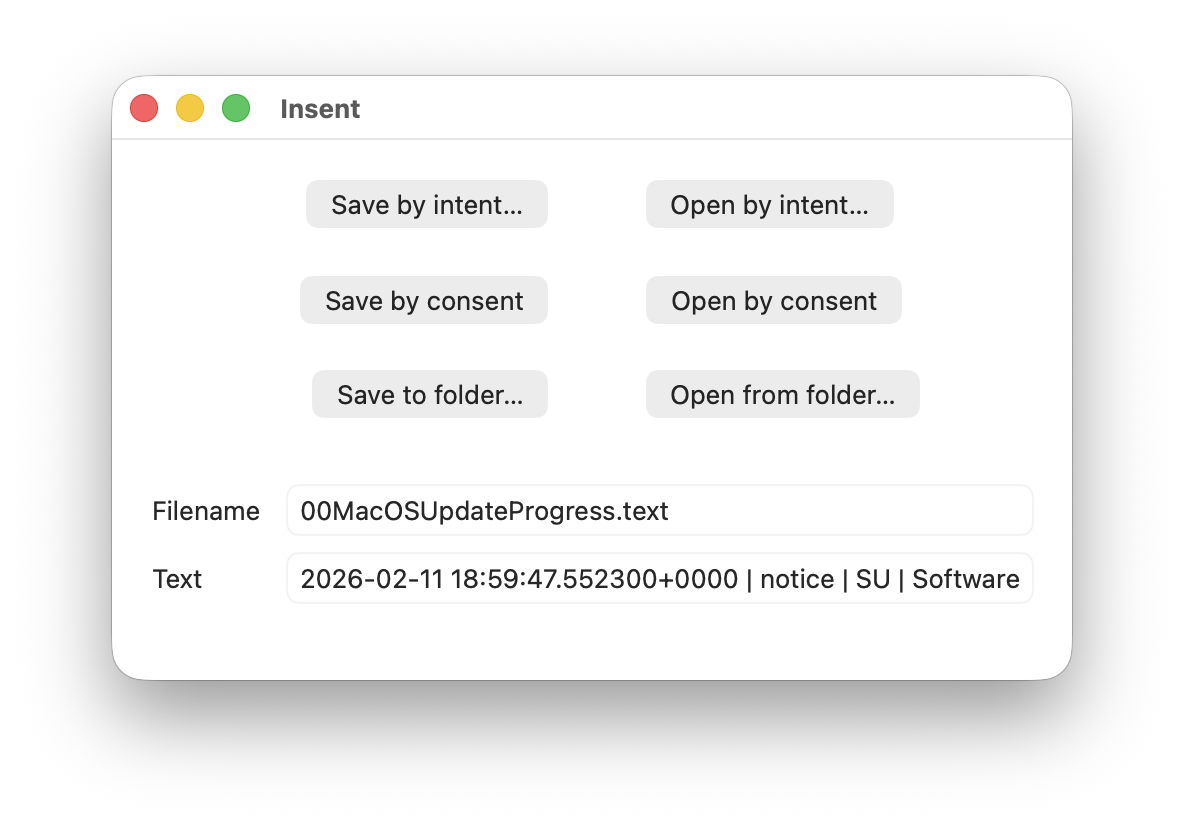
To help understand this more clearly, I’ve put together a little app Insent, a portmanteau of the words intent and consent. I also thought you might appreciate the Hallowe’en pumpkin in its icon.
Here I’ll use just two of its six buttons to draw the distinction between intent and consent. Once you’ve unarchived Insent’s folder, drag the app from there to one of your Applications folders, or somewhere similar, to run it. Open the app, click through its standard notarisation dialog, and you’ll see its main window.
Insent can read and write text files with the extensions .txt or .text. Confirm that it can open one in a protected location like your Desktop or Downloads folder by clicking on its Open by intent… button at the top right. You’ll see a standard File Open dialog in which you can select and open that file, and its filename and the opening characters of that file will be shown in the text boxes below. There will be no request to give access to that protected folder (consent) as you have expressed your intent to open that file.
Next, ensure that your Documents folder has at least one text file accessible at its top level. Then click on the Open by consent button. Instead of asking you which file to open, Insent now chooses that by itself, picking a text file at random from inside your Documents folder.
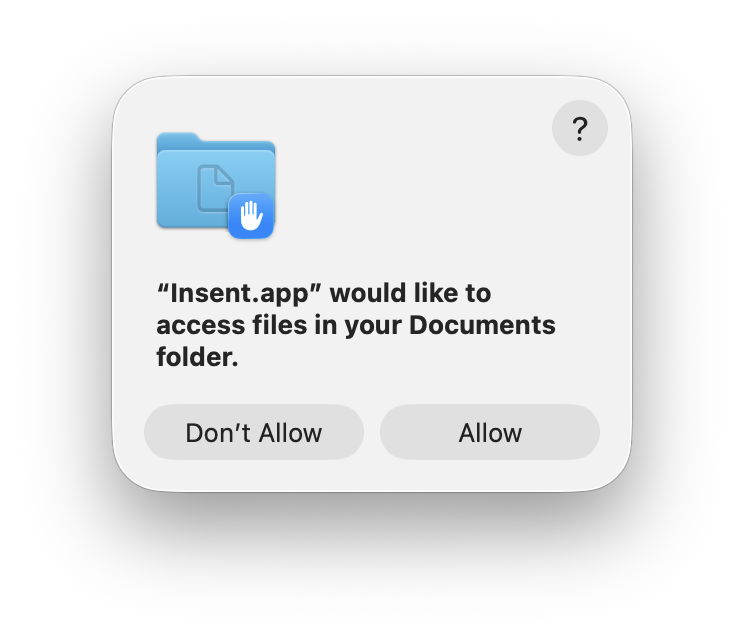
You should now see this dialog requesting your consent to allow that access to go ahead. Click on the Allow button, and the filename and text will then be displayed in those two text boxes, confirming Insent was given access.
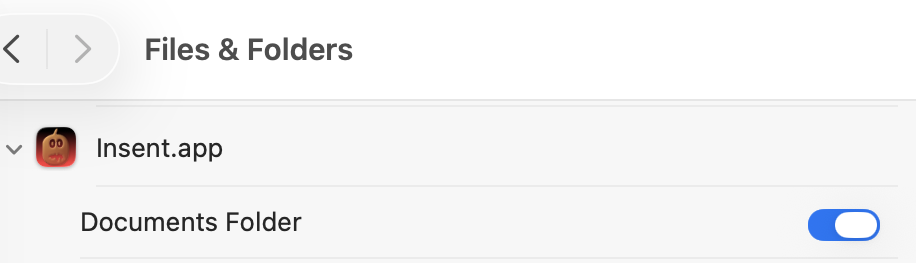
You’ll also see Insent has been added to the Files & Folders section in Privacy & Security settings, with access specifically to the Documents folder.
Confirm that control does what it claims by quitting Insent, turning access to the Documents folder off, opening Insent, and clicking on Open by consent again. Now instead of seeing the filename, you’ll see the message that Insent [Couldn't get contents of Documents folder], because you withdrew your consent.
With that privacy control still disabled, try clicking on the Save by consent… button. This writes a brief text file whose name starts with Insent followed by a UUID into your Documents folder – the same folder you’ve withdrawn consent from, and where it can’t read a text file. But if you click on Open by intent… and select that same file there, so expressing your intent to open it, it should still open normally.
These few minutes have shown:
Folders including ~/Documents are protected to restrict reading not writing files.
Apps retain the ability to read files in protected folders by user intent, when explicitly opening the file.
Apps themselves can only open files in protected folders with express user consent.
Each consent in Folders & Files is limited to the app and the protected folder.
Consent will be sought automatically when an app tries to access a protected folder.
When consent has been given and is then disabled, the app will be denied access to files in that protected folder.
So the next time you’re invited to give an app access to a protected folder, you’ll know that it’s trying to access its contents. If you don’t think that app should have free access to the files in that folder, deny that request, and don’t whatever you do be persuaded to give the app Full Disk Access just to have a quieter time, or because Support recommends it.
Insent version 1.0 for macOS 13.5 or later is available from here: insent10
and I’ll be returning to it later next week.
Look across a range of third-party apps on your Mac and you’ll see how different their interfaces are. Casting aside those based on cross-platform frameworks like Electron, most of the best either use traditional AppKit, or its more recent successor SwiftUI. This article explains how those have come about, and how they differ.
AppKit is descended from the UI framework in NeXTSTEP, and has been at the core of Mac OS X from the start. For much of the last 26 years, it has provided the interface for the Finder and Apple’s own apps. When Apple designed iOS and iPadOS, they were given equivalents in UIKit, which isn’t as extensive, and hasn’t facilitated cross-platform development.
Although AppKit apps can construct their interface procedurally, most rely on Interface Builder, a GUI tool built into Xcode that separates the design of menus, windows, their views and controls from the largely procedural or imperative code used to drive them. You can often tell apart apps using AppKit by their use of Storyboard files in the Resources folder in their app bundle.
SwiftUI was announced at WWDC in June 2019, and first became available in macOS 10.15 Catalina. One of its primary goals is make it easier for apps to run across multiple Apple operating systems. It adopts a declarative approach, so rather than separating interface design into a graphical editor, its windows, their views and controls are built from data structures as in the example given in the Appendix below. Their code can then be previewed in real-time, but there’s no direct manipulation in those previews, which are developed iteratively in code.
For example, to increase the size of an AppKit text entry box in Interface Builder, the developer can either drag the box to its new size, or adjust its dimensions in a control, and see the result immediately. In SwiftUI, those dimensions are edited in the code defining that box within its view and window, which is then converted into a graphical preview. Although this difference may appear subtle, it’s fundamental. Apps that use SwiftUI without AppKit don’t have Storyboards in the Resources folder in their app bundle.
The two come from different eras in human interfaces.
AppKit presents a more static approach, where the contents of its views are their dynamic, as demonstrated in SilentKnight version 2 below.
SwiftUI is thoroughly dynamic, reconfiguring its look using animations and transitions in layouts that adapt to their purpose, as shown in a prototype for SilentKnight version 3 below. Although AppKit is thoroughly accessible from Swift code, it was developed for Objective-C, while as its name implies, SwiftUI is thoroughly Swift-oriented.
While there are still many fine apps that only use AppKit, SwiftUI remains work in progress, and it’s common for apps still to dip into AppKit to handle tasks that can’t be achieved in SwiftUI alone. Among many examples remaining is the display of PDF documents, which is still only achievable from an AppKit view. This is improving as SwiftUI evolves, but that in turn poses problems with macOS support.
For example, one of the most substantial changes in SwiftUI has been the move from its Observable Object protocol to the Observable macro, which affects the back end of apps. But the Observable macro is only available in apps written for macOS 14 or iOS 17 or later, which explains why so many apps using SwiftUI require a minimum of macOS 14.6, so they can take advantage of this architectural change. It’s not just the more obvious features in new versions of macOS that limit backward compatibility of apps.
Among the archipelago of delights brought in SwiftUI are its List View, and Swift Charts.
AppKit has excellent support for Attributed Strings that are essentially their underlying data for Rich Text. Log entries shown in my AppKit-based log browser Ulbow demonstrate how its NSTextView can handle tens of thousands of lines of Attributed String data representing log entries.
In LogUI, I have replaced that with a SwiftUI List View, which is far more versatile, but doesn’t use Attributed Strings.
Although in recent versions of macOS this readily copes with tens or even hundreds of thousands of lines, it’s still prone to displaying blank areas when scrolling.
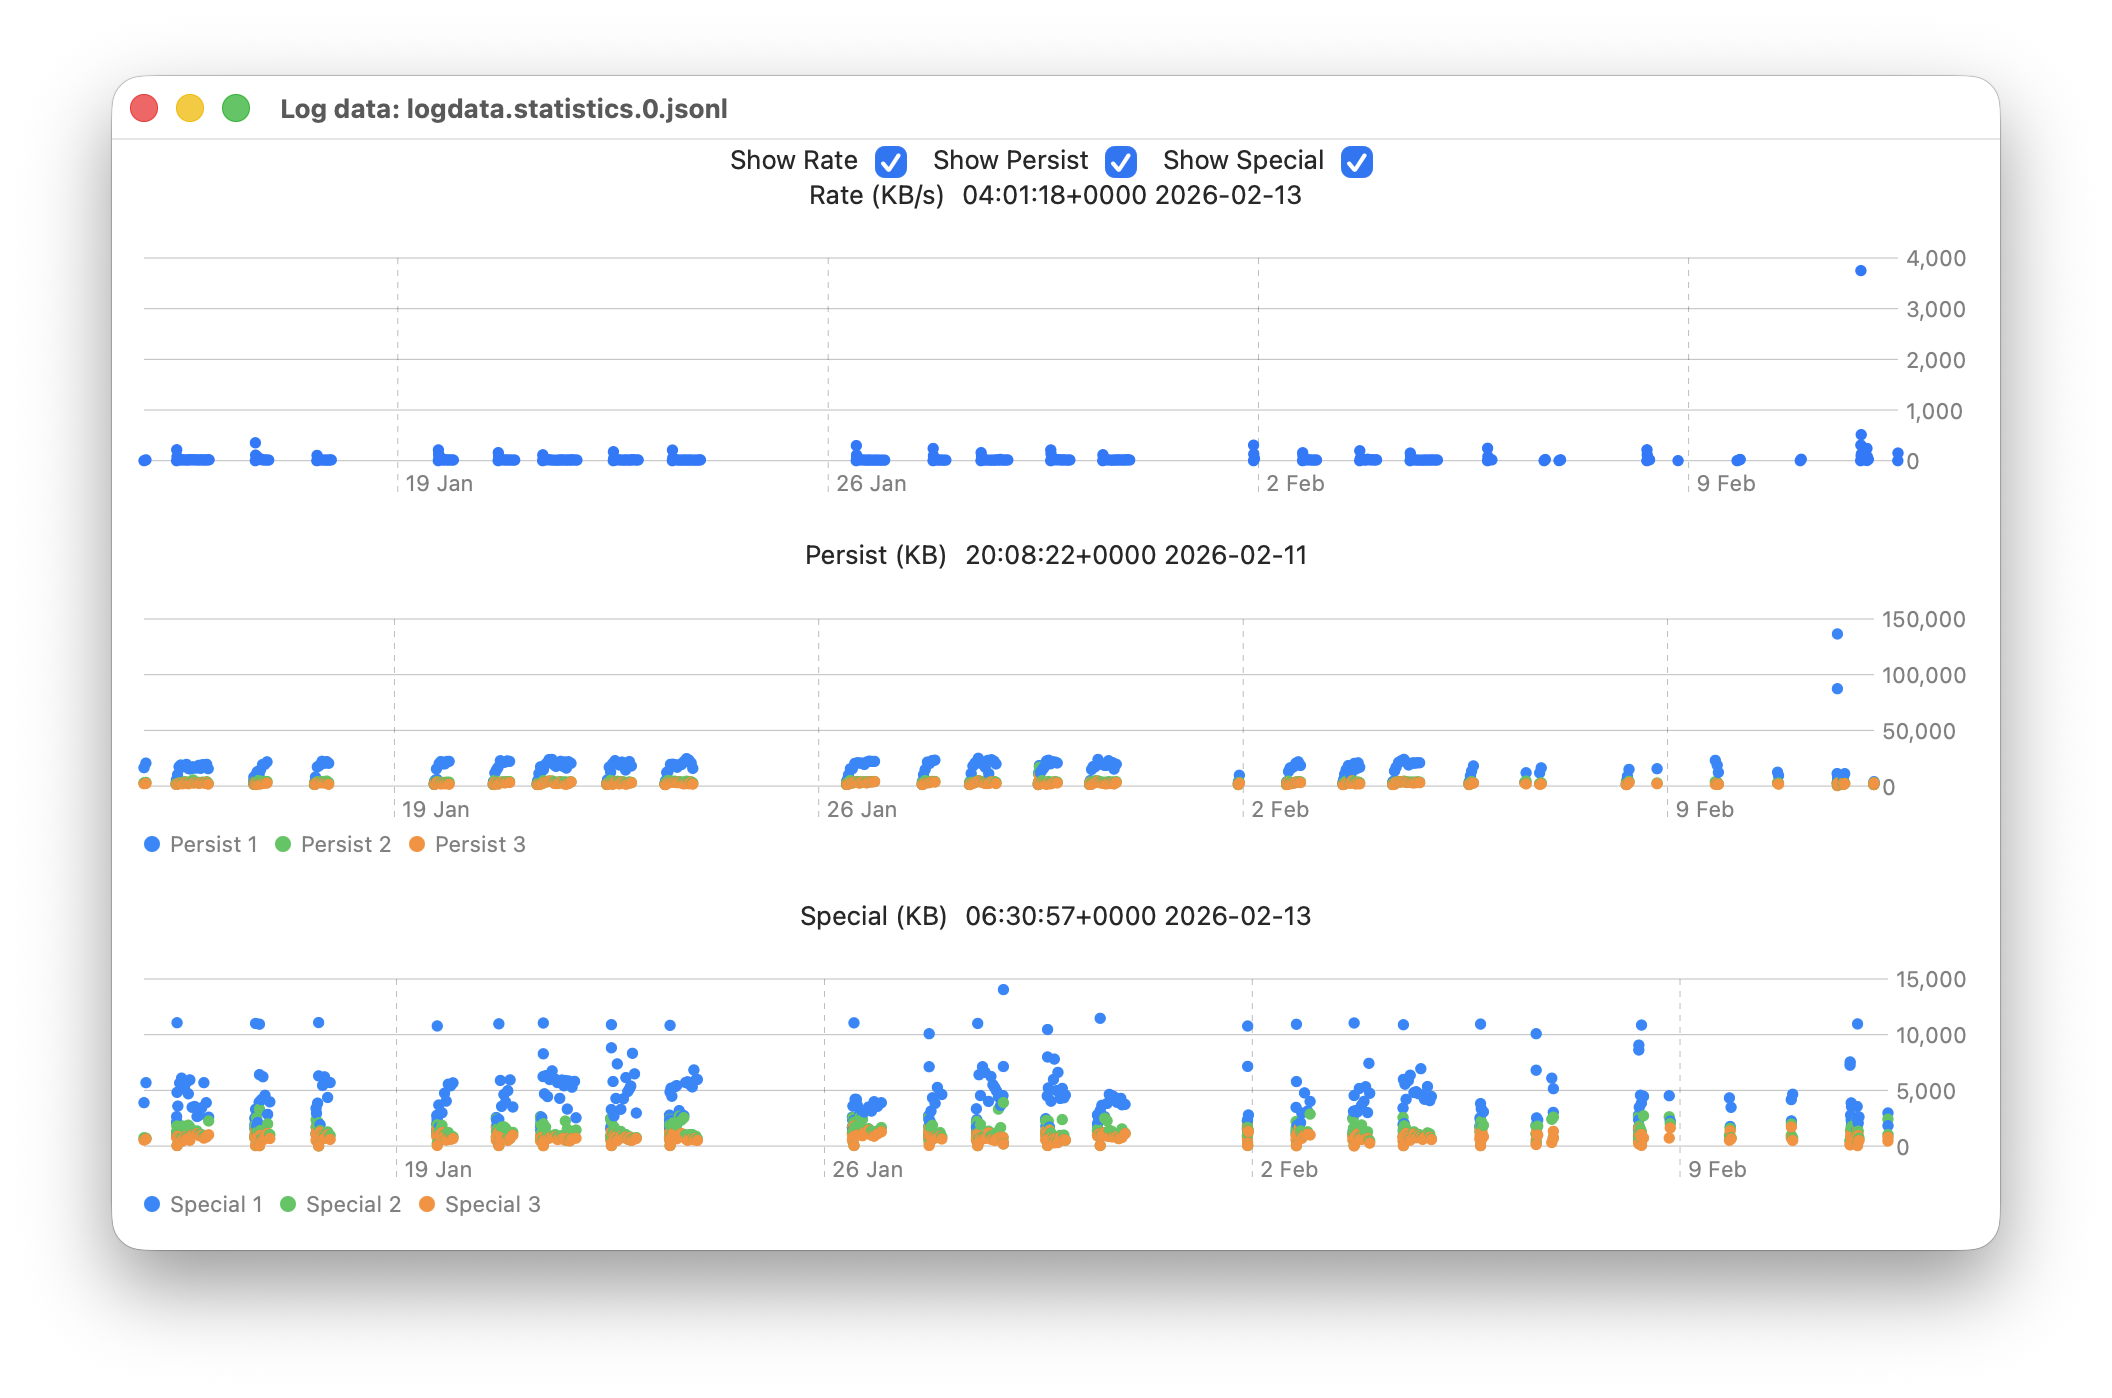
Implementing charts in Logistician relies entirely on the capabilities of Swift Charts, but those are only available in macOS 13 and later.
Although it might appear that Mac developers are now spoilt for choice between AppKit and SwiftUI, there are many occasions when they’d prefer taking the best bits of each and building something more coherent and comprehensive, and better tailored to the desktop rather than the device.
Appendix: Example SwiftUI code
structContentView: View{
@Stateprivatevar messageInfo = Logger()
var body: someView {
let_ = messageInfo.getMessages()
if (self.messageInfo.logList.count > 0) {
VStack {
List(self.messageInfo.logList) { line in MessageRow(line: line)
}
}
.frame(minWidth: 900, minHeight: 200, alignment: .center)
} else {
Text("No results returned from the log for your query.")
.font(.largeTitle)
}
}
}
structMessageRow: View{
let line: LogEntryvar body: someView {
HStack {
Text(line.date + " ")
if #available(macOS 14.0, *) {
Text("\(line.type)")
.foregroundStyle(.red)
} else {
Text("\(line.type)")
.foregroundColor(.red)
}
if !line.activityIdentifier.isEmpty {
Text(line.activityIdentifier)
}
// etc. Text(line.composedMessage)
}
}
}

 Login
Login