Edgar Degas had limited formal training in painting, studying at the École des Beaux-Arts in Paris for a year before he went to Italy for three years from the summer of 1856. On his return to Paris, where he set up his first studio in 1859, he followed convention and worked mainly in oils.
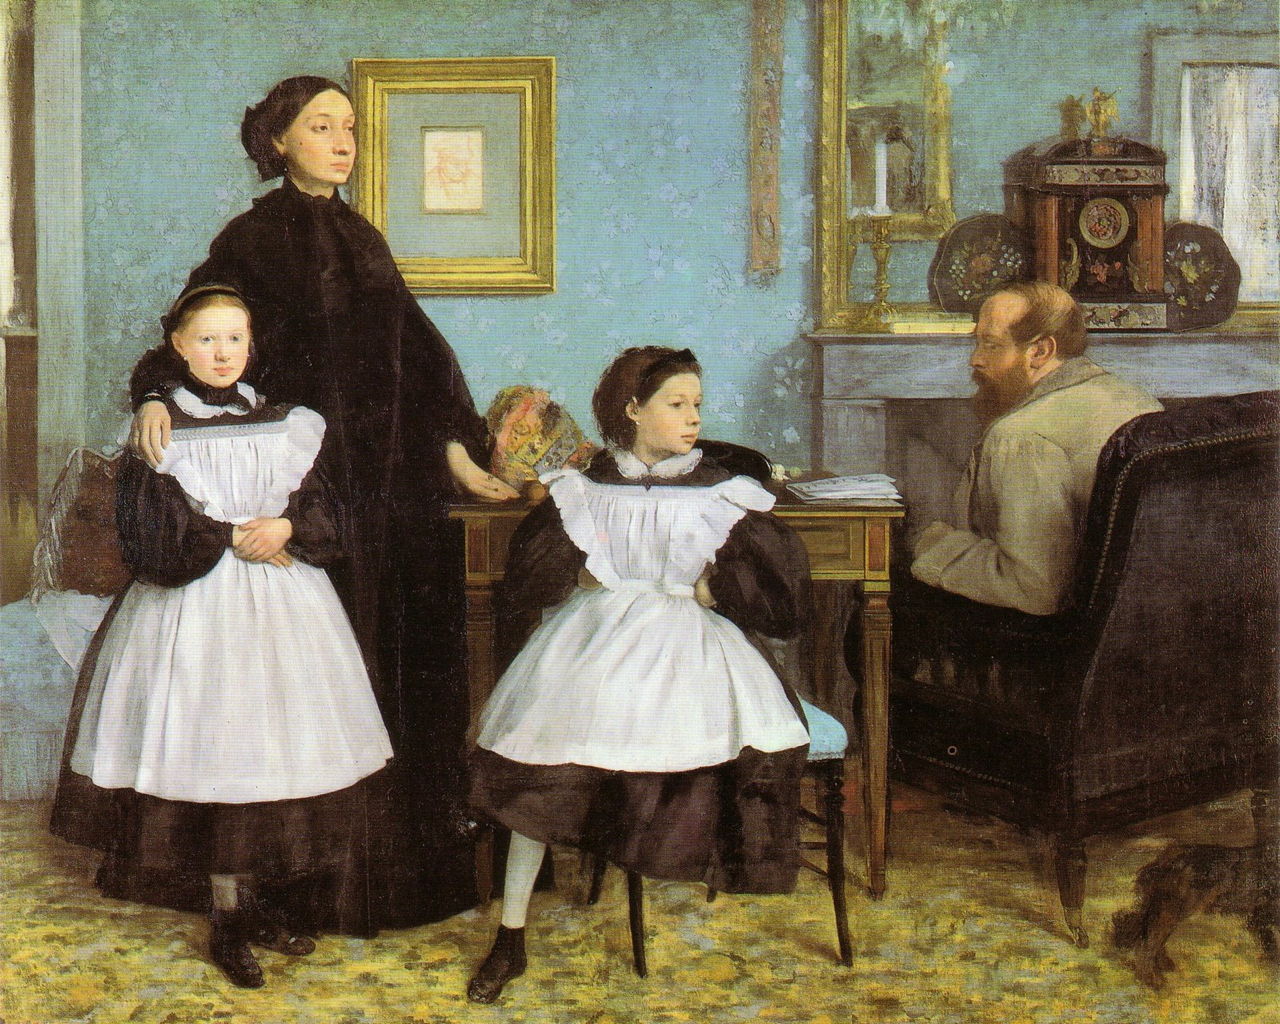
Edgar Degas (1834–1917), The Bellelli Family (1858-67), oil on canvas, 200 × 253 cm, Musée d’Orsay, Paris. Wikimedia Commons.
Degas painted some small portraits early in his career, but his first major work is that of The Bellelli Family, which he laboured over for nearly ten years between 1858-67. He started this when he was staying with the family in Naples.
Edgar Degas (1834–1917), View of Naples (1860), watercolour, dimensions not known, Bibliothèque Nationale de France, Paris. The Athenaeum.
He also made several landscape sketches, some in oil on paper, others like this View of Naples (1860) in watercolour. None seems to have been developed into anything more substantial, though.
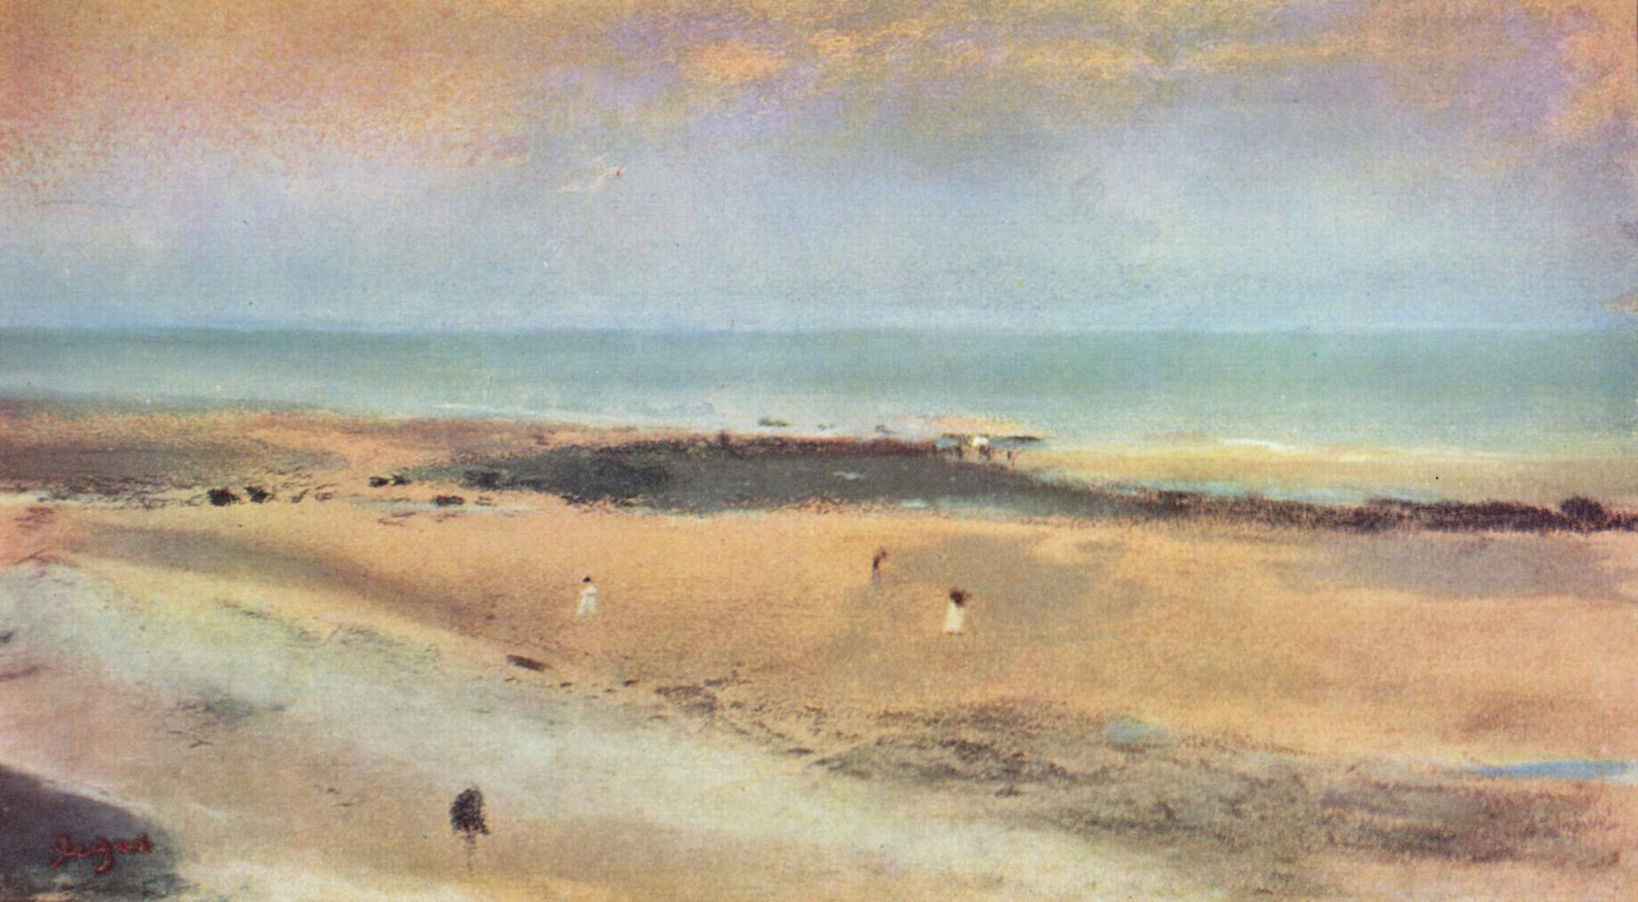
Edgar Degas (1834–1917), Beach at Low Tide (c 1869-70), pastel, 18 × 31 cm, Private collection. Wikimedia Commons.
In the summer of 1869 he travelled to the Normandy coast of France, where he visited Édouard Manet and painted some landscapes in pastels. Among those is Beach at Low Tide (c 1869-70) emphasising its flatness and emptiness. He then seems to have become more experimental in his technique, for example wetting his pastels to apply them with a brush, and combining them with print-making techniques he had been teaching himself. Among his goals seems to have been to reduce the amount of binder in his paint in a bid to apply pure colour.
Edgar Degas (1834–1917), Ballet at the Paris Opéra (1877), pastel over monotype on cream laid paper, 35.2 x 70.6 cm, Art Institute of Chicago, Chicago, IL. Wikimedia Commons.
From the mid-1870s in his paintings of the Ballet at the Paris Opéra, here from 1877, Degas experimented with another method of reducing the binder in his paint layer, by applying pastel over a monotype. He first created this painting on a non-absorbent surface, and while that was still wet used that to make a print on paper, which he completed by applying soft pastel on top.
Edgar Degas (1834–1917), Danseuse basculant (Danseuse verte) (Swaying Dancer, Dancer in Green) (1877-79), pastel and gouache on paper, 64 x 36 cm, Museo Thyssen-Bornemisza, Madrid, Spain. Wikimedia Commons.
As his ballet paintings progressed to smaller groups, they focussed more on their form and movement, as in Danseuse basculant (Danseuse verte) (Swaying Dancer, Dancer in Green) (1877-79). This is painted in a combination of pastel and gouache. By this time he had experimented technically in three main areas: the use of peinture à l’essence, oil paint with the drying oil largely removed, a rich variety of wet and dry techniques with soft pastels, and print-making, in particular his re-introduction of the monotype.
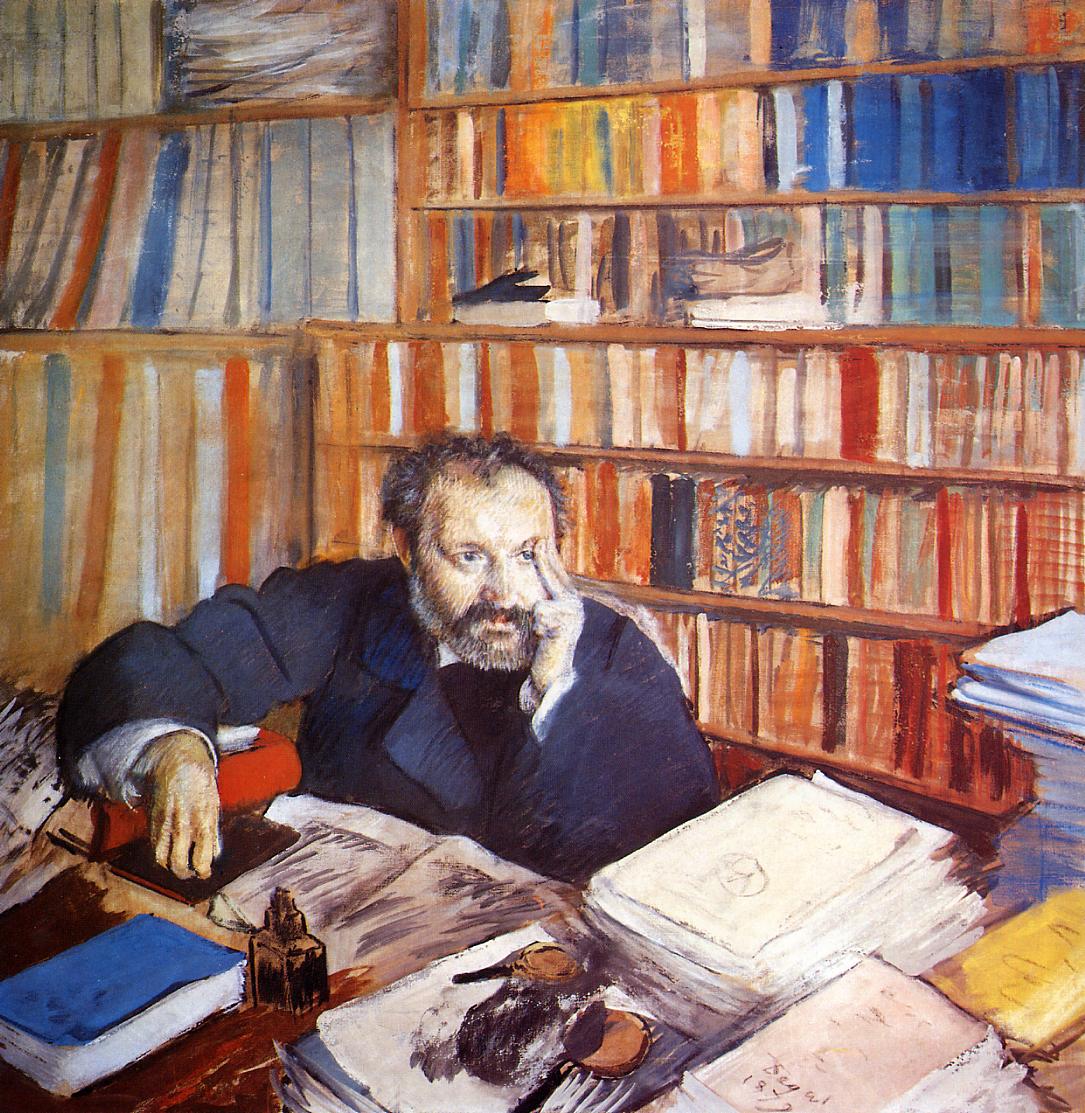
Edgar Degas (1834–1917), Portrait of Edmond Duranty (1879), gouache with pastel on linen, 128 x 128.6 cm, Burrell Collection, Glasgow, Scotland. Image by Rlbberlin, via Wikimedia Commons.
Degas’ Portrait of Edmond Duranty (1879) was unusually painted in gouache with pastel on linen. His friend Duranty is clearly thinking over his next piece of writing, which could have been as influential as his essay The New Painting, published in 1876, often used as a benchmark against which to compare Degas’ work.
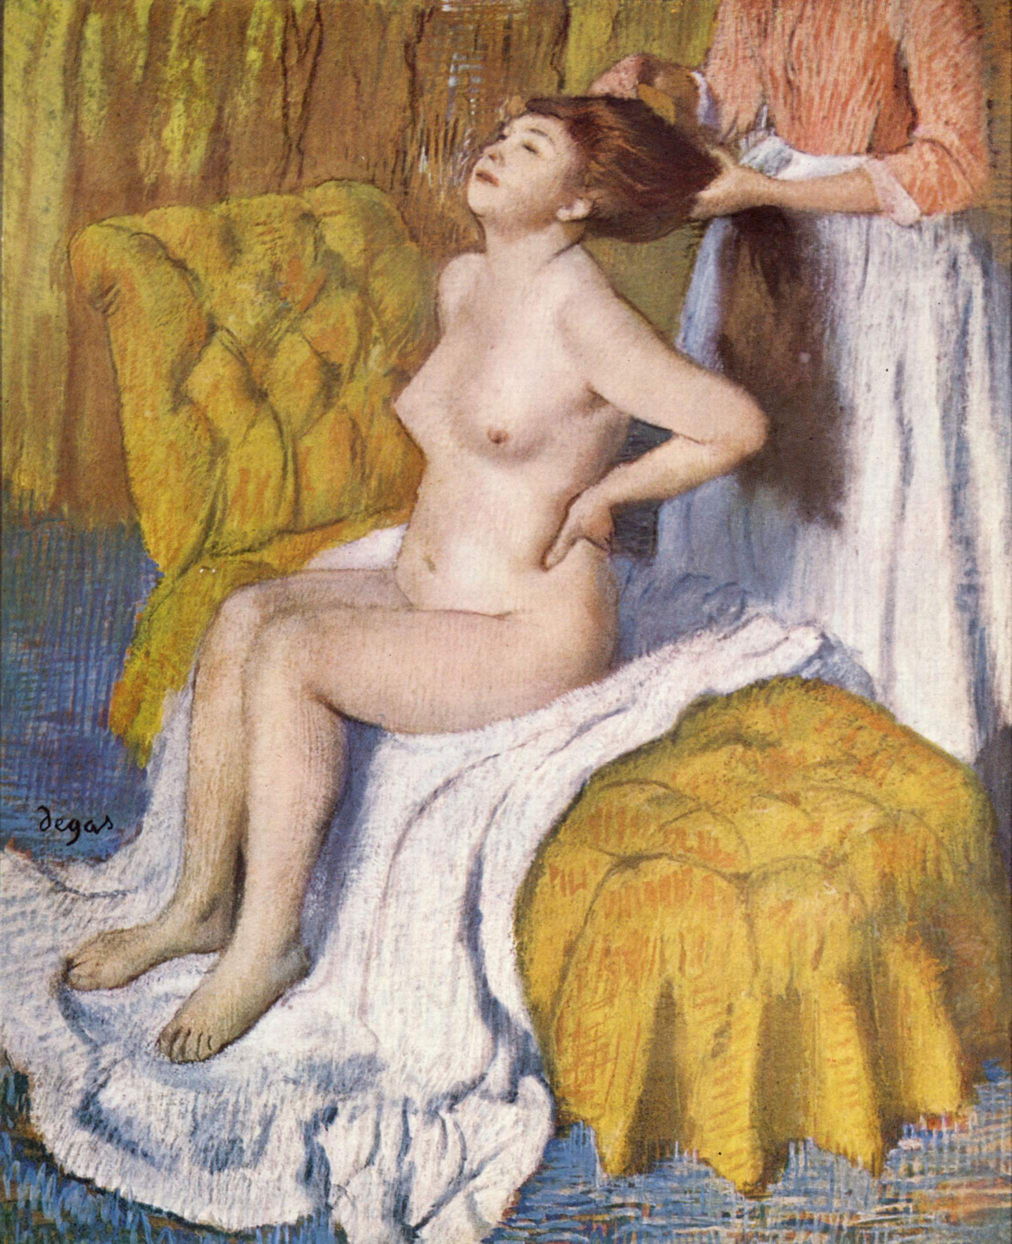
Edgar Degas (1834–1917), Woman Having Her Hair Combed (c 1885), pastel, 73 × 59 cm, Metropolitan Museum of Art, New York, NY. Wikimedia Commons.
This pastel painting of a Woman Having Her Hair Combed from about 1885 shows some of the textures he created using his techniques, from smooth flesh to the frizz of hair.
Edgar Degas (1834–1917), Woman Sponging Her Back (c 1888-92), pastel on paper mounted on cardboard, 70.9 x 62.4 cm, National Museum of Western Art 国立西洋美術館 (Kokuritsu seiyō bijutsukan), Tokyo, Japan. Wikimedia Commons.
This later period of his work also brought an increasing number of paintings of women bathing and dressing, culminating in pastel paintings formed from vigorous vertical or diagonal strokes, such as Woman Sponging Her Back (c 1888-92). The contrast with the previous work is stark.
Edgar Degas (1834–1917), Wheat Field and Green Hill (c 1890-92), pastel over monotype in oil colours on paper, dimensions not known, Norton Simon Museum, Pasadena, CA. Wikimedia Commons.
Degas’ late landscapes are based on similar combinations of media, as in his Wheat Field and Green Hill from the early 1890s, in which he applied soft pastels on a monotype using oil-based ink or paint.
Edgar Degas (1834–1917), Dancer Fastening Her Shoe (c 1893-98), oil colour and turpentine, 70 × 200 cm, Cleveland Museum of Art, Cleveland, OH. Wikimedia Commons.
His remarkable composite work, made using peinture à l’essence, of a Dancer Fastening Her Shoe (c 1893-98), brings together four different views of the same dancer fastening her left shoe. This may have been inspired by Muybridge and Marey’s composite photos of human motion, and may well have reflected his own experiments in photography.
Edgar Degas (1834–1917), After the Bath, Woman Drying Her Back (1896), gelatin silver photographic print, 16.5 x 12 cm, J. Paul Getty Museum, Los Angeles, CA. Wikimedia Commons.
Degas’ gelatin silver photographic print of After the Bath, Woman Drying Her Back from 1896 is one example of his many experiments with photography.
Most of the other more orthodox French Impressionists were remarkably conservative in their choice and use of media, sticking to oil on canvas for almost their entire careers. Degas was the odd man out, not just for what he painted, but for how he did so.
Many notable painters have also made their own prints, and the two arts have informed one another. We’ve seen this most recently in the paintings of Félix Vallotton, where his late works have become simplified in the way that’s often used when making successful prints. A few artists have gone one step further and produced images that combine both techniques, where their work consists of a painted print.
Most forms of printmaking involve the production of a plate of metal or wood in which cuts or marks are made. The surface is then covered in printing ink, and the paper (or other medium) is then pressed against that to transfer patterns of ink onto it. Monotypes are different in that the plate remains intact, and the image to be printed is formed on its surface before making a single impression from it. As with most types of printmaking, there are many variations.
In 1794, William Blake had perfected his colour illuminated printing process, in publishing a series of illuminated books, and the following year he used it to produce a limited run of twelve large colour paintings. These formed the first major collection of paintings he offered for sale: one mark of the importance that he accorded them was his use of the term fresco to describe their medium.
In fact, they weren’t made using a technique that resembled fresco painting at all. Although there remains some debate as to exactly what he did, the process was probably:
Develop the work using sketches, etc., until a design was ready to print. In some cases, these large prints were derived from earlier work, in others he made fresh sketches.
Draw the finished work onto a sheet of thick millboard, ready to colour.
Produce a wet watercolour, using pigment, binder, and a honey additive, on the millboard.
Print approximately three copies from the millboard ‘plate’.
Touch up each print by hand using pen and ink and watercolour to produce the finished painting.
Although it’s possible he may have used oil-based inks or paints on some, Blake’s lifelong aversion to the use of oil paints suggests that he used water-based media throughout, and analyses support that. These ‘large prints’ (also known as his Lambeth Prints, as that is where they were made) are therefore watercolour monotypes then individually retouched and painted further. Given the variation between the different ‘pulls’ or impressions made of each, they are less prints and more print-based paintings.
Neither were they illustrations in the way that the images within his illuminated books may be. They were supplied as individual sheets for mounting and framing as paintings. We don’t know whether Blake intended them to be viewed in pairs, groups, or as a complete set of twelve, and there’s uncertainty as to his own title for several. Indeed, some of them appear to have been mistitled following Blake’s death, and that has led to confusion as to what they actually depict.
William Blake (1757–1827), Satan Exulting over Eve (c 1795), graphite, pen and black ink, and watercolour over colour print, 42 x 53 cm, J. Paul Getty Museum, Los Angeles, CA. The Athenaeum.
Satan Exulting over Eve (c 1795) is thought to be the first impression of this work, with roots in the story of the Fall in Genesis, and in Milton’s Paradise Lost. In book 5 (lines 28-92), Milton writes a more detailed account of the Fall, in which Eve has a dream of Satan giving her the fateful apple, sweeping her up into the cloud before she sinks down and falls asleep. Blake shows Satan flying low over the sleeping body of Eve; he carries a shield and spear. The serpent has already coiled itself around Eve’s legs and body, and there is an apple by her right hand.
Newton (1795–c 1805), another first impression, is one of Blake’s most famous images. It shows the brilliant mathematician and physicist completely absorbed in a geometrical problem, oblivious to the wondrous rock on which he sits. Its standard interpretation is that Newton’s scientific rationalism was inadequate without imagination and the creativity of the artist, a surprisingly negative view of the man who is still considered a towering genius.
The Night of Enitharmon’s Joy (c 1795) has proved the most enigmatic of all the dozen paintings to read. For a long time, it was believed to show Hecate, as proposed by Dante Gabriel Rossetti. It’s more likely that the woman seen at the front of the figures is from Blake’s own mythology, Enitharmon: partner, twin, and inspiration to Los (and mother of Orc). She represents spiritual beauty, and was modelled on Blake’s wife, Catherine (who may have been the model for her figure here too). In her ‘night of joy’, she establishes her Woman’s World, with a false religion of chastity and vengeance – which was Blake’s view of the 1800 year history of the ‘official’ Christian church.
William Blake (1757–1827), Christ Appearing to His Disciples After the Resurrection (c 1795), color print (monotype), hand-colored with watercolor and tempera, 43.2 x 57.5 cm, The National Gallery of Art (Rosenwald Collection), Washington, DC. Courtesy of The National Gallery of Art.
Blake’s Christ Appearing to His Disciples/Apostles After the Resurrection refers to the gospel of Luke, chapter 24 verses 36-40: And as they thus spake, Jesus himself stood in the midst of them, and saith unto them, “Peace be unto you.” But they were terrified and affrighted, and supposed that they had seen a spirit. And he said unto them, “Why are ye troubled? and why do thoughts arise in your hearts? Behold my hands and my feet, that it is I myself: handle me, and see; for a spirit hath not flesh and bones, as ye see me have.” And when he had thus spoken, he shewed them his hands and his feet.
Edgar Degas’ monotypes are thought to have been more conventional, made on a lightweight aluminium sheet using oil-based printing ink, then extensively retouched and painted, often using soft pastels.
Edgar Degas (1834–1917), Intimacy (c 1877), monotype, 30.2 × 40.9 cm, Statens Museum for Kunst (Den Kongelige Malerisamling), Copenhagen, Denmark. Wikimedia Commons.
During the late 1870s, Degas devoted series of monotypes to women’s ‘toilet’ preparations, of which Intimacy from about 1877 is an example. He appears to have been fascinated at the craft and care used to prepare a woman for public viewing, something a single man who had no known amorous relationships would find quite strange. This print appears to have undergone retouching and modification, but hasn’t been painted using pigment or colours.
Edgar Degas (1834–1917), Ballet at the Paris Opéra (1877), pastel over monotype on cream laid paper, 35.2 x 70.6 cm, Art Institute of Chicago, Chicago, IL. Wikimedia Commons.
The same year Degas applied soft pastel to the print, in the Ballet at the Paris Opéra (1877), which more closely resembles a true painting.
Edgar Degas (1834–1917), Woman Drying Herself after the Bath (c 1885, or 1876-77), pastel over monotype, 43 × 58 cm, Norton Simon Museum, Pasadena, CA. Wikimedia Commons.
Also dating from 1876-77 is his Woman Drying Herself after the Bath, one his first works showing a woman bathing. It’s also one of the few in this series setting the woman in a broader context, here a plain and simple bedroom with a single bed. The woman, wearing only bright red ‘mule’ slippers, stands just behind the shallow metal tub, watching herself in the mirror of her dressing table, as she dries her body with a towel. On its shelf is a small range of cosmetics, with the mandatory mirror behind. This too is the result of applying pastels to a monotype.
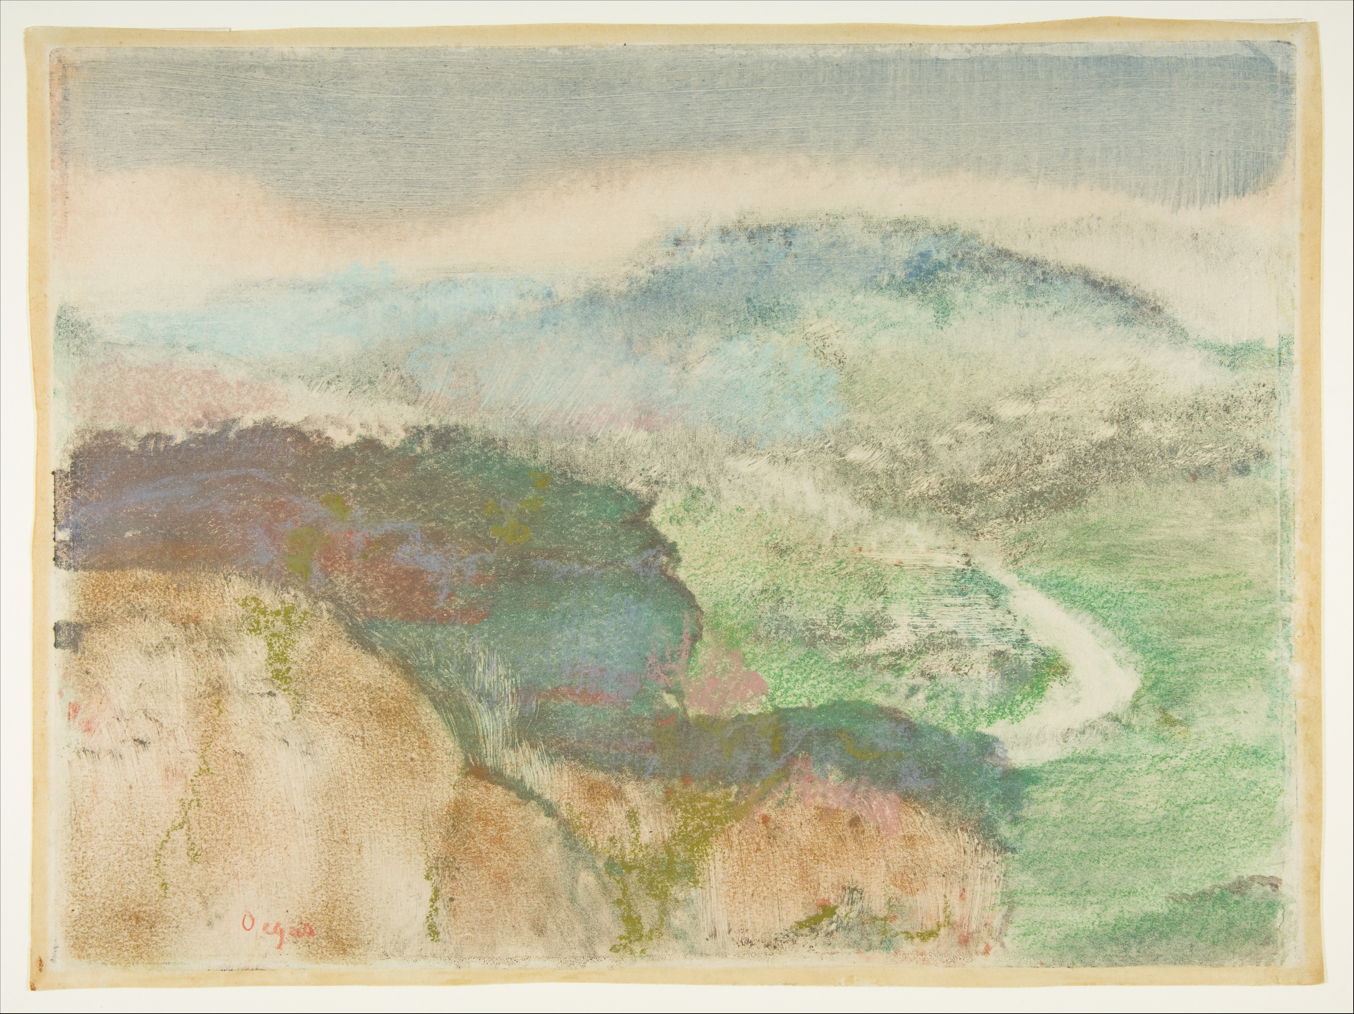
Edgar Degas (1834–1917), Landscape (1892), monotype in oil colours, heightened with pastel, 25.4 x 34 cm, Metropolitan Museum of Art, New York, NY. Wikimedia Commons.
Degas’ late landscapes are based on the same combination of media, as shown in his Landscape above, and Wheat Field and Green Hill below, both from the early 1890s.
Edgar Degas (1834–1917), Wheat Field and Green Hill (c 1890-92), pastel over monotype in oil colours on paper, dimensions not known, Norton Simon Museum, Pasadena, CA. Wikimedia Commons.
The American Impressionist Mary Cassatt learned her printmaking techniques with Degas, so it’s not surprising to see some of her monotypes forming the basis of paintings.
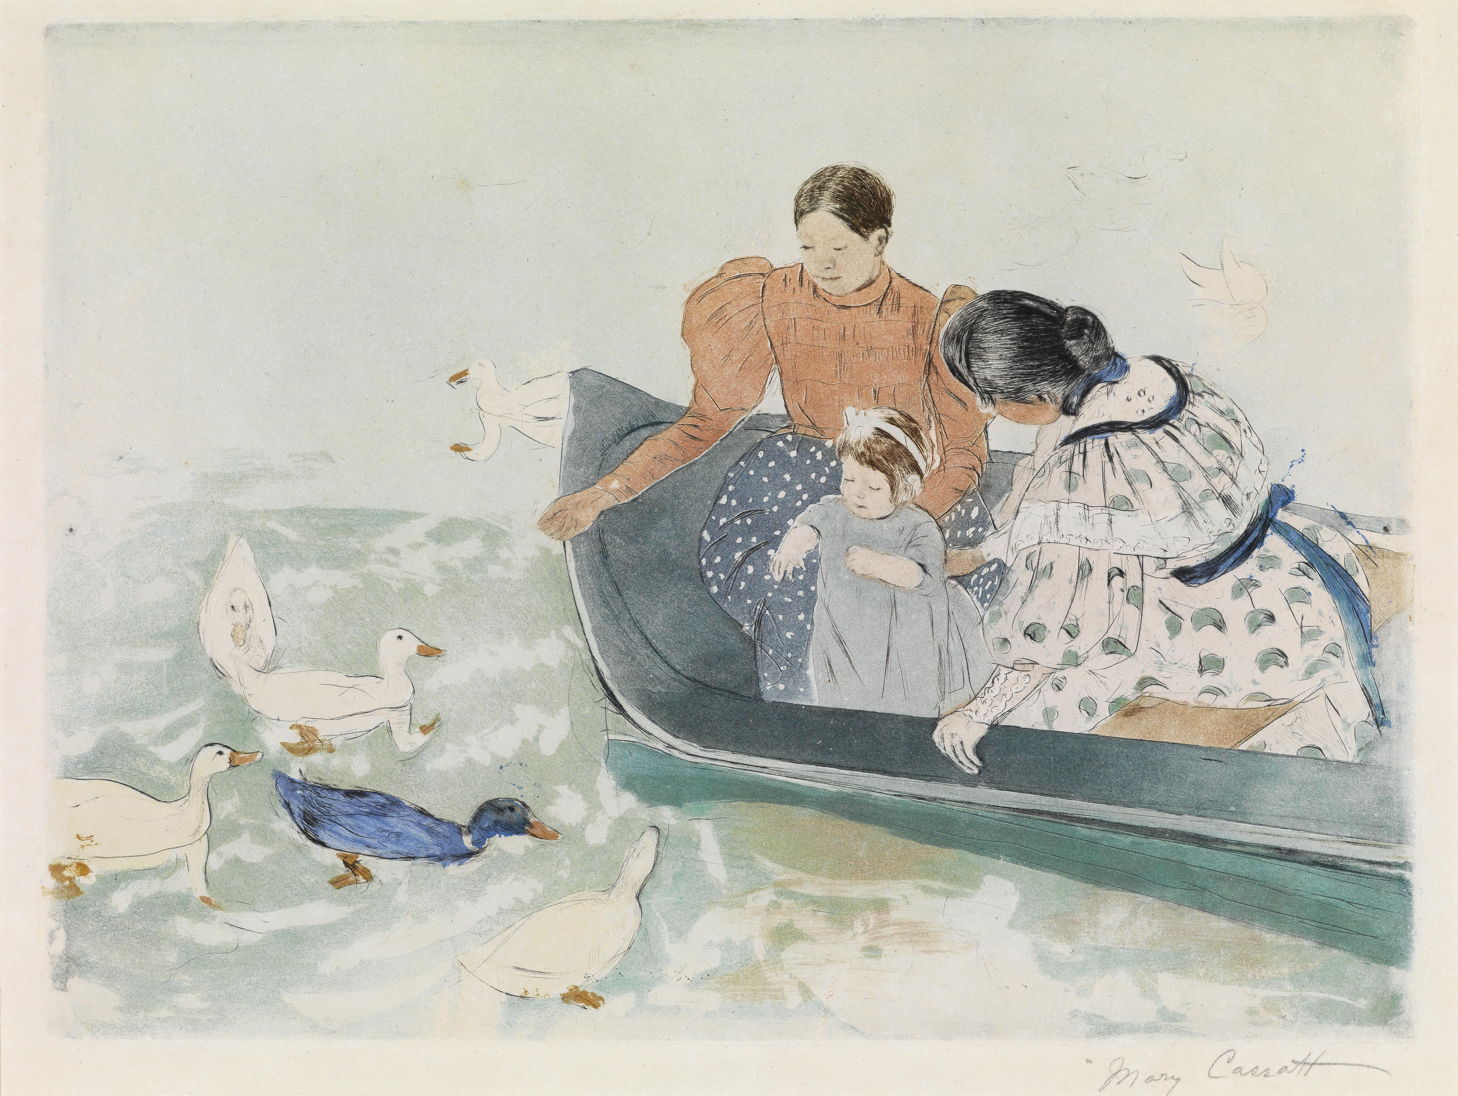
Mary Cassatt (1844–1926), Feeding the Ducks (c 1894), drypoint and aquatint with monotype on handmade paper, 29.5 x 39.5 cm, location not known. Wikimedia Commons.
For her Feeding the Ducks from about 1894 she combined a mature use of drypoint with aquatint, to which she added monotype using oil-based inks. In drypoint, the plate is scratched to form lines with the raised burrs that result. This was most probably produced by applying a fine acid-resistant powder such as rosin to form the ‘ground’, etching it in acid, then applying drypoint lines before printing using oil-based ink.
These techniques were developed further and became more popular in the twentieth century, in the work of artists such as Marc Chagall from the 1960s.
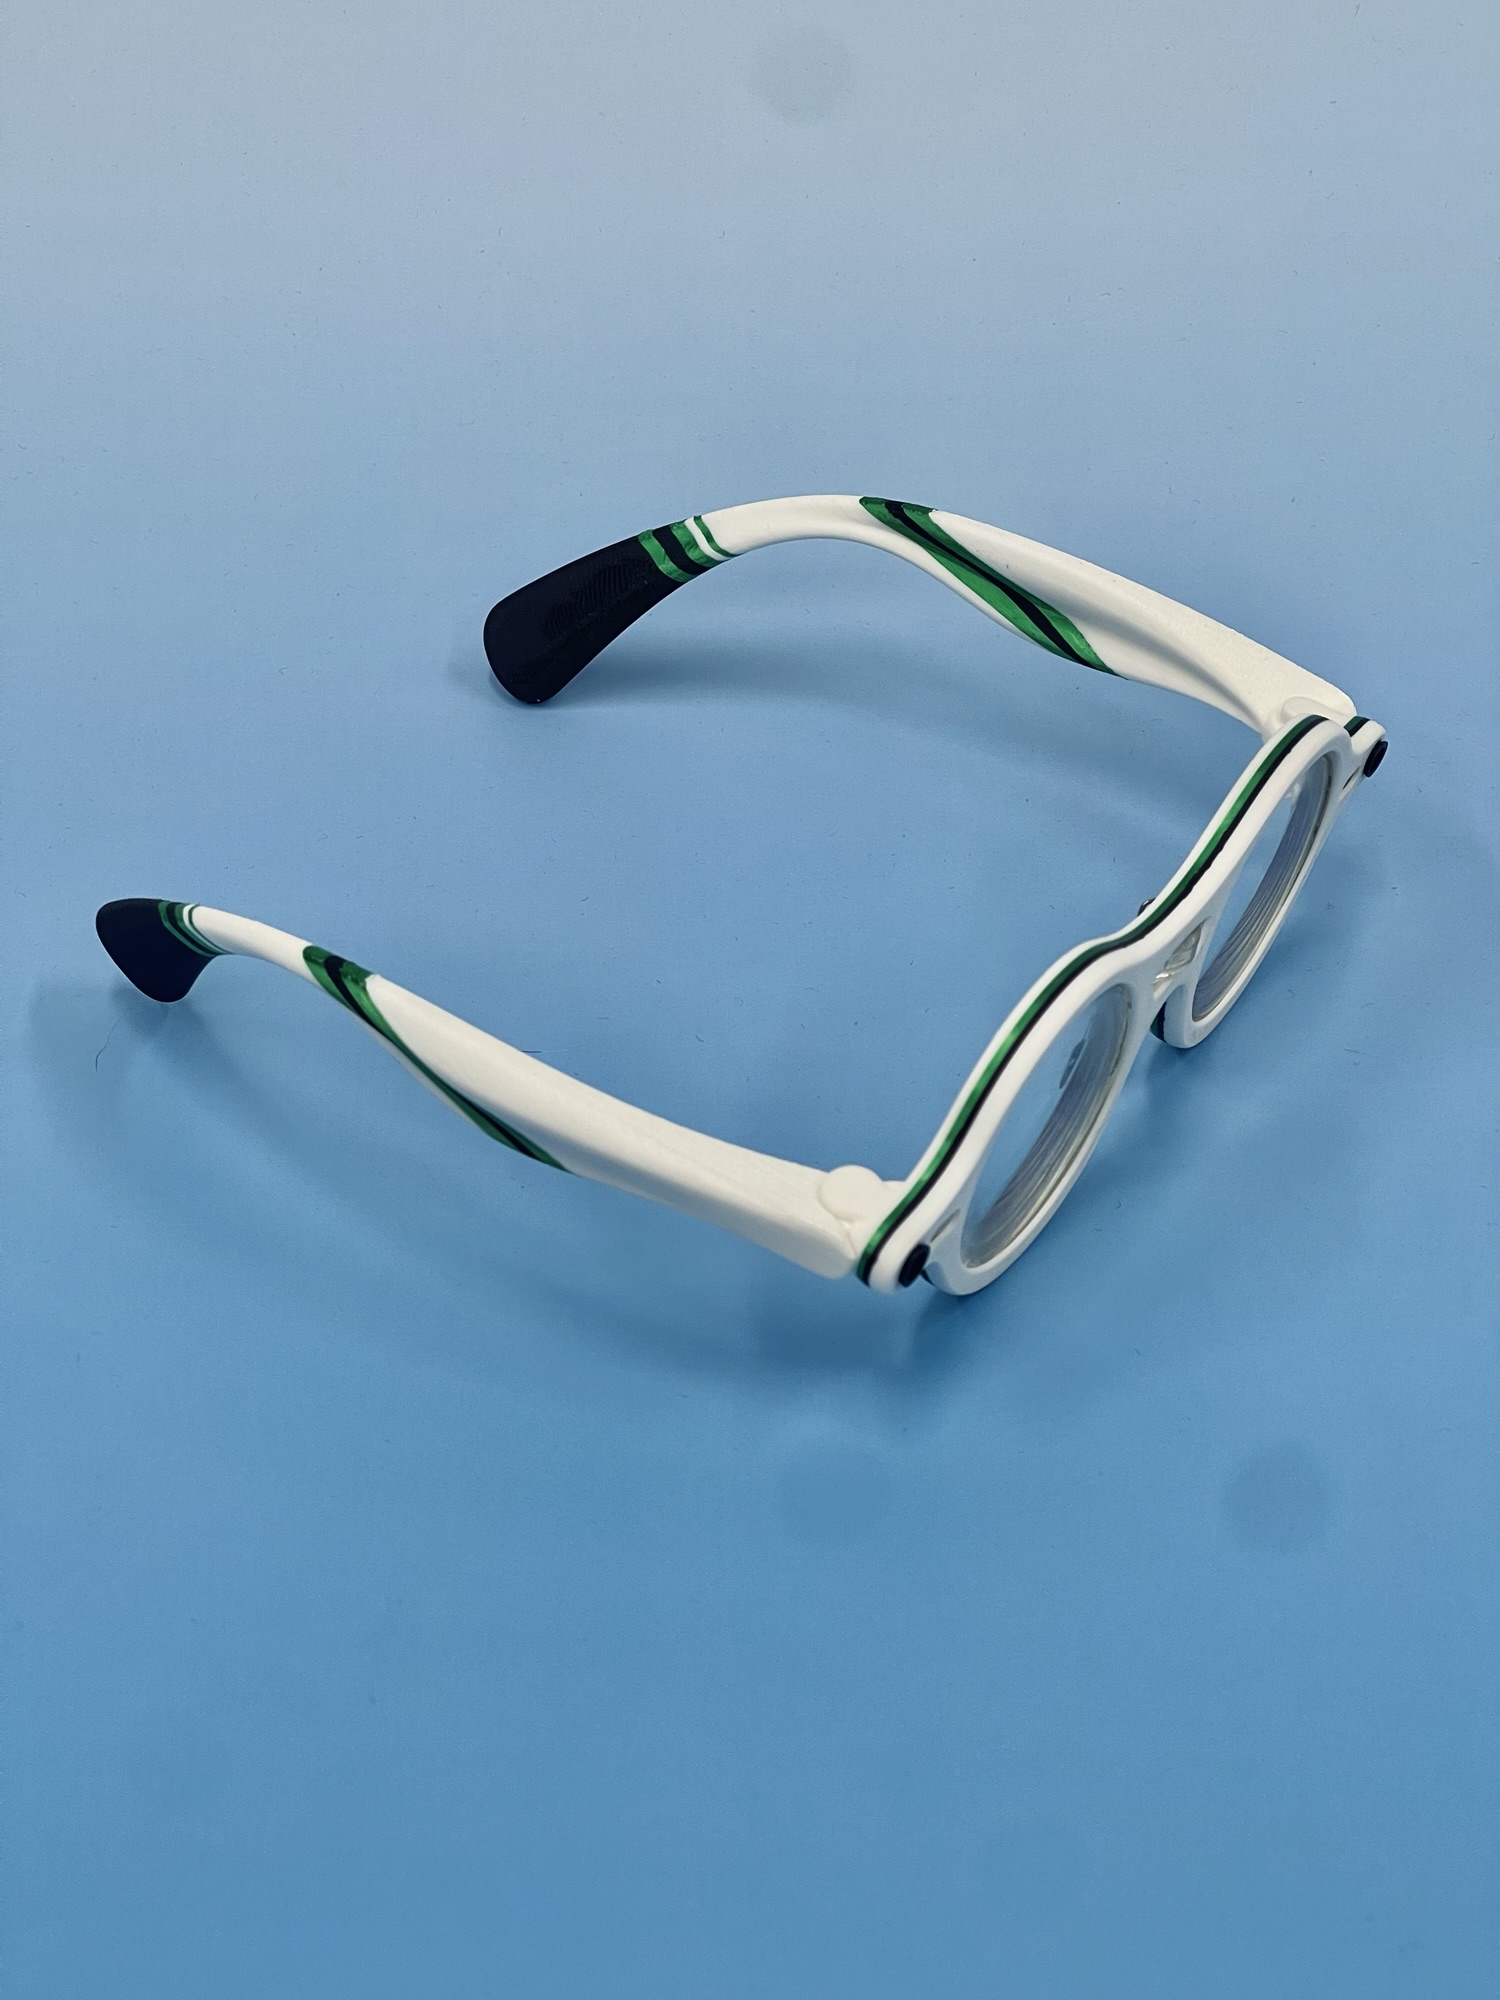
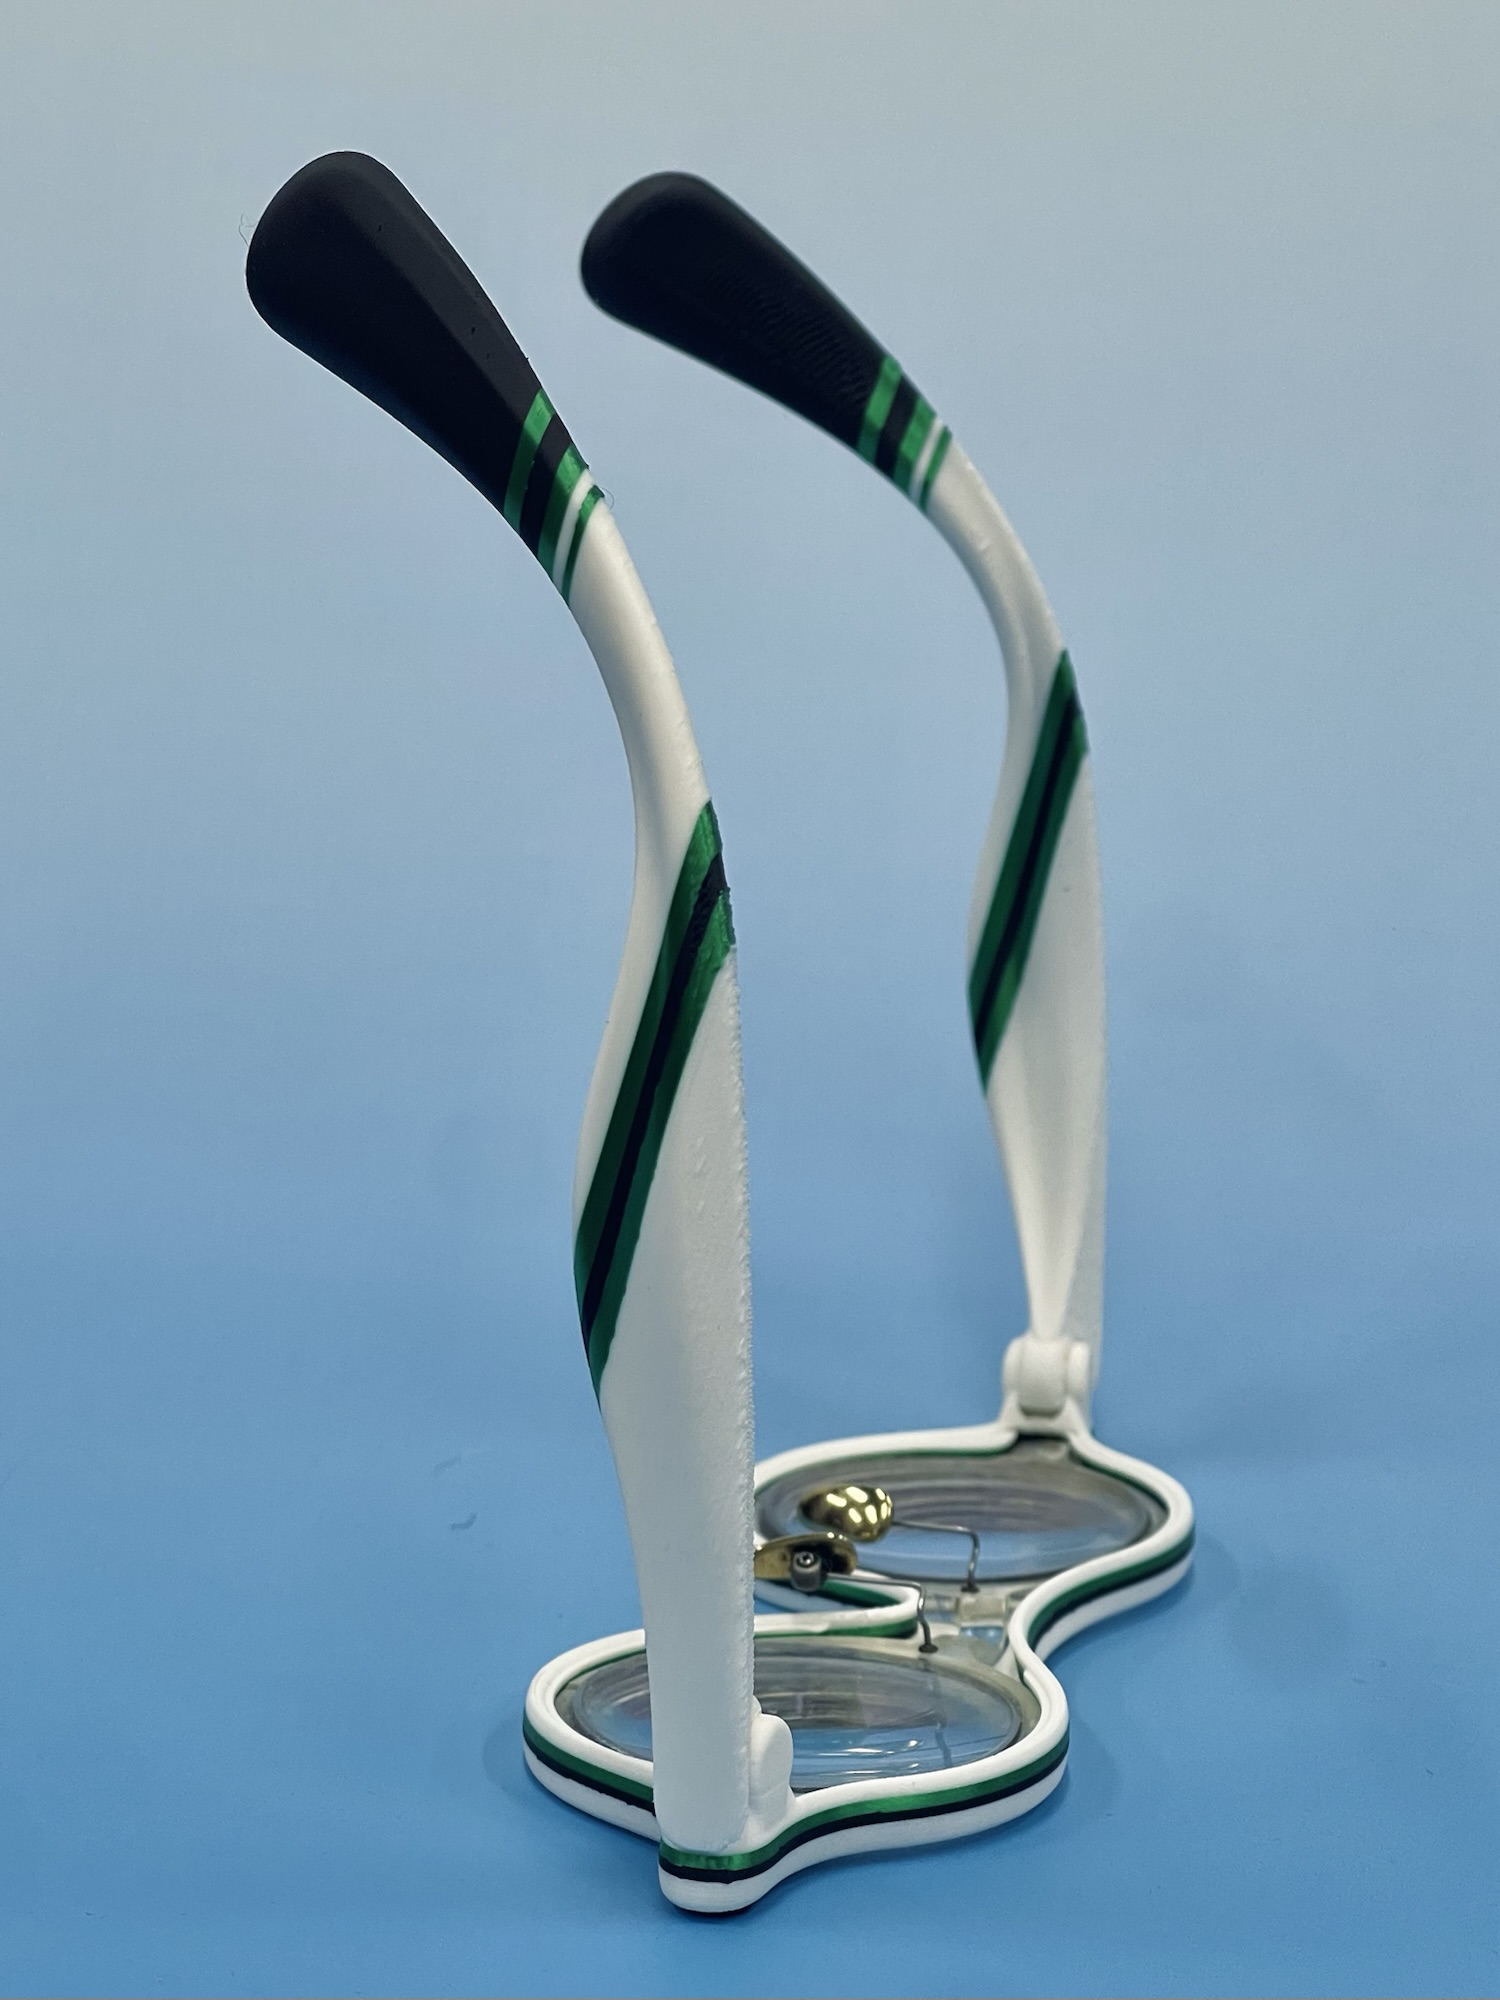
我参与 3DFiti 这个艺术项目,旨在通过 3D 扫描和 3D 打印技术,使我们生活的周边环境增加一些趣味性和艺术性。在人类学家项飙(英国牛津大学社会人类学教授,德国马克斯普朗克社会人类学研究所所长)所描述的那个「附近」的概念之中延展出来,一切我可以到达的地方,只要有我感兴趣的公共区域内「空缺」的空间,就有可能成为这个艺术项目的创作场所。
这次的四个模型分别对应四个「奖品」:
可以来参观我的工作室 x1
可以在线下设计咨询(免费)2小时 x1
可以在线上设计咨询(免费)1小时 x2
只有找到模型并按照二维码所示联系我的人,才可以获得「奖品」。
这是一次 3D 打印的创作,也是一次 Citywalk 路线的开发,还是一次与人连接的尝试。谁会找到这些模型呢?
我参与 3DFiti 这个艺术项目,旨在通过 3D 扫描和 3D 打印技术,使我们生活的周边环境增加一些趣味性和艺术性。在人类学家项飙(英国牛津大学社会人类学教授,德国马克斯普朗克社会人类学研究所所长)所描述的那个「附近」的概念之中延展出来,一切我可以到达的地方,只要有我感兴趣的公共区域内的「缺损」部分,就有可能成为这个艺术项目的创作对象。
我通过 iPhone 扫描空间或者物体,并对模型进行二次创作,使用 3D 打印技术将其制作成一件真实的物品,即能够与现场的「缺损」相嵌合的物件,使这个「缺损」转化为一处临时的微型艺术场所。
No.001 作品中的 紫竹观音像 3D 模型,是来自 Funes.world 的文件。他们的工作是在人类从原子社会进入到比特社会的过程中,将原本属于原子世界中的建筑、空间、故事,通过 3D 扫描建模的方式,将其保存在数字世界中,建成一座人类文明的数字空间博物馆。