Normal view

There are new articles available, click to refresh the page.
Before yesterdayMain stream

Recover files from a sick Mac

By: hoakley
10 March 2026 at 15:30

Gone are the days when you could pop the hard drive out of a sick Mac and connect it to another to recover its contents. This article explains how you may be able to transfer some or all of the contents of a modern Mac’s internal SSD to another Mac.

Any Mac: Thunderbolt

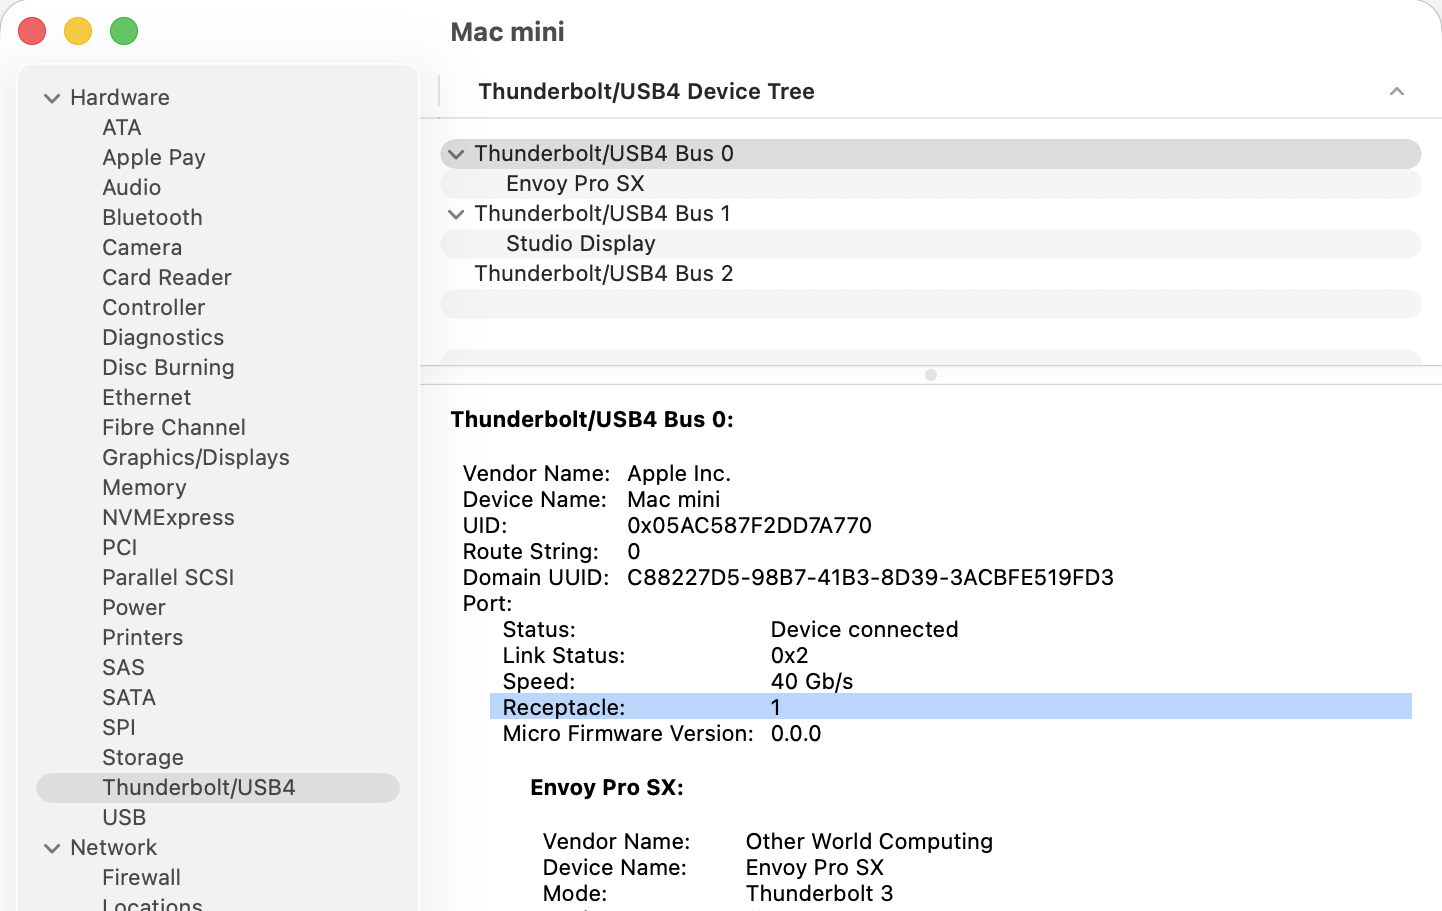
As long as you can get your Mac up and running, the fastest way to transfer files from its internal storage is back-to-back Thunderbolt networking, easily set up in Network settings. All you need is another Mac with a free Thunderbolt port and a suitable cable to connect them directly.

Apple silicon: Share Disk

If you can get an Apple silicon Mac to start up in Recovery mode, or Fallback Recovery, then you’ve got a good chance of salvaging whatever you need from its internal SSD.

Connect it back-to-back with another Mac using a Thunderbolt 4 (or 3) cable. Start the sick Mac up in Recovery, pass through to Options and authenticate as necessary. In the Utilities menu there select the Share Disk command.

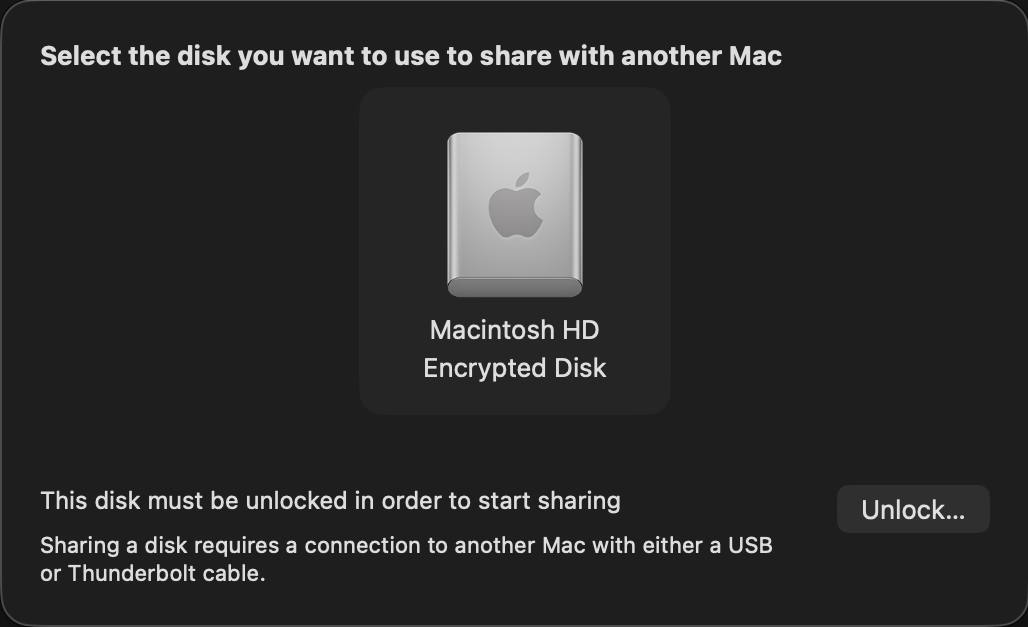
Select the volume you want to share, and when necessary unlock it with the password required for its encryption.

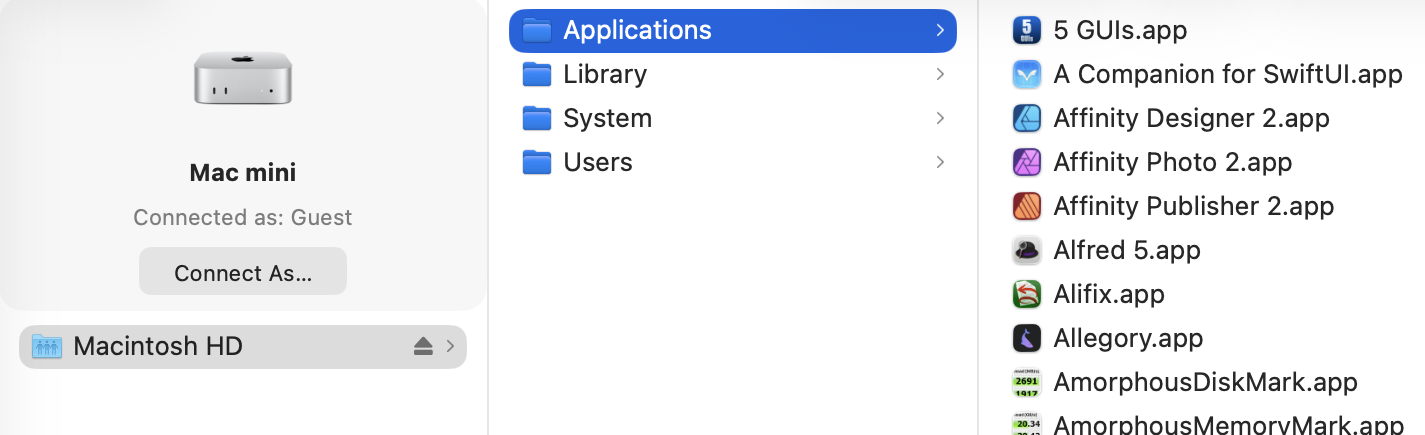
On the other Mac, that shared volume should appear as a networked device, connected as Guest, or on the Desktop. Despite that, you should have full access to its contents. This connection uses SMB, so listing large folders in the Finder will be surprisingly slow.

Now you can copy across all the files you want to your other Mac. That’s impressively quick, and can read them at about 3 GB/s, as you’d expect from a fast locally attached SSD. However, because of the SMB overhead, copying many small files is noticeably slower.

This can also get a bit kludgy when you’ve finished and want to disconnect. Trying to eject the shared volume may not work, and even when you stop sharing on the Mac in Recovery, and disconnect the cable, you may find the other Mac just won’t let go of it.

This only works with a single volume at a time. If you have added volumes to your Mac’s internal SSD, then you’ll have to repeat the process to access files on a different volume. But it does allow you to choose which volume to share.

Apple silicon: DFU mode

If you’re unable to put your sick Mac into Recovery, or Fallback Recovery, it’s still possible it has entered DFU mode, or could do so when started up to engage that mode. This is explored in more detail in this article, but doesn’t give you access to the contents of the Mac’s internal storage. You could try reviving it rather than performing a full Restore, though, as that isn’t destructive of its contents.

Intel T2: Target Disk

There are now two ways to enter Target Disk Mode on an Intel Mac with a T2 chip: if the Mac is already up and running (and not near-dead at all), you can opt for this in System Settings > General > Startup Disk, although I’m not sure why you would want to. If the Target really is sick, the only way you’re likely to engage this mode is to hold the T key during startup until the Thunderbolt symbol appears on its display.

The Target and Host must now be connected using a Thunderbolt 3 or 4 cable, although between Macs that are both running Catalina or earlier, a USB or USB-C cable could be used instead.

Shortly after they’re connected and ready, the Target’s internal Data volume should mount in the Host’s Finder. You should then be prompted for its FileVault password, and gain access to its contents. As with Apple silicon Macs, you can also copy files from the Host to the Target. To disconnect the Host and Target, eject the Target’s volume from the Host, then press and hold the Power button on the Target to shut it down.

Note that Target Disk Mode doesn’t offer a choice of volume.

Any Mac: External Boot Disk

If an Intel Mac with a T2 chip already has its boot security set (using Startup Security Utility) to allow it boot from an external disk, you may be able to get that to work, then mount the internal SSD to allow you to recover its contents to that or another external disk.

This is unlikely to work with an Apple silicon Mac, though, as it must always start the boot process from its internal SSD before it can continue booting from a system installed on an external bootable disk.

Summary

  • Cable: Thunderbolt 4 (or 3) connecting the two Macs back-to-back.
  • Apple silicon Mac: Recovery mode, Utilities menu, Share Disk.
  • Intel T2 Mac: T key held during startup.
  • Eject the Target’s disk on completion.
  • Apple silicon Mac: disconnect button, then shut down.
  • Intel T2 Mac: hold the Power button to shut down.

Explainer: Mac firmware version numbering

By: hoakley
7 March 2026 at 16:00

Firmware engineering must be among the least glamorous of the specialities, but it’s literally among the most fundamental. As regular users seldom need to come into contact with firmware and its versions, how those are numbered is kept as a dark secret. This article reveals what I have gathered.

Although you will come across different usage elsewhere, I here draw the distinction between:

  • True ROM, including Macintosh ROM (Classic Macs) and Apple silicon Boot ROM, is set in the factory and normally can’t be changed;
  • Firmware that can be updated in place includes Mac OS ROM (PowerPC), EFI Boot ROM or bootloader, and LLB/iBoot (Apple silicon);
  • The operating system including any kernel, in Mac OS, Mac OS X, OS X and macOS, which are usually updated repeatedly.

PowerPC: Open Firmware

Classic Macs using Motorola 68K processors have their own Macintosh ROM with opaque hexadecimal versions. After the introduction of PowerPC models in 1994, that changed with the Power Macintosh 9500 of 1995 to support Apple’s version of Open Firmware.

firmware2002

Their ROM and firmware version numbering is elaborate, with a ROM revision, here shown as $77D.45F6, a Boot ROM version of $0004.25f1, and a Mac OS ROM file version of 8.4, for this Power Mac G4 running Mac OS 9.2.1 in 2002. Of those, Mac OS ROM file updates were provided as needed, and appear to have followed a plain major and minor numbering system.

Intel: EFI

When Apple transitioned from PowerPC to the Intel architecture in 2006, Open Firmware was replaced by the Extensible Firmware Interface (EFI), already on its way to become Unified as UEFI. Each Intel model thus has an EFI version number, from 1.0 upwards, and a firmware version number such as IM41.0055.B08, that of the early 2006 iMac.

firmware2017

Back in late 2017, this iMac17,1 was reported as running Boot ROM version IM171.0105.B26.

This consists of the following elements:

  1. A model type given as 2-3 letters, such as IM for iMac, MM for Mac mini, MBP for MacBook Pro, or XS for Xserve.
  2. An individual model within that type given as 2-3 decimal digits, here 41 for the two iMac variants introduced in early 2006, while the mid-2006 iMac is 42, and the late-2006 iMac is 51 or 52. Those are commonly combined in a more accessible model identifier, such as iMac4,1 or iMac17,1.
  3. A major version number given as four hexadecimal digits.
  4. A minor version number given as three hexadecimal digits. With High Sierra, Apple ceased using the minor version number, leaving it set to either B00 or 00B.

Just for fun, many models also have a completely different SMC firmware version that was updated separately.

These were replaced in October 2018, in Macs that have been updated to macOS 10.14.1, High Sierra Security Update 2018-002, or Sierra 2018-005. Those updated EFI firmware to use a different version numbering system, with five decimal numbers separated by dots, such as 1037.140.50.0.0. Those differ between individual model types, making conversion from firmware version to model identifier impossible. The only way to determine whether any given firmware version is the most recent for a given model is thus to use a lookup table.

Intel: T2

Apple introduced the first MacBook Pro models with T1 chips in 2016-2017, but it wasn’t until the T2 models at the end of 2017 that there was any change in the format of firmware version numbers. Therefore MacBook Pro models with T1 chips continue to report just a plain EFI firmware version.

Intel Macs with T2 chips report two complete firmware versions, that for their Intel side as an EFI firmware version, and an iBridge or BridgeOS version for the firmware installed in the T2 chip. For example, 1037.147.1.0.0 (iBridge: 17.16.16065.0.0,0) gives 1037.147.1.0.0 as its new-style EFI firmware, and 17.16.16065.0.0,0 as that for the T2. However, in return for that added complexity, all Intel Macs with T2 chips give the same firmware versions when running the same version of macOS, so there’s no need for a model-based lookup table.

At this stage, Intel Macs can have one of three firmware versions:

  • old-style EFI firmware, such as IM171.0105.B26, when they haven’t had a firmware update from October 2018 or later;
  • new-style EFI firmware, such as 1037.140.50.0.0, when their firmware dates from October 2018 or later, and they don’t have a T2 chip;
  • T2 models with EFI and iBridge firmware, such as 1037.147.1.0.0 (iBridge: 17.16.16065.0.0,0).

Apple silicon

Strictly speaking, Apple silicon Macs have two distinct firmware version numbers, one for the Low-Level Bootloader (LLB, stage one) and the other for iBoot (stage two), but I can’t recall ever seeing the two differ in any release version of macOS. Both bring the sanity of a standard numbering system consisting of three numbers [major].[minor].[patch], and so far all models have remained in synchrony with the same numbers for each release of macOS since Big Sur 11.

Version numbers are composed of:

  1. A major version number of 4-5 decimal digits set by the current major macOS. These have been 67xx (macOS 11), 74xx (12), 84xx (13), 10151 (14), 11881 (15), and for macOS 26 it’s currently 13822.
  2. A minor version number in decimal that increments for each minor version of macOS. Although this varies between major versions, a recent sequence might run: 1 (macOS x.0), 41 (x.1), 61 (x.2), 81 (x.3), 101 (x.4), 121 (x.5) and 141 (x.6, if it precedes the next major version of macOS).
  3. A patch version number in decimal that usually varies from 1-10, and has even reached 96.

For example, 13822.81.10 is installed in macOS 26.3, 15.7.4 and 14.8.4, which were released simultaneously.

Most recently, version numbers reported by beta-test releases of 26.4 have been completely different, of the form mBoot-18000.100.10.0.1. It’s not yet known whether this is a bug, or the harbinger of yet another change in firmware version numbering.

What firmware engineers might lack in glamour they seem to compensate for by turning what should be simple and consistent into great complexity.

Further reading

A brief history of Mac firmware
Pre-2018 Intel firmware version numbering

Firmware updates for macOS Tahoe, Sequoia and Sonoma

By: hoakley
18 February 2026 at 15:30

Of all the important features of Macs, firmware must be among the dullest, although it’s also one of the Mac’s major benefits. Because Mac hardware, firmware, and its operating system are all made by Apple, the firmware in our Macs should always remain secure, robust and up to date.

That wasn’t always the case, though. Older Intel Macs could be difficult and sometimes impossible to update their firmware. Some particular configurations were notorious, and most became unreliable if you replaced their internal storage. After a long campaign with tools like eficheck, switching first to T2 then Apple silicon chips has proved decisive. With firmware updates distributed in and installed by macOS updates and upgrades, it’s almost unheard of now for a recent model to be running out of date firmware, unless it’s also running out of date macOS.

This has been important for system stability, where flaws in firmware can turn the most stable Mac into a series of kernel panics and crashes, and essential for security. All the user has to do to secure their Mac’s firmware is to keep macOS up to date. Vulnerabilities in PC firmware are relatively frequent and notoriously hard to address.

Now that support for Intel Macs is waning, and there are only a couple of iMac variants lacking T2 chips that are still fully supported, keeping track of firmware updates is far simpler. Last week’s release of macOS updates brought firmware updates all round, for the iMac19,1 and iMac19,2, as well as T2 and Apple silicon models.

The iMac19,1 and iMac19,2 (4K and 5K 2019) have firmware updates to take them from 2075.100.3.0.3 to 2094.80.5.0.0, the same EFI version found in T2 models. That’s the first update for them since last Spring (March).

Intel models with T2 chips have the same EFI version update to 2094.80.5.0.0, as well as their iBridge firmware, which changes from 23.16.12048.0.0,0 to 23.16.13120.0.0,0.

Currently all Apple silicon Macs from the first base M1 to those with the latest M4 and M5 chips, run common firmware, and that too has been updated from 13822.61.10 to 13822.81.10.

Version numbering of iBoot in Apple silicon Macs seems to have stabilised, with

  • A major version number set by the current major macOS. For macOS 14 that was 10151, for macOS 15 it was 11881, and for macOS 26 it’s currently 13822.
  • A minor version number that increments for each minor version of macOS. This runs in the sequence 1 (macOS x.0), 41 (x.1), 61 (x.2), 81 (x.3), 101 (x.4), 121 (x.5) and 141 (x.6).
  • A patch version number that varies from 1-10, and has once reached 96.

The iBoot update released with security updates to the older two supported versions of macOS should be the same as that for the current version. Thus, the next iBoot update should bring its version number to 13822.101.x, in macOS 26.4, 15.7.5 and 14.8.5. We’ll see how close that gets.

I maintain separate lists of current firmware versions for all three supported versions of macOS:

Apple silicon Macs have 2 types of Thunderbolt ports

By: hoakley
6 February 2026 at 15:30

If you have an Apple silicon Mac, take a look at its Thunderbolt ports and you’ll see that, other than being marked with the Thunderbolt lightning symbol, they all look identical. In fact they’re not: one of them is different from the others, although nothing in or on your Mac will tell you that. One of them is the DFU port, and works differently.

Why two types?

Apple designed these new Macs to provide two important features that depend on how their Thunderbolt ports work:

  • the ability to start up in a special Boot ROM mode to allow them to connect to another Mac and have the entire contents of their internal SSD replaced, giving them a new set of firmware and setting them back to factory condition in a Restore process;
  • the ability to start up from a bootable external disk while remaining in Full Security mode.

Neither of those is available in Intel Macs with T2 chips.

Because starting up using the Boot ROM alone can only support a plain USB-C and not Thunderbolt connection, that Device Firmware Update or DFU mode uses a Thunderbolt port that also supports DFU. However, as a result that port isn’t able to operate fully with a bootable external disk. Hence, every Apple silicon Mac has one Thunderbolt port designated as its DFU port. That’s used to connect it to another Mac when in DFU mode, but can’t be used to install or update macOS on a bootable external disk.

Apple hasn’t explained how the DFU port is different. My speculation is that the Boot ROM directly runs a simple protocol over USB-C for compactness of code, and to ensure it’s less prone to hacking using malicious devices such as those available for Thunderbolt. In contrast, secure protocols using LocalPolicy to enable starting up from an external system could rely on features that are intentionally blocked for DFU mode. The end result is that, while the DFU port works fine in all other respects, and has full USB4 and Thunderbolt 4/5 support, it can’t be used to make an external disk bootable, nor to update macOS on an external disk that’s already bootable.

Identification

The DFU port appears identical to other USB-C ports and has no marking.

System Information and other utilities in macOS don’t provide any information about DFU ports.

The Mac User Guide provided in the Tips app describes the ports on different Macs without making any mention of the DFU port. It contains no relevant information about creating a bootable external disk (except as a bootable installer), or the use of DFU mode.

Apple has published a support note aiming to identify DFU ports on both Apple silicon and T2 Macs, its current version dating from 4 November 2025. However, the information given in that may not be correct, at least for the MacBook Pro 16-inch 2024. According to Apple, the DFU port on a MacBook Pro 16-inch is “the USB-C port furthest to the left when you’re facing the left-hand side of the Mac”. However, Jeff Johnson has reported the DFU Port on his MacBook Pro M4 Pro 16-inch 2024 appears to be on the right side of its case, not the left.

The original version of that support note appears to have been published on 9 December 2024, four years after the release of the first Apple silicon Macs, and almost seven years after the first Intel Macs with T2 chips. When I discovered it in January 2025, I found it internally inconsistent, “for instance, it shows the DFU port as being that on the left of the left side of a MacBook Pro, but states in the text that on a MacBook Pro 14-inch 2024 with an M4 chip, the DFU port is that on the right of the left side instead.” It has since been updated.

There may be an empirical method of discovering the DFU port using System Information, though. This has been tested on at least a dozen different Apple silicon Macs and has held good so far. In the Hardware section, select the Thunderbolt/USB4 item to list each of its buses. In that list at the top, select Bus 0, and below that you should see its details, including those of the Port, where there will be a Receptacle number, starting from 1. As far as I can tell, Receptacle 1 is normally that for the DFU port.

Having identified which of the buses feeds Receptacle 1, the remaining task is to correlate that with the physical port on your Mac. If you already have a device connected to Receptacle 1, you can identify that from the details given below. On my Mac mini, its backup SSD is connected to Receptacle 1, making it simple to see on the case which is the DFU port.

Use

When connecting an Apple silicon Mac in DFU mode using a USB-C cable, that must be connected to the DFU port on that Mac. If a different port is used, the connection is almost certain to fail.

When connecting an external boot disk to an Apple silicon Mac, for that to work fully as expected, it must be connected to a port other than the DFU port. Although the Mac can still boot from an external disk connected to the DFU port, that can’t be used when installing or updating macOS on the external disk, including when creating it, or in other procedures where LocalPolicy for that disk may need to be created or changed.

Intel Macs with T2 chips

DFU ports aren’t unique to Apple silicon Macs, and are also designated for Intel models with T2 chips. However, their impact is then more limited:

  • DFU mode is used more rarely, and only to restore current firmware, rather than perform the full restore process available on Apple silicon Macs;
  • external bootable disks don’t rely on LocalPolicy, and are installed and used differently as a result.

Recommendations

  • Discover which of your Apple silicon Mac’s Thunderbolt ports is its DFU port.
  • Use that port to connect it in DFU mode.
  • Use any other port when creating a bootable external disk, installing or updating macOS on it, or performing any operation that might create or change LocalPolicy. When possible, it’s simplest to avoid connecting the disk to the DFU port.
  • Apple should check and correct, as necessary, information on the DFU port on the MacBook Pro M4 Pro 16-inch 2024.
  • System Information should explicitly identify the DFU port on all Apple silicon Macs.
  • Future Macs should identify the DFU port on their case.

Is your Mac dead, in DFU mode, or alive?

By: hoakley
4 February 2026 at 15:30

You pressed the Power button on your Mac, and nothing happened. It didn’t show signs of starting up, so is it dead, or just pretending? The distinction might seem obvious until you consider DFU mode.

Power reaching the Mac, no sign of life

Simple mains/AC power problems have caught many out: if your Mac isn’t showing any signs of life when it should, ensure that power is reaching it in the first place. Never put yourself at any risk of coming into contact with any live cable, though. Good checks are to verify that the mains socket/receptacle delivers power correctly to another system, and that the Mac’s power cable also does its job. If you’re in any doubt about the electrical safety of either, stop immediately, make everything safe, and obtain professional advice.

If you’re confident that power is going into your Mac, the next and more difficult question is whether the Mac’s hardware is dead, or it has entered DFU mode. DFU mode is the fallback for all Apple silicon Macs that encounter a problem early in the boot process, whether it’s in ROM or later stages before the kernel starts. This also applies to Intel T2 Macs that encounter problems when loading iBridge firmware for their T2 chip, as explained below.

Is it in DFU mode?

Most Apple silicon Macs and T2 models that have entered DFU mode show no obvious signs of life. This is even true of MacBook Pro models with MagSafe 3 power cables: in DFU mode, their LED doesn’t light up. Neither will a notebook keyboard light, nor is there normally any indication that a built-in display has power. Built-in trackpads also feel dead.

Notable exceptions to this are:

  • Mac Studio and Mac mini, whose power status indicator light should display amber;
  • Mac Pro, whose status indicator light should display amber and may flash.

For all models, once they have connected successfully to a second Mac in DFU mode, you should see the Apple logo and a progress bar on any connected display during IPSW download.

For the Mac Pro, the status indicator light will flash amber in different patterns as a result of memory, PCIe card and other faults. Apple explains those separately for the Mac Pro 2019 and Mac Pro 2023.

DFU mode is detailed by Apple in this support note.

Spontaneously entering DFU mode should be a very rare event, but in most cases the only way to determine whether it has happened is to connect the Mac using an appropriate USB cable to another Mac running recent macOS, which should then connect to the Mac that’s in DFU mode. If that’s suspected, try a firmware Refresh in the first instance to see if that occurs, as that’s non-destructive of the internal SSD’s contents.

Connecting the Macs requires attention to detail. The cable used should be capable of transferring data via USB-C but not Thunderbolt. This is a limitation imposed by DFU mode, and must be observed if the Macs are to connect. That should be connected to the DFU port on the dead Mac, one of its USB-C+Thunderbolt ports. Apple lists those here, and they’re given in MacTracker.

If you aren’t sure, or can’t connect a suitable Mac, it may be best to assume that it’s in DFU mode, and shut it down with a 10 second press of the Power button. On a laptop, DFU mode should use very little power, as there’s normally only one CPU core running and little else. However, as that Mac can’t be charged in DFU mode, this could eventually lead to discharge of the battery.

Not in DFU mode

If there are no signs of life and the Mac isn’t in DFU mode, then it has most probably suffered a fatal hardware failure, and needs the attention of an authorised Apple service provider. If it shows no signs of life in response to a normal press of the Power button, then it’s extremely unlikely to start up in Recovery mode to let you run Diagnostics there.

Signs of life

If the Mac shows signs of life, the next question is how far it proceeds with the boot process:

  • It doesn’t reach the login window
    • because it freezes and fails to make any further progress, perhaps displaying the Apple logo and progress bar, but no further;
    • because it enters a boot loop, in which a kernel panic occurs during boot, forcing the Mac to restart, or to shut down, only to repeat the same sequence.
  • It reaches the login window, but sticks there.
  • The login window allows user selection and password entry, but refuses any further progress.
  • Login is successful, but the Mac freezes or reboots shortly afterwards.
  • Login is successful, and problems occur later.

That determines whether you can get it to start up in Recovery mode, and gain access to the tools it provides.

Boot processes

BootProcess

Once a T2 Mac has performed its Power-On Self-Test (POST) and initialised the SMC, the T2 sub-system establishes the level of Secure Boot in force, and, if that’s Full or Medium Security, boot.efi is checked before being loaded, and that leads through to the rest of the boot process. Apple provides a key to the different screens that can appear during these stages.

Boot security in Apple silicon Macs aims to provide a verified chain of trust through each step in the boot process to the loading of macOS, that can’t be exploited by malicious components. Booting an M-series Mac thus starts with the immutable Boot ROM in the hardware, whose most important task is to verify the executable for the next stage, then load and run it. If that isn’t possible, then the fallback is to go into DFU mode and await a connection over USB.

SecureBootM1v2fw

In the event of early boot failure, the only recourse seems to be to abandon the process, and leave the Mac in DFU mode, although Macs running Tahoe could now enter Recovery Assistant to try to fix the problem.

Should you restart or cold boot?

By: hoakley
27 January 2026 at 15:30

There are two ways to restart a Mac that’s already running: you can either use the Apple menu command Restart (or an equivalent in Terminal), or you can shut it down, leave it a few seconds, and start it up afresh in what’s known as a cold boot. This article examines whether there’s any difference, and which you should prefer.

Differences

When a desktop Mac starts up from cold, its power supply starts providing power to its internal components, and when the boot process starts they are all initialised from their power-off state. There’s one small exception to that in the internal clock, possibly part of the Always On Processor (AOP) in Apple silicon Macs.

It’s commonly held that a regular (or warm) restart doesn’t interrupt the power supplied to internal components, as Intel Macs may not undergo power-on self-testing (POST) when only restarted. That doesn’t appear to be correct, though, as it’s easily demonstrated that Intel Macs with T2 chips do undertake a POST during a restart. Apple silicon Macs don’t appear to perform a similar form of POST. Neither does there appear to be any difference for peripherals, which are shut down before being started up again whether the Mac is booted warm or cold.

It’s also most unusual to attempt a true cold boot, particularly in a laptop. To remove all power from a desktop Mac requires it to be disconnected from its mains power supply, and for a laptop the internal battery also needs to be isolated or removed, something only performed during service by a technician.

What is clear is that the period during which power is turned off is very different: during a warm restart that’s only a second or two.

Received wisdom is that this allows data to be retained in memory through a warm restart, but that it’s wiped clean after a cold boot. This was first documented by Alex Halderman and others, who used it to perform ‘cold boot’ attacks to recover encryption keys. They demonstrated that RAM contents were still recoverable many seconds after shutting down, and could be used to recover encryption keys and other critically secure data. A great deal has changed since that research was undertaken. As far as the protection of secrets is concerned, all modern Macs have secure enclaves and use Extended Anti-Replay Technology (xART) to prevent that.

It’s thus plausible that there could be some differences in hardware between a restart and a cold boot, but careful comparison of log entries during booting from a Mac’s internal SSD fails to reveal any significant differences there.

How long to wait?

There appears to be no useful evidence for recent and current Macs to determine how long you should wait between shutdown and a cold boot. Periods given range widely, from a few seconds to a minute or more.

Experience

There are many reports of cold boots resolving problems that weren’t affected by a warm restart, but those are generally if not exclusively for Intel Macs, and most usually those without T2 chips.

I have only once experienced a problem in an Apple silicon Mac that required a cold boot, and that occurred a couple of years ago with a dual-boot setup that wouldn’t restart into its primary macOS on its internal SSD, but would do so when started up with a cold boot.

Cold booting is sometimes recommended following more severe problems, such as a freeze or kernel panic. As the normal way to recover from a frozen Mac is to force shutdown using the Power button, there is no option other than a cold boot. Kernel panics should normally result in an automatic restart, the behaviour that demonstrates that a panic took place, and only after that restart is the panic confirmed in an alert, from where the panic log can be accessed. There is no option to perform a cold boot until after the restart. Apple silicon Macs are almost invariably cold booted into Recovery or Safe mode, as those require a long hold of the Power button.

Thus the choice between a restart and a cold boot is usually determined by the problem that has occurred.

Summary

  • Perform a cold boot by shutting down, waiting at least ten seconds, then starting up again.
  • A cold boot may sometimes be more effective at fixing problems than a restart.
  • If you have tried restarting your Mac to address a problem and that didn’t help, try a cold boot.
  • Cold booting may be more effective at addressing problems with external boot disks, or possibly with other peripherals.
  • We don’t fully understand why a cold boot might differ in effect from a restart, but it could.
  • There is no evidence that a Mac should always, or usually, be cold-booted rather than restarted.

❌
❌