Normal view

There are new articles available, click to refresh the page.
Before yesterdayMain stream

How to make and roll back to a snapshot

By: hoakley
7 May 2026 at 14:30

There are often times when a laptop Mac has to be separated from its backup storage. This article explains how you can use local snapshots to cover those, and roll back to a snapshot in the event of a problem.

Snapshots are one of the most valuable features new to APFS. In the days of HFS+, Time Machine offered something similar that required around 10,000 lines of code, and still wasn’t as good as a real snapshot. Although they’re no substitute for a proper backup on a separate disk, snapshots can get you out of a hole when nothing else will.

A snapshot is simply a copy of the file system for a single volume at a moment in time. The file system data itself is relatively small, but to ensure your Mac can roll back to that, it has to retain changed and deleted storage from that moment on, and that makes increasing demands on space. So you only want to keep snapshots for the shortest time necessary, or they can quickly consume tens and even hundreds of GB.

If you want to restore just part of a snapshot, you can mount it as a volume in the Finder and copy the folders and files you need from there, as if it was a backup. This article considers how you can address a bigger problem, where your best choice is to return the whole of your Mac’s Data volume to how it was when a snapshot was made.

Make a snapshot

The essential ingredient is, of course, a snapshot. If your laptop Mac is already making Time Machine backups, when its backup storage isn’t available it should continue making snapshots instead of full backups, so you’re covered.

You don’t need to be using Time Machine to make a snapshot of your current Data volume, though. Any Mac will make one when you enter the command in Terminal
tmutil snapshot

Although third-party backup utilities can also make snapshots, you may well find they don’t work with Apple’s rollback feature, and should check with their documentation before relying on them.

Roll back

To roll back your current Data volume to a previous snapshot, first check in Disk Utility that the snapshot you intend to use is still available, if necessary using the command Show APFS Snapshots in its View menu when the Data volume is selected. That will list all those available.

Then shut your Mac down and start it up in Recovery mode, passing through to the main window in Recovery Assistant.
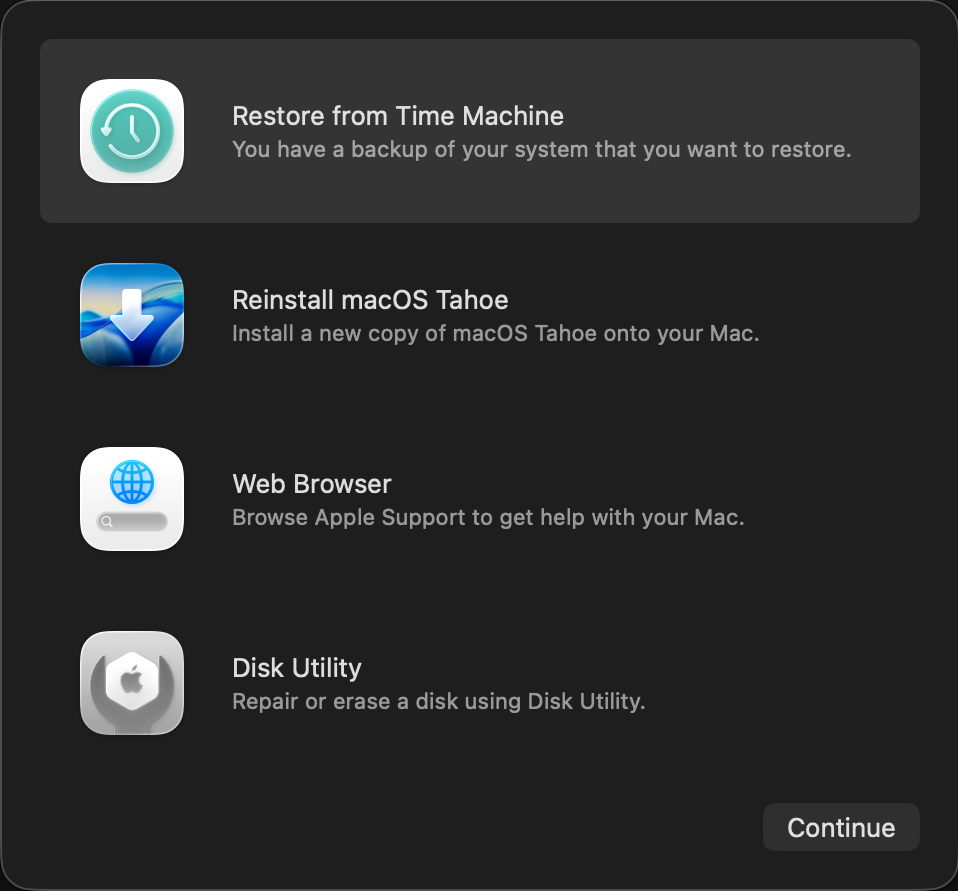
Select the top item to Restore from Time Machine, and click Continue.
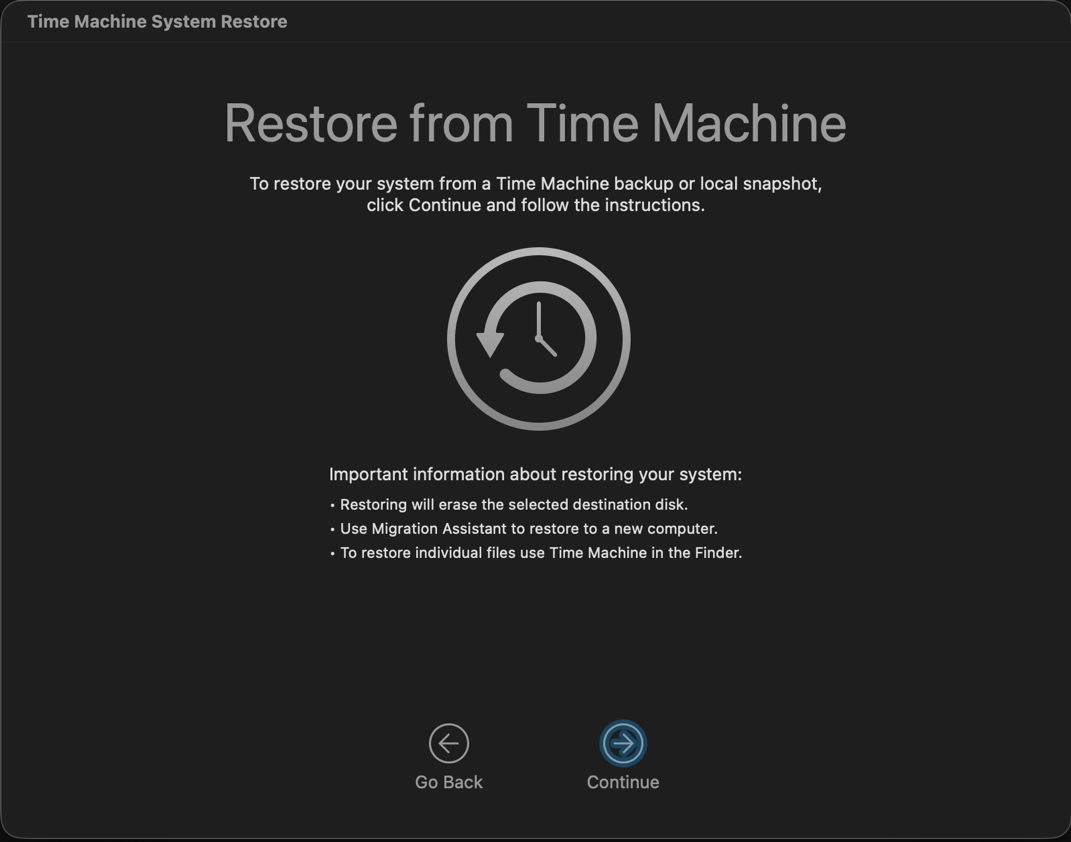
Click Continue to move past its opening window.
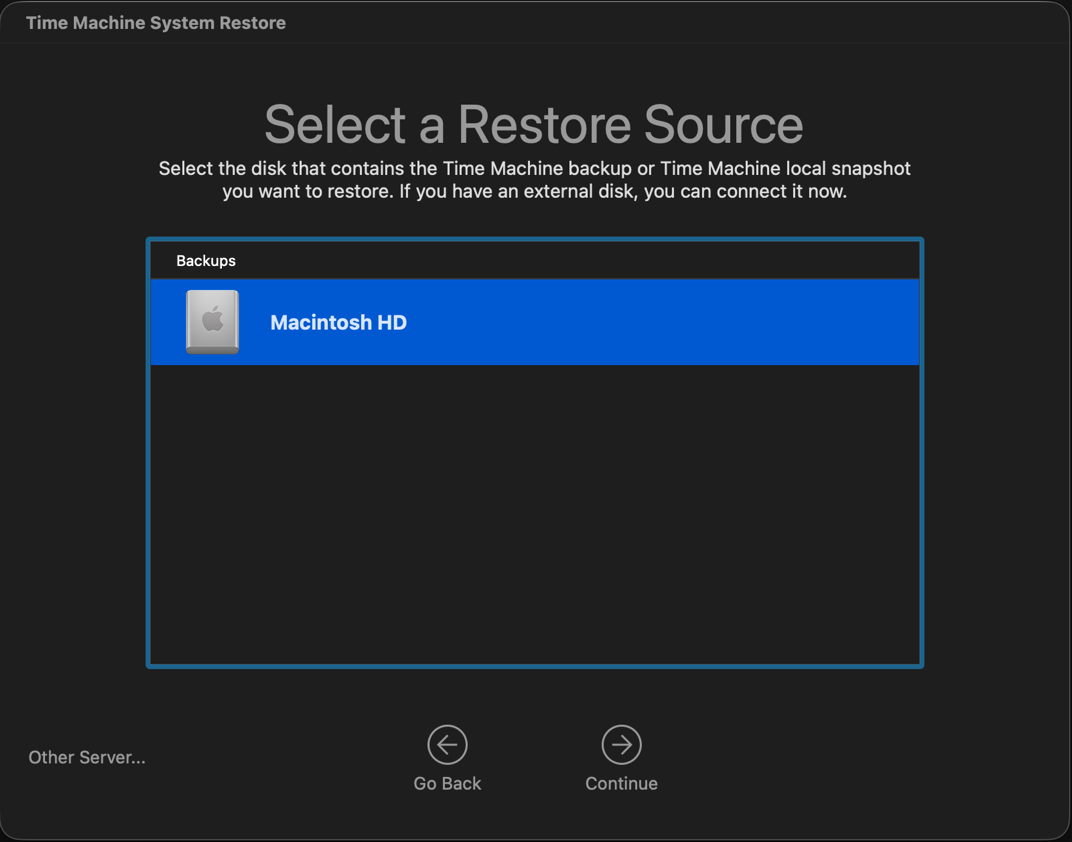
Select the boot volume group here, normally named Macintosh HD, then Continue.
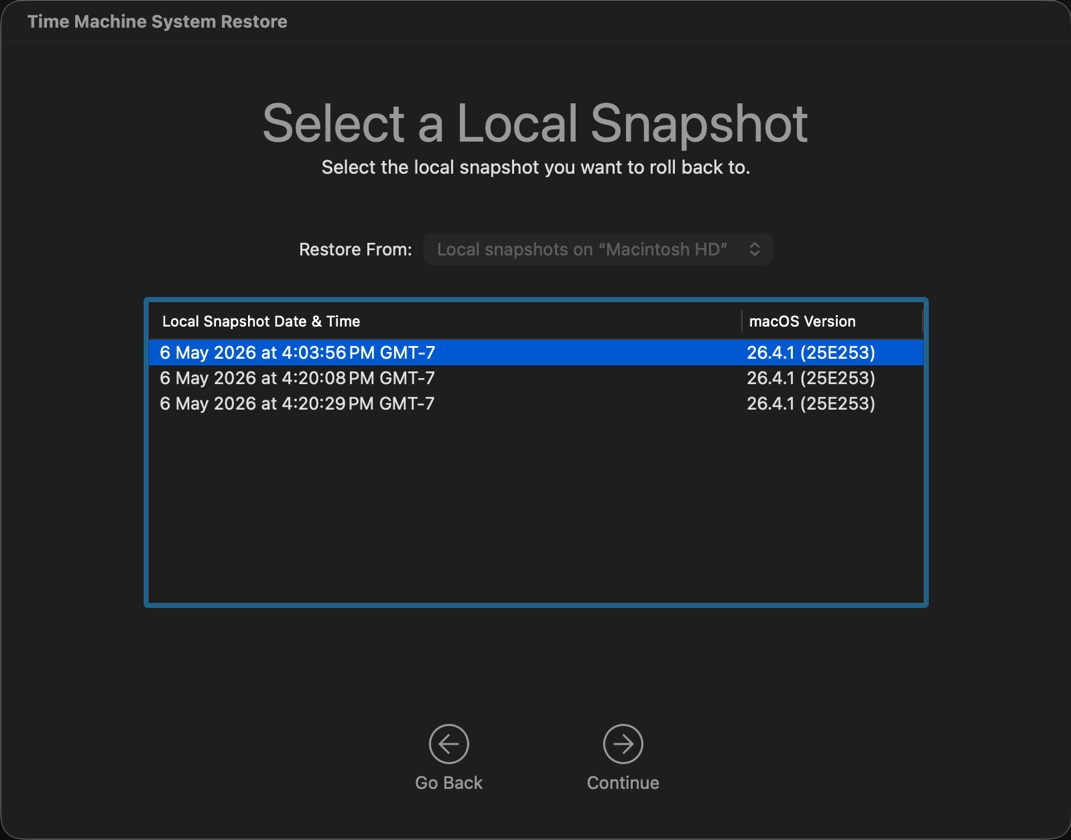
You’ll then be offered the list of available snapshots. If you don’t see any here, then I’m afraid you’re out of luck, and won’t be able to roll back using Time Machine System Restore. Click Continue.
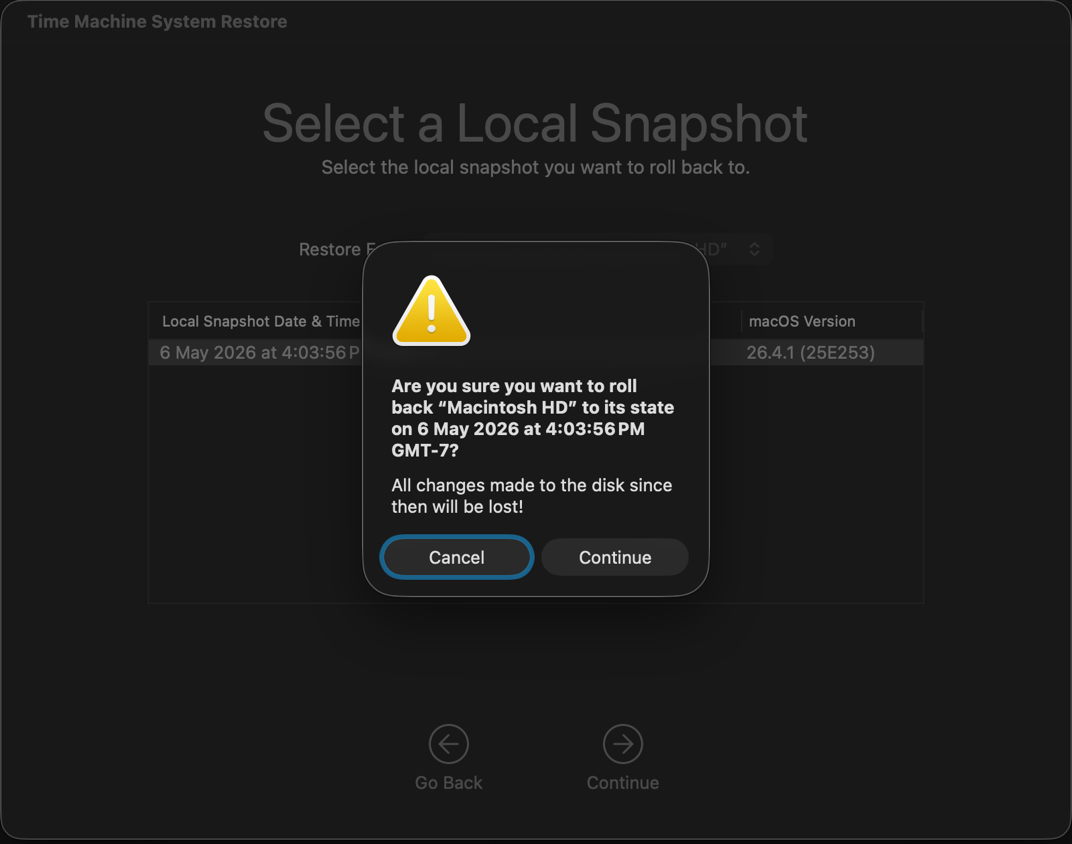
Check in this warning dialog that you’re going to roll back to the correct snapshot, then click Continue.
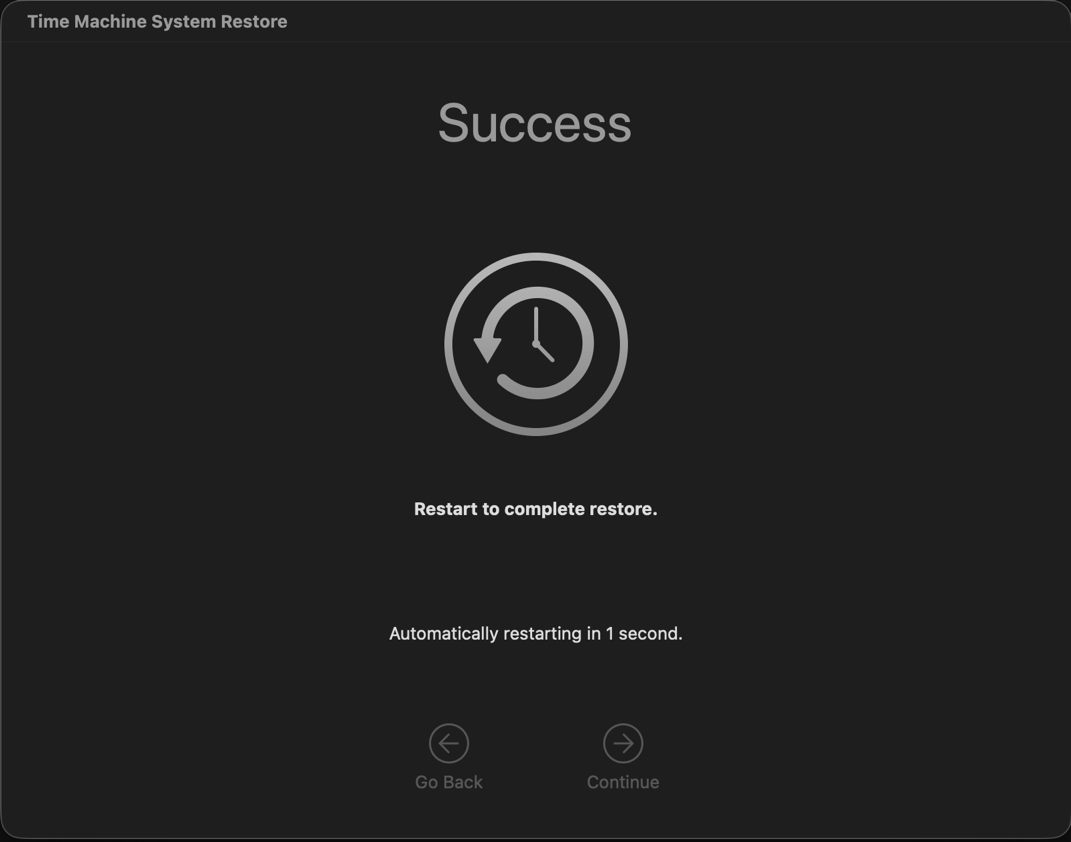
The rollback takes but the twinkling of an eye, following which your Mac will automatically restart back into normal user mode, with the snapshot contents as its Data volume. If you made the snapshot yourself in Terminal, Terminal will still be open, displaying that command, just as it was when you made that snapshot.

The only side-effect to be aware of is that all snapshots made after the one you rolled back to have now vanished, and can’t be retrieved. That’s because you have effectively forked the file system from the moment of the snapshot you have rolled back to, and more recent snapshots can’t fit in with the changes made by the rollback.

Finally, I have heard of commands that are claimed to perform rollbacks, including one for diskutil apfs. I believe those to be bogus. As far as I’m aware, Terminal in Recovery doesn’t offer a command tool to perform snapshot rollbacks, but I’ll be happy to be proved wrong.

Key points

  • Use a Time Machine snapshot, or tmutil snapshot in Terminal.
  • Roll back in Recovery, using Time Machine System Restore.
  • Rolling back is almost instant, but deletes all later snapshots automatically.

Explainer: Recovery

By: hoakley
18 April 2026 at 15:00

For the first decade of Mac OS X there was no Recovery system. The closest equivalent had been booting in Single User Mode, which took the user straight into the command line to check and repair disks, for example. In the summer of 2011, in Mac OS X Lion, Apple introduced the first Recovery partition, complete with Disk Utility and tools to install or reinstall Mac OS X, and restore from a Time Machine backup. This was augmented by Internet Recovery, which connected to an Apple server to download a disk image containing the Recovery system, in case the local Recovery partition was damaged or unavailable.

In March 2017 macOS Sierra 10.12.4 expanded that into three different Recovery modes:

  • local Recovery mode, engaged with Command-R, behaved as before, in providing the version of macOS already running on that Mac, even if a more recent version was available;
  • remote latest Recovery mode, engaged with Command-Option-R, behaved differently according to the version of macOS installed. In 10.12.3 and earlier, reinstalling restored the version that came with that Mac. In 10.12.4 and later, reinstalling upgraded that Mac to the latest version of macOS compatible with it.
  • remote original Recovery mode, engaged with Command-Option-Shift-R, only worked when running macOS 10.12.4 or later, where it reinstalled the version of macOS that shipped with the Mac.

With the arrival of APFS, what had been an HFS+ partition became just another volume inside the same container as the boot volume, and when the latter was divided into conjoined System and Data volumes in macOS Catalina, the Recovery volume was paired with that boot volume group in that container.

BootDiskStructureCatalina

When the first Apple silicon Macs came in 2020, they had a brand new Recovery system, dubbed 1 True Recovery (1TR), run from a hidden container on their internal SSD, and engaged by pressing and holding the Power button. For security, this requires both physical contact with the Mac and a mechanical action.

BootDiskStructureM1

In Big Sur on an Apple silicon Mac, the Apple_APFS_Recovery container was dedicated to providing 1TR, stored in its Recovery volume. This includes a second part of iBoot and all that’s necessary for the M1’s full Recovery mode. In this scheme, there was just one True Recovery system on each M1 Mac, regardless of how many different versions of macOS it might have installed.

If you needed your M1 Mac to enter 1 True Recovery but that failed, there was a second copy of the software required for 1TR “for resiliency”, stored in the Recovery volume paired in the current boot volume group. To boot into that, instead of just holding the Power button until 1TR starts loading, you pressed the Power button twice in rapid succession, and on the second press, instead of releasing the button, hold it pressed until recovery options are reported as loading. What you then got was every bit as good as regular 1TR, with one significant exception: you couldn’t set the system security state using Startup Security Utility.

That new Recovery architecture was fine while Apple silicon Macs could only boot into the one major version of macOS, Big Sur. When Apple released the next, Monterey, it changed Recovery to cope better with those that might have two different boot volume groups installed on their internal storage. That swapped the locations of primary and fallback Recovery.

From Monterey onwards, starting up in primary Recovery using the Power button boots that Mac into the Recovery volume paired with the current boot volume group. Starting up in fallback Recovery using the doubly-pressed Power Button boots that Mac into the fallback Recovery (frOS) installed in the hidden Apple_APFS_Recovery container on the internal SSD. Now any paired Recovery volume can use Startup Security Utility, but it’s not available in fallback Recovery.

BootDiskStructureM1Monty

Since then there has been further economy that allows one paired Recovery volume to act as the primary Recovery system for additional boot volume groups installed within the same container.

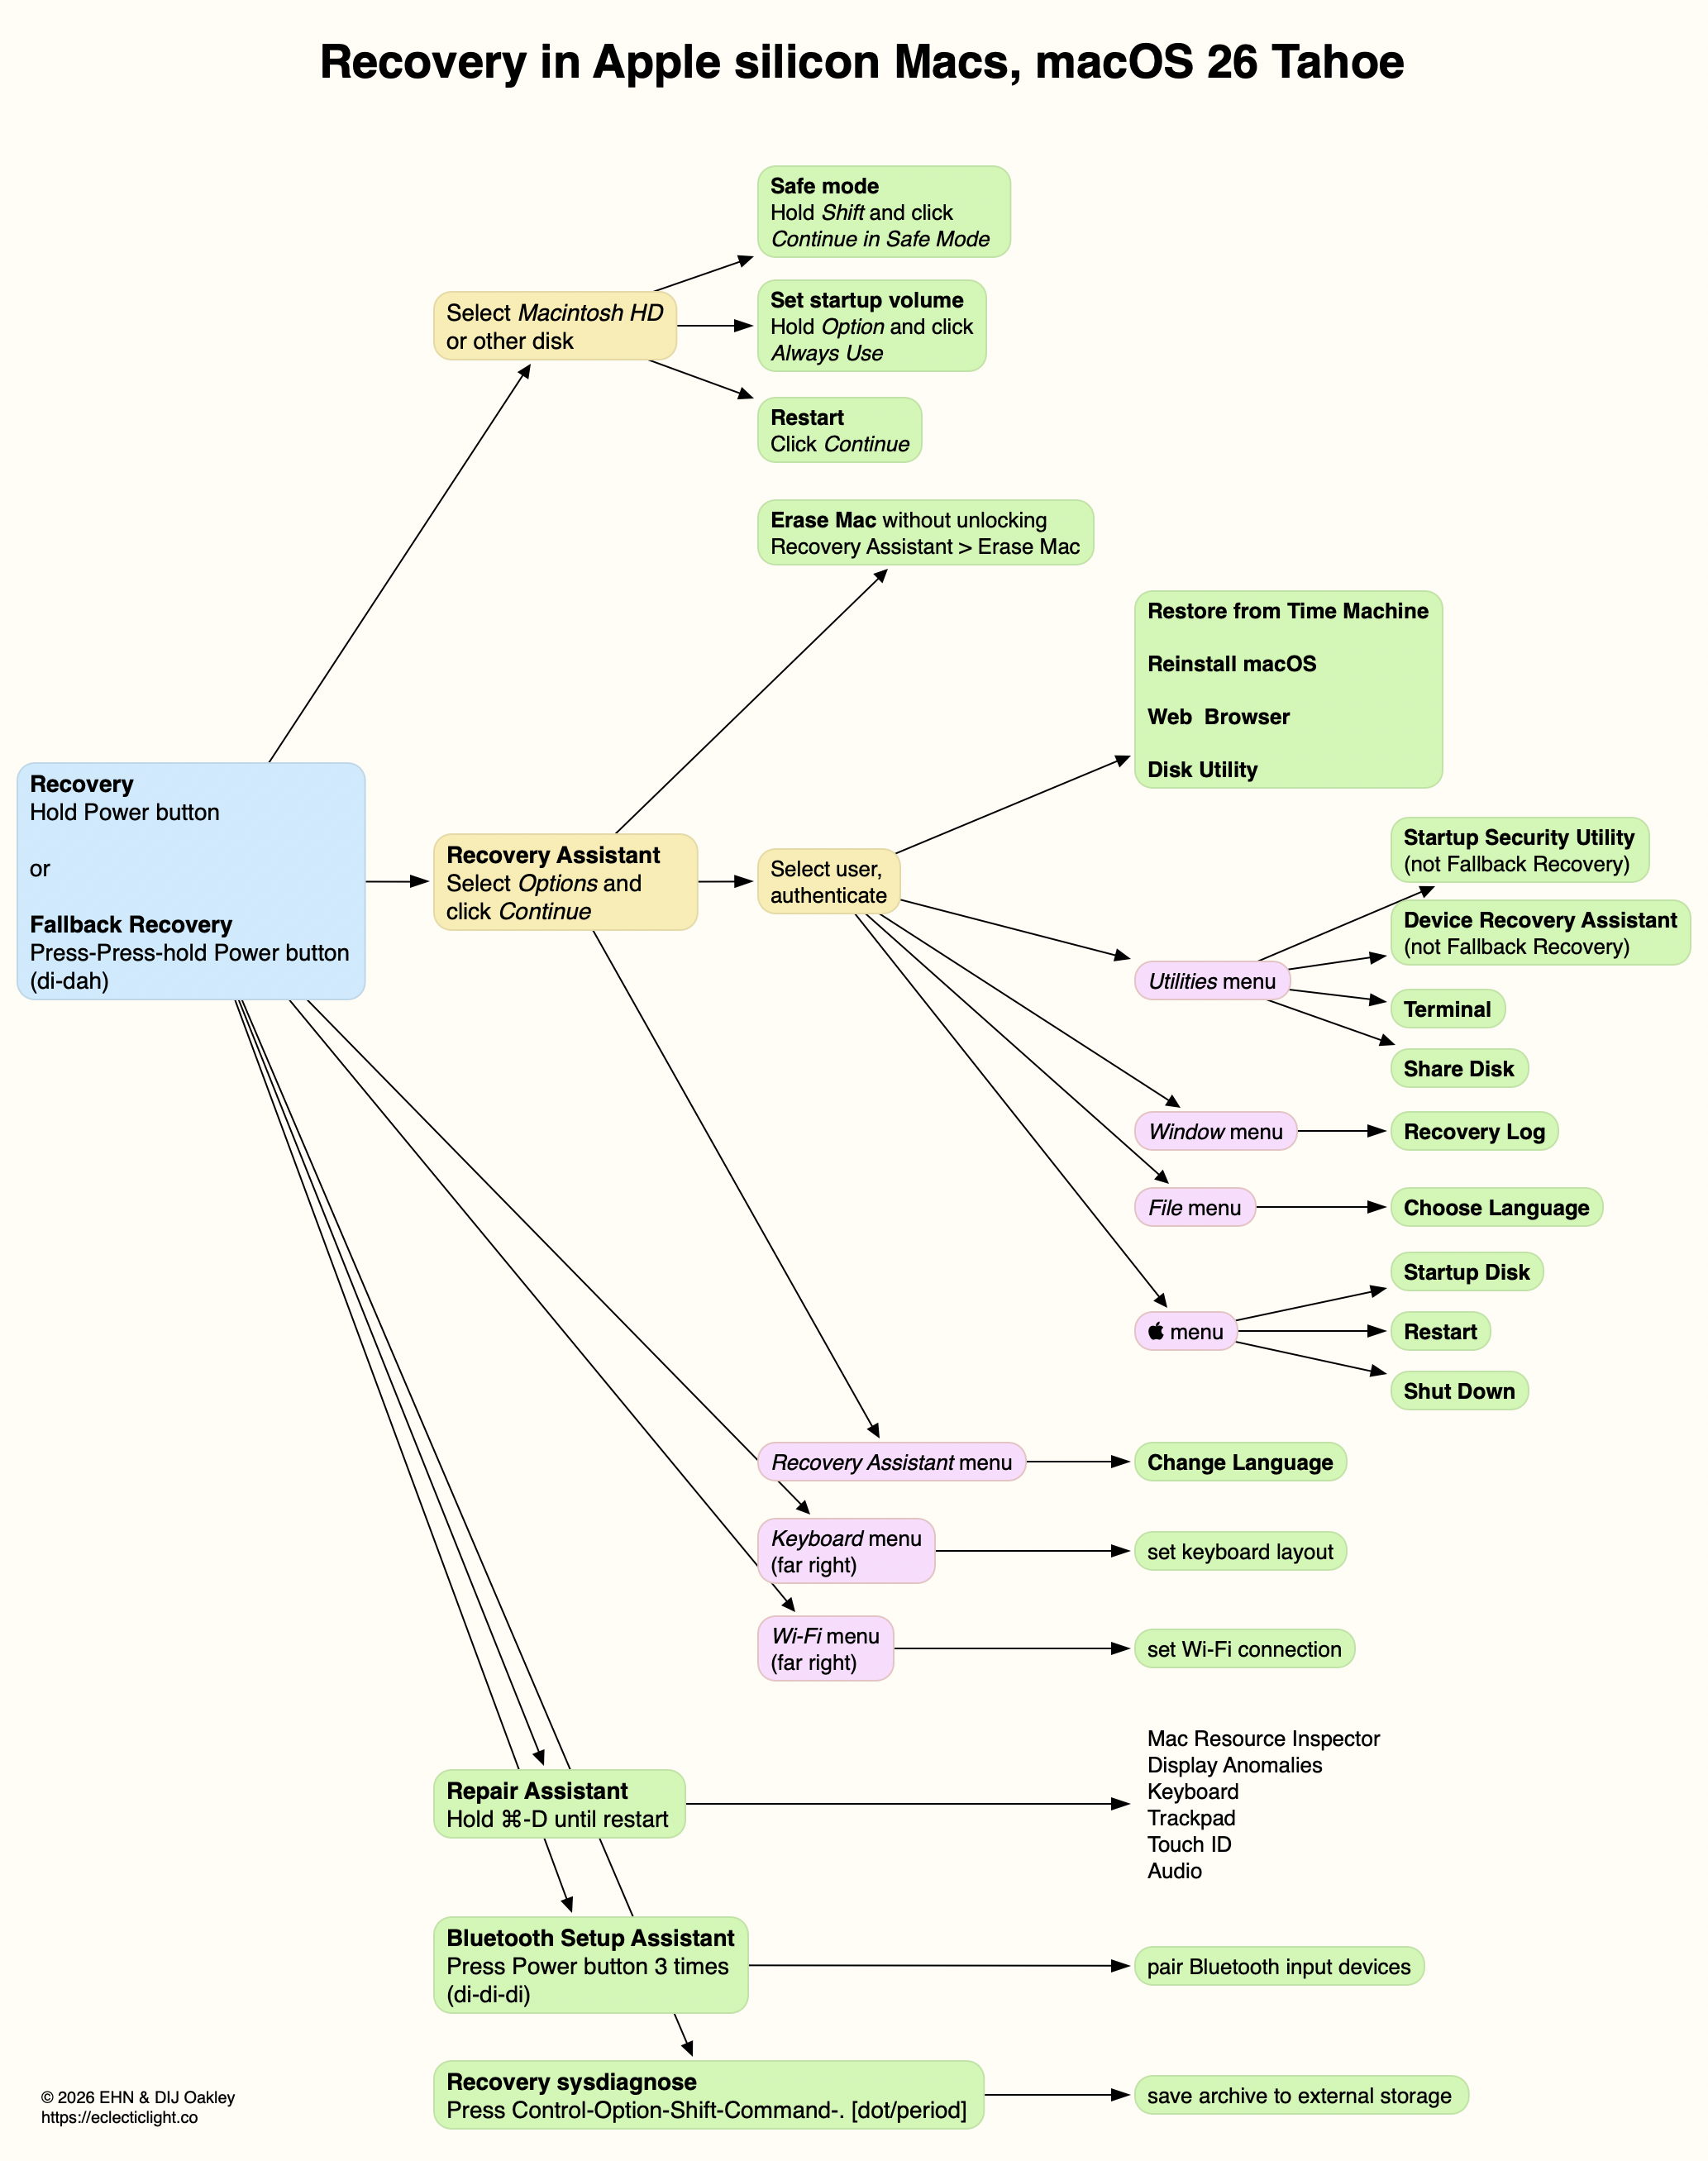
Because the Recovery system is a sealed disk image, users can’t add their own tools to augment it. However, it has become progressively more capable, with the recent addition of Device Recovery Assistant and Repair Assistant. The diagram below gives an overview of its anatomy as of macOS 26.4.

Further details are illustrated in my guide to Recovery on Apple silicon Macs.

How to enter Recovery in recent macOS

Intel Macs
  • local Recovery, Command-R;
  • remote latest Recovery, Command-Option-R, for latest version of macOS compatible with that Mac, over the internet;
  • remote original Recovery, Command-Option-Shift-R, to reinstall the version of macOS that shipped with the Mac, over the internet.
Apple silicon Macs
  • primary (paired) Recovery, press and hold Power button until entering Options;
  • fallback Recovery, short press, press and hold (di-dah) Power button until entering Options.

❌
❌