Reading view
Inside M4 chips: CPU power, energy and mystery
Few comparisons or benchmarks for M-series chips take into account the reason for equipping Apple silicon chips with more than one CPU core type, according to Arm’s big.LITTLE architecture. Measuring single- or multi-core performance ignores the purpose of E cores, and estimating overall power use can’t compare those core types. This article tries to estimate the cost in terms of power and energy of running identical tests on M4 P and E cores, and thereby provide insight into some of the most distinctive features of Apple silicon, and their benefits.
Methods
To run these two in-core performance tests I use a GUI app wrapped around a series of loading tests designed to enable the CPU core to execute that code as fast as possible, and with as few extraneous influences as possible. Both tests used here are written in assembly code, and aren’t intended to be purposeful in any way, nor to represent anything that real-world code might run. Those are:
- 64-bit floating point arithmetic, including an FMADD instruction to multiply and add, and FSUB, FDIV and FADD for subtraction, division and addition;
- 32-bit 4-lane dot-product vector arithmetic (NEON), including FMUL, two FADDP and a FADD instruction;
Source code of the loops is given in the Appendix.
The GUI app sets the number of loops to be performed, and the number of threads to be run. Each set of loops is then put into the same Grand Central Dispatch queue for execution, at a Quality of Service of the maximum of 33. That ensures they are run preferentially on P cores, but will spill over to E cores when no P core is available, when more than 10 threads are run concurrently. Timing of thread execution is performed using Mach Absolute Time, and the time for each thread to be executed is displayed at the end of the tests.
For these tests, the total number of loops to be executed in each thread was set at 5 x 10^8 for floating point, and 3.5 x 10^9 for NEON. Those values were chosen to take 2-3 seconds per thread, to ensure the whole test period was available for analysis.
Immediately before running each test, I launch powermetrics from the command line, to gather core power and performance data in sampling periods of 0.1 second for a total of 50 samples. Its output is piped into a text file, which is then analysed using Numbers and DataGraph. All tests were conducted on a Mac mini M4 Pro with 10 P and 4 E cores, running macOS 15.1.1 in standard power mode.
Each test was inspected individually, and seen to contain the following phases:
- small initial activity resulting from bringing the GUI app into focus, and clicking the Run button;
- a brief period of low activity, typically with total CPU power at below 50 mW;
- 1-2 sample periods when threads are loaded onto the cores;
- 15-21 sample periods when threads are run, whose total CPU power measurements are collected for analysis;
- 1-2 sample periods when threads are unloaded;
- a return to low activity, typically with total CPU power returning below 50 mW.
Means and standard deviations were then calculated for each series of power measurements, and pooled with times taken to execute threads.
Power used by thread
The first pair of graphs shows average power use for the number of threads run, shown here with error bars giving the range of +1 standard deviation. These show two sections: for 1-10 threads, when all were running on P cores, and for 11-14 threads, when the 10 P cores were fully committed and 1-4 threads spilt over to run on E cores at their maximum frequency. Maximum power used during testing was just short of 34 W.

That for the floating point test above, and NEON below, have regression lines fitted, indicating that:
- Each additional floating point thread required 1,300 mW on P cores, and 110 mW on E cores.
- Each additional NEON thread required 3,000 mW on P cores, and 280 mW on E cores.
- P cores thus required 11-12 times the power of E cores, or E cores used 8-9% of the power of P cores.

Although linear regressions aren’t a bad fit, there’s consistent deviation from the linear relationship seen in previous analyses on M1 and M3 cores. More remarkably, the pattern of deviation is identical between these two tests, although they run in different units in these cores. In both cases, power use was high for 2 and 7 threads, while that for 3 and 8 threads was slightly lower. The only unusual pattern seen in powermetrics output was that, when running 2 and 7 threads, thread mobility was much higher than in other tests.
Previous tests on M1 and M3 P cores found that each additional floating point thread run on those requires about 935 mW, indicating a substantial increase in power used by M4 P cores when running at their higher maximum frequency. E cores in an M1 Pro require about 100 mW each when running at maximum frequency, similar to those in the M4.
Execution time
As power is the rate of energy use over time, the next step is to examine total execution time for all the threads running concurrently, which should form a linear relationship with different gradients for P and E cores. The next two graphs demonstrate that.

For both floating point (above) and NEON (below), there’s a tight linear relationship between total execution time and numbers of threads. Floating point demonstrates that each thread costs 2.4 seconds on P cores and 3.6 seconds on E cores, making E core execution time 150% that of P cores. NEON is similar, at 2.5 seconds on P cores and 3.4 seconds on E cores, for a ratio of 136%.

Time taken for the slowest thread to complete execution shows interesting finer detail.

For both tests, performance falls into several sections according to the number of threads run. With less than 5 threads run, there’s a sharp rise in time taken per thread. From 5-10 threads, time required remains constant, before increasing from 10-14 threads, when additional threads are spilt over onto E cores.
This has implications for anyone trying to measure core performance, as it demonstrates that a single thread can run disproportionately fast, compared with 3-10 threads. Basing any conclusion or comparison on a single thread completing in little more than 2 seconds, when 5 concurrent threads would take 2.34 seconds, 117% of the single thread, could be misleading.

Energy use
Although power use determines heat production, so is an important factor in determining cooling requirements, total energy required to execute threads is equally important for Macs running from battery. Simply reducing core frequency will reduce power used, but by extending the time taken to complete tasks, it may have no effect on energy used, and battery endurance. My final two graphs therefore show estimated total energy used when running test threads on P and E cores, the ultimate test of any big.LITTLE CPU design such as that in the M4.

Graphs for floating point (above) and NEON (below) are inevitably similar in form to those for power, with a near-linear section from 1-10 cores, when the threads are run only on P cores, and from 11-14 cores when they also spill over to E cores.
Fitted regression lines provide the energy cost for each additional thread:
- For floating point, each thread run on a P core costs 3.1 J, and for an E core 1.5 J, making the energy used by an E core 47% that of a P core.
- For NEON, P cores cost 7.7 J per thread, and E cores 3.0 J, making the energy used by an E core 38% that of a P core.
It’s important to remember that the E cores here aren’t being run at frequencies for high efficiency, but at their maximum so they can substitute for the P cores that are already in use.

Considering the small deviations from those linear relationships, it appears that running 2, 6 or 7 threads on P cores requires slightly more energy than predicted from the regression lines shown.
Unfortunately, assessing the energy used by E cores running at low frequencies, as they normally do when performing background tasks, is fraught with inaccuracies due to their low power use. My previous estimate for floating point tests is that a slow-running E core uses less than 45 mW per thread, and for the same task requires about 7% of the energy used by a P core running at maximum frequency, but I have lower confidence in the accuracy of those figures than in those above for higher frequencies.
Key information
- When running the same code at maximum frequency, E cores used 8-9% of the power of P cores.
- Power use when running 2 or 7 threads was anomalously high, possibly due to high thread mobility.
- Execution on E cores was significantly slower than on P cores, at 136-150% of the time required on P cores.
- Single-core performance measurements may not be accurate reflections of performance on multiple cores.
- When running the same code at maximum frequency, energy used by an E core is expected to be 38-47% that of a P core.
Previous articles
Inside M4 chips: P cores
Inside M4 chips: P cores hosting a VM
Inside M4 chips: E and P cores
Inside M4 chips: CPU core performance
Appendix: Source code
_fpfmadd:

STR     LR, [SP, #-16]!

MOV     X4, X0

ADD     X4, X4, #1

FMOV    D4, D0

FMOV    D5, D1

FMOV    D6, D2

LDR     D7, INC_DOUBLE

fp_while_loop:

SUBS    X4, X4, #1

B.EQ    fp_while_done

FMADD   D0, D4, D5, D6

FSUB    D0, D0, D6

FDIV    D4, D0, D5

FADD    D4, D4, D7

B       fp_while_loop

fp_while_done:

FMOV    D0, D4

LDR     LR, [SP], #16

RET
_neondotprod:

STR     LR, [SP, #-16]!

LDP     Q2, Q3, [X0]

FADD    V4.4S, V2.4S, V2.4S

MOV     X4, X1

ADD     X4, X4, #1

dp_while_loop:

SUBS    X4, X4, #1

B.EQ    dp_while_done

FMUL    V1.4S, V2.4S, V3.4S

FADDP   V0.4S, V1.4S, V1.4S

FADDP   V0.4S, V0.4S, V0.4S

FADD    V2.4S, V2.4S, V4.4S

B       dp_while_loop

dp_while_done:

FMOV    S0, S2

LDR     LR, [SP], #16

RET
Inside M4 chips: CPU core performance
There’s no doubt that the CPUs in M4 chips outperform their predecessors. General-purpose benchmarks such as Geekbench demonstrate impressive rises in both single- and multi-core results, in my experience from 3,191 (M3 Pro) to 3,892 (M4 Pro), and 15,607 (M3 Pro) to 22,706 (M4 Pro). But the latter owes much to the increase in Performance (P) core count from 6 to 10. In this series I concentrate on much narrower concepts of performance in CPU cores, to provide deeper insight into topics such as core types and energy efficiency. This article examines the in-core performance of P and E cores, and how they differ.
P core frequencies have increased substantially since the M1. If we set that as 100%, M3 P cores run at around 112-126% of that frequency, and those in the M4 at 140%.
E cores are more complex, as they have at least two commonly used frequencies, that when running low Quality of Service (QoS) threads, and that when running high QoS threads that have spilt over from P cores. Low QoS threads are run at 77% of M1 frequency when on an M3, and 105% on an M4. High QoS threads are normally run at higher frequencies of 133% on the M3 E cores (relative to the M1 at 100%), but only 126% on the M4.
Methods
To measure in-core performance I use a GUI app wrapped around a series of loading tests designed to enable the CPU core to execute that code as fast as possible, and with as few extraneous influences as possible. Of the seven tests reported here, three are written in assembly code, and the others call optimised functions in Apple’s Accelerate library from a minimal Swift wrapper. These tests aren’t intended to be purposeful in any way, nor to represent anything that real-world code might run, but simply provide the core with the opportunity to demonstrate how fast it can be run at a given frequency.
The seven tests used here are:
- 64-bit integer arithmetic, including a MADD instruction to multiply and add, a SUBS to subtract, an SDIV to divide, and an ADD;
- 64-bit floating point arithmetic, including an FMADD instruction to multiply and add, and FSUB, FDIV and FADD for subtraction, division and addition;
- 32-bit 4-lane dot-product vector arithmetic (NEON), including FMUL, two FADDP and a FADD instruction;
simd_float4calculation of the dot-product usingsimd_dotin the Accelerate library.- vDSP_mmul, a function from the vDSP sub-library in Accelerate, multiplies two 16 x 16 32-bit floating point matrices, which in M1 and M3 chips appears to use the AMX co-processor;
- SparseMultiply, a function from Accelerate’s Sparse Solvers, multiplies a sparse and a dense matrix, that may use the AMX co-processor in M1 and M3 chips.
- BNNSMatMul matrix multiplication of 32-bit floating-point numbers, here in the Accelerate library, and since deprecated.
Source code of the loops is given in the Appendix.
The GUI app sets the number of loops to be performed, and the number of threads to be run. Each set of loops is then put into the same Grand Central Dispatch queue for execution, at a set Quality of Service (QoS). Timing of thread execution is performed using Mach Absolute Time, and the time for each thread to be executed is displayed at the end of the tests.
I normally run tests at either the minimum QoS of 9, or the maximum of 33. The former are constrained by macOS to be run only on E cores, while the latter are run preferentially on P cores, but may spill over to E cores when no P core is available. All tests are run with a minimum of other activities on that Mac, although it’s not unusual to see small amounts of background activity on the E cores during test runs.
The number of loops completed per second is calculated for two thread totals for each of the three execution contexts. Those are:
- P cores alone, based on threads run at high QoS on 1 and 10 P cores;
- E cores at high frequency (‘fast’), run at high QoS on 10 cores (no threads on E cores) and 14 (4 threads on E cores);
- E cores at low frequency (‘slow’), run at low QoS on 1 and 4 E cores.
Results are then corrected by removing overhead estimated as the rate of running empty loops. Finally, each test is expressed as a percentage of the performance achieved by the P cores in an M1 chip. Thus, a loop rate double that achieved by running the same test on an M1 P core is given as 200%.
P core performance
As in subsequent sections, these are shown in the bar chart below, in which the pale blue bars are for M1 P cores, dark blue bars for M3 P cores, and red for M4 P cores.

As I indicated in my preview of in-core performance, there is little difference between integer performance between M3 and M4 P cores, but a significant increase in floating point, which matches that expected by the increased frequency in the M4.
Vector performance in the NEON and simd dot tests, and matrix multiplication in vDSP mmul rise higher than would be expected by frequency differences alone, to over 160% of M1 performance. The latter two tests are executed using Accelerate library calls, so there’s no guarantee that they are executed the same on different chips, but the first of those is assembly code using NEON instructions. SparseMultiply and BNNS matmul are also Accelerate functions whose execution may differ, and don’t fare quite as well on the M4.
E core slow performance

On E cores, threads run at low QoS are universally at frequencies close to idle, as reflected in their performance, still relative to an M1 P core at much higher frequency. Frequency differences account for the relatively poor performance of M3 E cores, and improvement in results for the M4. Those are disproportionate in vector and matrix tests, which could be accounted for by the M4 E core running those at higher frequencies than would be normal for low QoS threads.
Although the best of these, NEON, is still well below M1 P core performance (73%), this suggests a design decision to deliver faster vector processing on M4 E cores, which is interesting.
E core fast performance

Ideally, when high QoS threads overspill from P cores, it’s preferable that they’re executed as fast as they would have been on a P core. Those in the M1 fall far short of that, in scalar and vector tests only delivering 40-60% of a P core, although that seemed impressive at the time. The M3 does considerably better, with vector and one matrix test slightly exceeding the M1 P core, and the M4 is even faster in vector calculations, peaking at over 130% for NEON assembly code.
Far from being a cut-down version of its P core, the M4 E core can now deliver impressive vector performance when run up to maximum frequency.
M4 P and E comparison
Having considered how P and E cores have improved against those in the M1, it’s important to look at the range of computing capacity they provide in the M4. This is shown in the chart below, where pale blue bars are P cores, red bars E cores at high QoS and frequency, and dark blue bars E cores at low QoS and frequency. Again, these are all shown relative to P core performance in the M1.

Apart from the integer test, scalar floating point, vector and matrix calculations on P cores range between 140-175% those of the M1, a significant increase on those expected from frequency increase alone. Scalar and vector (but not matrix) calculations on E cores at high frequency are slower, although in most situations that shouldn’t be too noticeable. Performance does drop off for E cores at low frequency, though, and would clearly have impact for code.
Given the range of operating frequencies, P and E cores in the M4 chip deliver a wide range of performance at different power levels, and its power that I’ll examine in the next article in this series.
Key information
- M4 P core maximum frequency is 140% that of the M1. That increase in frequency accounts for much of the improved P core performance seen in M4 chips.
- E core frequency changes are more complex, and some have reduced rather than risen compared with the M1.
- P core floating point performance in the M4 has increased as would be expected by frequency change, and vector and matrix performance has increased more, to over 160% those of the M1.
- E core performance at low QoS and frequency has improved in comparison to the M3, and most markedly in vector and matrix tests, suggesting design improvements in the latter.
- E core performance at high QoS and frequency has also improved, again most prominently in vector tests.
- Across their frequency ranges, M4 P and E cores now deliver a wide range of performance and power use.
Previous articles
Inside M4 chips: P cores
Inside M4 chips: P cores hosting a VM
Inside M4 chips: E and P cores
Appendix: Source code
_intmadd:

STR     LR, [SP, #-16]!

MOV     X4, X0

ADD     X4, X4, #1

int_while_loop:

SUBS    X4, X4, #1

B.EQ    int_while_done

MADD    X0, X1, X2, X3

SUBS    X0, X0, X3

SDIV    X1, X0, X2

ADD     X1, X1, #1

B       int_while_loop

int_while_done:

MOV     X0, X1

LDR     LR, [SP], #16

RET
_fpfmadd:

STR     LR, [SP, #-16]!

MOV     X4, X0

ADD     X4, X4, #1

FMOV    D4, D0

FMOV    D5, D1

FMOV    D6, D2

LDR     D7, INC_DOUBLE

fp_while_loop:

SUBS    X4, X4, #1

B.EQ    fp_while_done

FMADD   D0, D4, D5, D6

FSUB    D0, D0, D6

FDIV    D4, D0, D5

FADD    D4, D4, D7

B       fp_while_loop

fp_while_done:

FMOV    D0, D4

LDR     LR, [SP], #16

RET
_neondotprod:

STR     LR, [SP, #-16]!

LDP     Q2, Q3, [X0]

FADD    V4.4S, V2.4S, V2.4S

MOV     X4, X1

ADD     X4, X4, #1

dp_while_loop:

SUBS    X4, X4, #1

B.EQ    dp_while_done

FMUL    V1.4S, V2.4S, V3.4S

FADDP   V0.4S, V1.4S, V1.4S

FADDP   V0.4S, V0.4S, V0.4S

FADD    V2.4S, V2.4S, V4.4S

B       dp_while_loop

dp_while_done:

FMOV    S0, S2

LDR     LR, [SP], #16

RET
func runAccTest(theA: Float, theB: Float, theReps: Int) -> Float {

var tempA: Float = theA

var vA = simd_float4(theA, theA, theA, theA)

let vB = simd_float4(theB, theB, theB, theB)

let vC = vA + vA

for _ in 1...theReps {

tempA += simd_dot(vA, vB)

vA = vA + vC

}

return tempA

}
16 x 16 32-bit floating point matrix multiplication
var theCount: Float = 0.0

let A = [Float](repeating: 1.234, count: 256)

let IA: vDSP_Stride = 1

let B = [Float](repeating: 1.234, count: 256)

let IB: vDSP_Stride = 1

var C = [Float](repeating: 0.0, count: 256)

let IC: vDSP_Stride = 1

let M: vDSP_Length = 16

let N: vDSP_Length = 16

let P: vDSP_Length = 16

A.withUnsafeBufferPointer { Aptr in

B.withUnsafeBufferPointer { Bptr in

C.withUnsafeMutableBufferPointer { Cptr in

for _ in 1...theReps {

vDSP_mmul(Aptr.baseAddress!, IA, Bptr.baseAddress!, IB, Cptr.baseAddress!, IC, M, N, P)

theCount += 1

} } } }

return theCount
Apple describes vDSP_mmul() as performinng “an out-of-place multiplication of two matrices; single precision.” “This function multiplies an M-by-P matrix A by a P-by-N matrix B and stores the results in an M-by-N matrix C.”
Sparse matrix multiplication
var theCount: Float = 0.0

let rowCount = Int32(4)

let columnCount = Int32(4)

let blockCount = 4

let blockSize = UInt8(1)

let rowIndices: [Int32] = [0, 3, 0, 3]

let columnIndices: [Int32] = [0, 0, 3, 3]

let data: [Float] = [1.0, 4.0, 13.0, 16.0]

let A = SparseConvertFromCoordinate(rowCount, columnCount, blockCount, blockSize, SparseAttributes_t(), rowIndices, columnIndices, data)

defer { SparseCleanup(A) }

var xValues: [Float] = [10.0, -1.0, -1.0, 10.0, 100.0, -1.0, -1.0, 100.0]

let yValues = [Float](unsafeUninitializedCapacity: xValues.count) {

resultBuffer, count in

xValues.withUnsafeMutableBufferPointer { denseMatrixPtr in

let X = DenseMatrix_Float(rowCount: 4, columnCount: 2, columnStride: 4, attributes: SparseAttributes_t(), data: denseMatrixPtr.baseAddress!)

let Y = DenseMatrix_Float(rowCount: 4, columnCount: 2, columnStride: 4, attributes: SparseAttributes_t(), data: resultBuffer.baseAddress!)

for _ in 1...theReps {

SparseMultiply(A, X, Y)

theCount += 1

} }

count = xValues.count

}

return theCount
Apple describes SparseMultiply() as performing “the multiply operation Y = AX on a sparse matrix of single-precision, floating-point values.” “Use this function to multiply a sparse matrix by a dense matrix.”
Sparse matrix multiplication
var theCount: Float = 0.0

let inputAValues: [Float] = [ 1.0, 2.0, 3.0, 4.0, 5.0, 6.0, 7.0, 8.0,

1.0, 2.0, 3.0, 4.0, 5.0, 6.0, 7.0, 8.0,

1.0, 2.0, 3.0, 4.0, 5.0, 6.0, 7.0, 8.0 ]

let inputBValues: [Float] = [

1, 2,

3, 4,

1, 2,

3, 4,

1, 2,

3, 4]

var inputADescriptor = BNNSNDArrayDescriptor.allocate(

initializingFrom: inputAValues,

shape: .imageCHW(3, 4, 2))

var inputBDescriptor = BNNSNDArrayDescriptor.allocate(

initializingFrom: inputBValues,

shape: .tensor3DFirstMajor(3, 2, 2))

var outputDescriptor = BNNSNDArrayDescriptor.allocateUninitialized(

scalarType: Float.self,

shape: .imageCHW(inputADescriptor.shape.size.0,

inputADescriptor.shape.size.1,

inputBDescriptor.shape.size.1))

for _ in 1...theReps {

BNNSMatMul(false, false, 1,

&inputADescriptor, &inputBDescriptor, &outputDescriptor, nil, nil)

theCount += 1

}

inputADescriptor.deallocate()

inputBDescriptor.deallocate()

outputDescriptor.deallocate()

return theCount
Inside M4 chips: E and P cores
In the two previous articles (links at the end), I explored some of the features and properties of Performance (P) cores in Apple’s latest M4 chips. This article looks at their Efficiency (E) cores by comparison.
M4 family
In the three current M4 designs, there are only two variations in terms of E cores:
- Base M4, with 6 E cores, except for a cheaper variant with only 4 active E cores.
- M4 Pro and Max, with 4 E cores, including ‘binned’ variants.
Apple is expected to release an Ultra variant in 2025, with two M4 Max chips in tandem, providing a total of 8 E cores. Apart from the number of cores, all E cores are the same, and different from P cores.
E core architecture
All E cores are arranged in a single cluster of 4 or 6, sharing common L2 cache, and running at the same frequency (clock speed). Analysis of M1 cores implies that each E core has roughly half the number of processing units, where there is more than one such unit in the P core, giving an M1 E core roughly half the compute capacity of the P core. I haven’t seen any comparable analysis of cores in later M families, although differences in power consumption imply there remain substantial differences in processing units and compute capacity.
Frequency
Like P cores, E cores can be set to run at any of 5 values between the minimum of 1,020 MHz and maximum of 2,592 MHz (1.0-2.6 GHz). When running macOS, cluster frequency is set by macOS at a kernel level; other operating systems may offer more direct control. This range of frequencies is significantly narrower than that of E cores in the M3, which range between 744-2,748 MHz.
E cores idle at 1,020 MHz, and although they can be shut down altogether, that’s exceptional given the steady demand for macOS background threads to be run on them. Nevertheless, powermetrics still reports their ‘down’ residencies separately from idle residencies.
Instruction set
This is believed to be identical to ARMv9.2-A without Scalable Vector Extension (SVE) supported by M4 P cores, enabling the same threads to be run on either core type.
Single thread comparisons
One way to appreciate the contrasts between core types is to compare a single intensive in-core thread run in each. For this purpose, I used a tight loop of floating point calculations, running at two different Quality of Service (QoS) settings, in macOS 15.1.
Single thread at high QoS on P cores

This thread was initially loaded onto P13 (red) in the second (P1) cluster, and after 3.7 seconds was moved to P5 (blue) in the first (P0) cluster. After a further 4.6 seconds running on that, it was moved back to the second (P1) cluster, to run on P11 (purple). During this run, there was almost no other activity on the two P clusters, and the inactive cluster was therefore shut down while this thread was running on the other.

The active cluster was run at the maximum frequency of 4,511 MHz throughout. Just before the thread was moved to a different cluster, that was brought up and run up to maximum frequency ready to run the thread.

Total CPU power remained similar throughout the period the thread was being executed, but there is a small and consistent difference according to which cluster was active: the first (P0) brought power use of about 2,520 mW, 50 mW higher than the second (P1) at about 2,470 mW. This matches the difference reported previously, and merits assessment in other M4 Pro chips to determine whether this is a general feature.
Single thread at high QoS on E cores
There are methods of running code, such as the in-core floating point loop test used here, on E cores: they can be run with a low QoS (Background), so that macOS allocates them to run on only E cores, or they can be spilt over from high QoS threads when there are more threads than available P cores. On an M4 Pro chip, that requires 11 threads, which results in one of those being allocated to the E cluster, as described next.

This chart shows active residency on the four E cores with a single high QoS thread spilt onto them. While cores E1, E2 and E3 appear to handle other threads over this period of more than six seconds, core E0 appears to run at 90-100% active residency executing the spilt thread. Note that this thread wasn’t moved between cores over that period of over six seconds.
E cluster frequency remained constant throughout at its maximum of 2,592 MHz. CPU power use was inevitably dominated by the ten P cores running at 100% active residency and maximum frequency, remaining at just under 14,000 mW. Unfortunately, using powermetrics it’s not possible to estimate the power use of the E cluster directly.
Single thread at low QoS on E cores
This is very different from the spilt thread at high QoS.

There’s no evidence here that any single core in the E cluster ran a thread at 100% active residency. Instead it appears to have been moved rapidly and freely around the cores, with many 0.1 second sampling intervals spanning its execution in more than one core over that period.

Cluster frequency was a steady minimum of 1,050-1,060 MHz, with superimposed spikes when it rose briefly to the maximum of 2,592 MHz. This suggests that the single thread would most probably have been run at close to core minimum frequency, had there not been additional threads to run.

A similar picture is seen in power use, with spikes from a low background of about 40-45 mW required by the single thread alone.
Single thread behaviours
These can be summarised as:
- P core (high QoS) runs at 100% active residency on a single P core at maximum frequency, and is switched between clusters irregularly (about every 3.7-4.6 seconds). Total power use is about 2,500 mW.
- High QoS spilt over to E cores runs at 90-100% active residency on a single E core at maximum frequency, and is either not switched between cores at all, or only infrequently.
- E core (low QoS) runs at about 100% and is moved frequently between all E cores in the cluster, at close to minimum frequency. Total power use is about 40-45 mW.
Performance, power and efficiency
Although I’ll be returning to more detailed comparisons of performance and power use between P and E cores, I provide a single illustration here, for the in-core floating point task used above.
Running 2 x 10^9 loops in each thread, P cores at maximum frequency take 9.2-9.7 seconds per thread, and use about 2,500 mW per thread. E cores running low QoS threads at close to minimum frequency take about four times as long, 38.5 seconds, but use less than 45 mW power per thread. Total energy used to complete one thread is therefore over 23 J when run on P cores, and less than 1.7 J when run on E cores. E cores therefore use only 7% of the energy that P cores do performing the same task.
Key information
- Current M4 chips feature 4-6 CPU E cores.
- M4 E cores are arranged in a single cluster of 4 or 6, sharing L2 cache and running at a common frequency.
- The E core cluster can be shut down (exceptionally), idling at their minimum frequency of 1,020 MHz, or at one of 6 set frequencies up to a maximum of 2,592 MHz, as controlled by macOS.
- Their instruction set is the same as M4 P cores, ARMv9.2-A without its Scalable Vector Extension (SVE).
- They use 40-45 mW when at low frequencies, but it’s not currently feasible to measure directly their maximum power use at high frequencies.
- macOS allocates threads to E cores when their QoS is 9 (Background), and when a thread with higher QoS can’t be allocated to a P core because they are all busy. Management of frequencies and core allocation differ between those two cases.
- High QoS threads on E cores are run at maximum frequency and appear not to move between cores.
- Low QoS threads on E cores are run at close to minimum frequency and are highly mobile between cores.
- Low QoS threads running on E cores run more slowly than higher QoS threads running on P cores, but E core power use is much lower, resulting in considerable saving in total energy use for the same computational task.
Previous article
Inside M4 chips: P cores
Inside M4 chips: P cores hosting a VM
Explainer
Residency is the percentage of time a core is in a specific state. Idle residency is thus the percentage of time that core is idle and not processing instructions. Active residency is the percentage of time it isn’t idle, but is actively processing instructions. Down residency is the percentage of time the core is shut down. All these are independent of the core’s frequency or clock speed.
苹果内置英语学习工具大赏 | Exhibition of Marvelous and Built-in English Leaning Tools and Features on Apple platforms
Intro
In this article, I’m gonna show you some marvelous tools that you may not have found or you have but don’t know their potentiality. These built-in system features are gonna blow your minds, I hope they can bring you to the next level of English learning journey or you just wanna have more digital entertainments. Believe me it won’t be only something elementary but also advance.
在本篇文章,我会带你发现一些你从未了解过的工具和特性,挖掘出他们还没被真正发现的潜力。这些内置的系统工具肯定会让你大吃一惊,我敢说他们肯定可以在你学习语言的路上帮到你,又或者你只是想要更多的数字娱乐活动。本文内容不仅涵盖基础部分,也包含了进阶技巧,总有一款适合你~
Since some parts of this article are written for everyone, so I’m gonna write it in dual-languages. Btw, if you have some confusions after reading, please don’t hesitate to contact me whether through the E-mail or the WeChat official account (but I don’t really check it often, email would be better). Back to the topic, here’s my E-mail address and the outline of today’s post:
由于本文的部分内容是写给每个人的,所以我将使用双语写作(说是双语,其实中文的部分我都是请Chat-gpt帮我翻译的,我只在极少数的地方帮它修改了一些,最让我惊讶的是这货居然还会在合适的地方用合适的成语,用的还是我用英文写作时就想用的那个中文成语……)。另外,如果您阅读后有任何疑问,请随时通过电子邮件或微信公众号与我联系(但我不经常查看微信公众号,电子邮件会更好)。回到主题,这是我的电子邮件地址和今天文章的大纲:
E-Mail: Lucashasanidea@Gmail.com
* Books & Z-Library
* Dictionary & Spotlight & Lookup
* Spelling and Grammar Checker
* Podcast & RSS
* Accessibility / Spoken Content
* 图书app & Z- Library互联网藏书阁
* 字典 & 聚焦搜索工具 & 查找
* 拼写和语法检查器
* 播客 & RSS订阅
* 辅助功能 / 朗读内容
Thanks to highly unified design of the Apple platform and the iCloud service, you’ll get same experience across the different Apple devices, whether you’re using iPhone, iPad, or Mac. That means once you’ve learned how to use the tool on one device, you can naturally use the same tools on the other without any extra cost.
得益于苹果高度统一的设计理念和iCloud服务,你可以在不同设备上获得相同的使用体验,无论是iPhone、iPad还是Mac电脑。这意味着,只要你在手机上学会使用我说的某项工具,在电脑上你自然而然就会用。
Books & Z-Library | The Built-in Application and the ‘Biggest’ Libraries in the World
Maybe you guys deleted the books app once you’ve gotten a new iPhone, especially the function of ‘book store’ doesn’t work in mainland China, so all you can see is a blank in this app, but what if I told you that you have some remedies to read books in this app? Before we get started, let me clarify somethings, first you can easily redownload the BOOK app on the AppStore, then you can’t access the bookstore doesn’t mean you can’t use the whole app, you still can import books that you download from the internet.
也许你们在拥有新iPhone后删除了书籍应用,特别是在中国大陆,‘书店’功能不可用,所以你在这个应用程序中只能看到一个空白,但如果我告诉你,在这个应用程序中,你有一些阅读书籍的方法呢?在我们开始之前,让我澄清一些事情,首先,你可以轻松地在App Store上重新下载BOOK应用程序,然后无法访问书店并不意味着你不能使用整个应用程序,你仍然可以导入从互联网上下载的书籍。
Here it is, Z-Library. I kind of like the concept that it expresses, even I know technically it’s illegal and it’s literally a piracy action. But still, it really brings me back to the days when the Internet wasn’t as thriving as it is nowadays. The whole concept is mainly about getting everyone educated without financial problems, since all books are free for everyone who can access the Internet in this website. I’m not gonna say it’s totally a kindness, even it does help people who are in the financial backwardness at least for now, and in my perception, knowledge and education shouldn’t be some ‘‘rich’’ people’s privileges, right? Everyone around the world has the right of getting educated. On the other side, it does infringes some people’ rights. As for these people, they really make a lot of efforts on it, not only these writers but also the publisher. And don’t even mention the costumers who paid the real money for the books. So what would you say, it’s kind of a judgment call, it’s literally up to you.
这就是它,Z-Library。我还挺喜欢喜欢它所表达的概念,即使我知道严格来说上它不大合法、是一种盗版行为。但是,它确实让我回到了互联网不像现在这样繁荣的日子。它所传达的理念是让每个人在没有财务负担的情况下接受教育,因为在这个网站上,所有的书籍对每个可以访问互联网的人都是免费的。我不会说这完全是一种善意的行为,即使它现在确实帮助了那些暂处于经济窘境的人,但在我的看法中,知识和教育不应该是一些‘’富‘’人的特权,对吧?世界上每个人都有接受教育的权利。另一方面,它确实侵犯了一些人的权利。对于这些人来说,他们确实付出了很多努力,不仅是这些作家,还有出版商,更别提那些付出真钱购买书籍的客户了。那么你会说什么呢?在我看来其实并非黑白,是与非完全取决于你的判断。
Then, use or not, make you own decision. Here I’m gonna give you some quick views here, instead of leading you deeply, cause I don’t wanna risk it to teach you how to use it step-by-step, like how you setup the network, how you access the websites and things like that. It can rise the law problems in the mainland China, I’m just gonna say the following website that I give you still works, if you can’t access it, that will be your networking problem, hope you can get the point.
然后,使用或不使用,由你来决定。在这里,我带你速览,而不是深入引导你,因为我不想“冒险”地逐步教你如何使用它,比如如何设置网络,如何访问网站等。这可能会在部分地区引起法律问题。你只需要知道,我给你的下面这个网站仍然有效,如果你无法访问它,那将是你的网络问题,希望你懂我的意思。

After you register, you can see a website like that, as you can see there’re enormous books, I highly recommend you download the EPUB format if you choose Apple Book app for reading. And it would be best if the books you prefer existed here and was formatted as the natural EPUB format, cause it’ll rise some annoying problems, such as layouts, picture missing, wrong words and so on, if you have to choose the converted the EPUB format to read.
完成注册后,你会看到一个类似于这样的网站,其中有大量的书籍可供选择。如果你选择使用Apple Book应用程序来阅读,我强烈建议你下载EPUB格式的书籍。如果这有你想要的书籍,并且如果是是原生EPUB的,那就更好了。因为如果你不得不选择转换格式来进行阅读,可能会遇到一些令人烦恼的问题,例如布局问题、图片缺失、错字等。
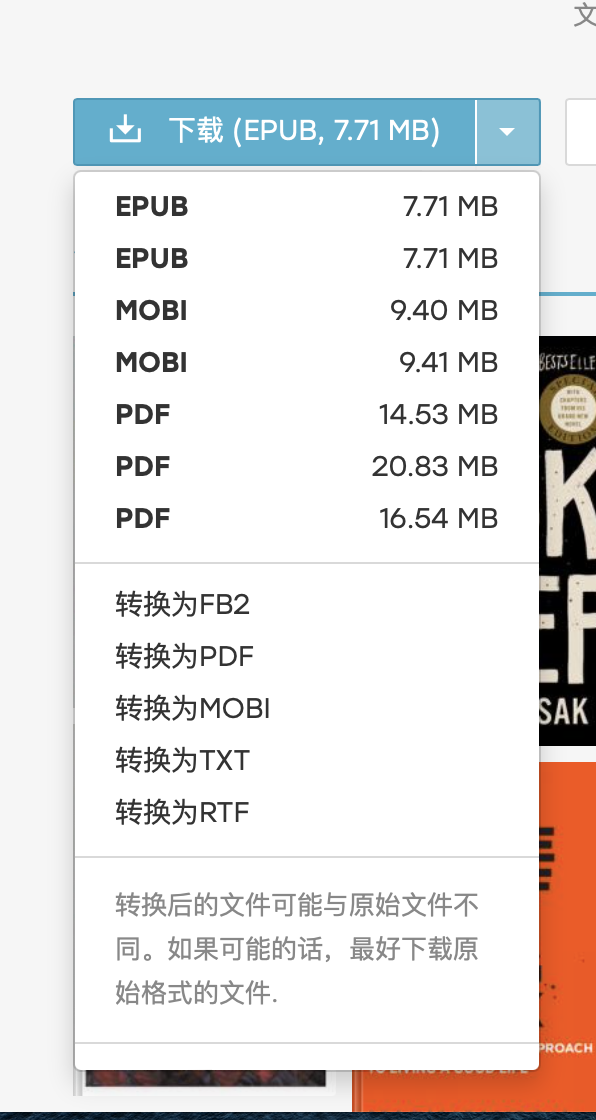
The limitation of downloading is 10 books within per 24hrs for free, it’s enough for most cases, but if you want additional 10 books for free within the 24hrs, you can connect your Z-Lib account to the telegram bot, not only for people who want to up their limitation for free, but also for who are ”lazy” like me. It’s much handier to search a book, download a book in the telegram bot. The setup is not tricky, follow the step-by-step guide the website gave, then all set.
每24小时免费下载的限制是10本书,对大多数情况来说已经足够了。但如果你想在24小时内再免费下载10本书,你可以将你的Z-Lib账户连接到Telegram机器人上。这不仅适用于想要免费增加下载数量的人,也适用于像我这样的“懒人”。在Telegram机器人中搜索书籍并下载书籍会更方便。设置并不复杂,按照网站提供的逐步指南进行设置即可。
Now, I assume you had the ebooks, open the ebooks by using the Apple Book App, it will automatically import to the app.
现在,我假设你已经拥有了电子书,在Apple Book应用程序中打开电子书,它将自动导入到应用程序中。

Now, tap on any imported books, enjoy it. (BTW, you can categorize these books as I did like left bottom side. Click “Edit” button on the top-right side then you’ll know how.)
现在,点击任何已导入的书籍,开始享受阅读吧。
(顺便说一下,你可以像我一样将这些书籍分类,就像左下角那样。点击右上角的“编辑”按钮,你就会知道如何操作。)
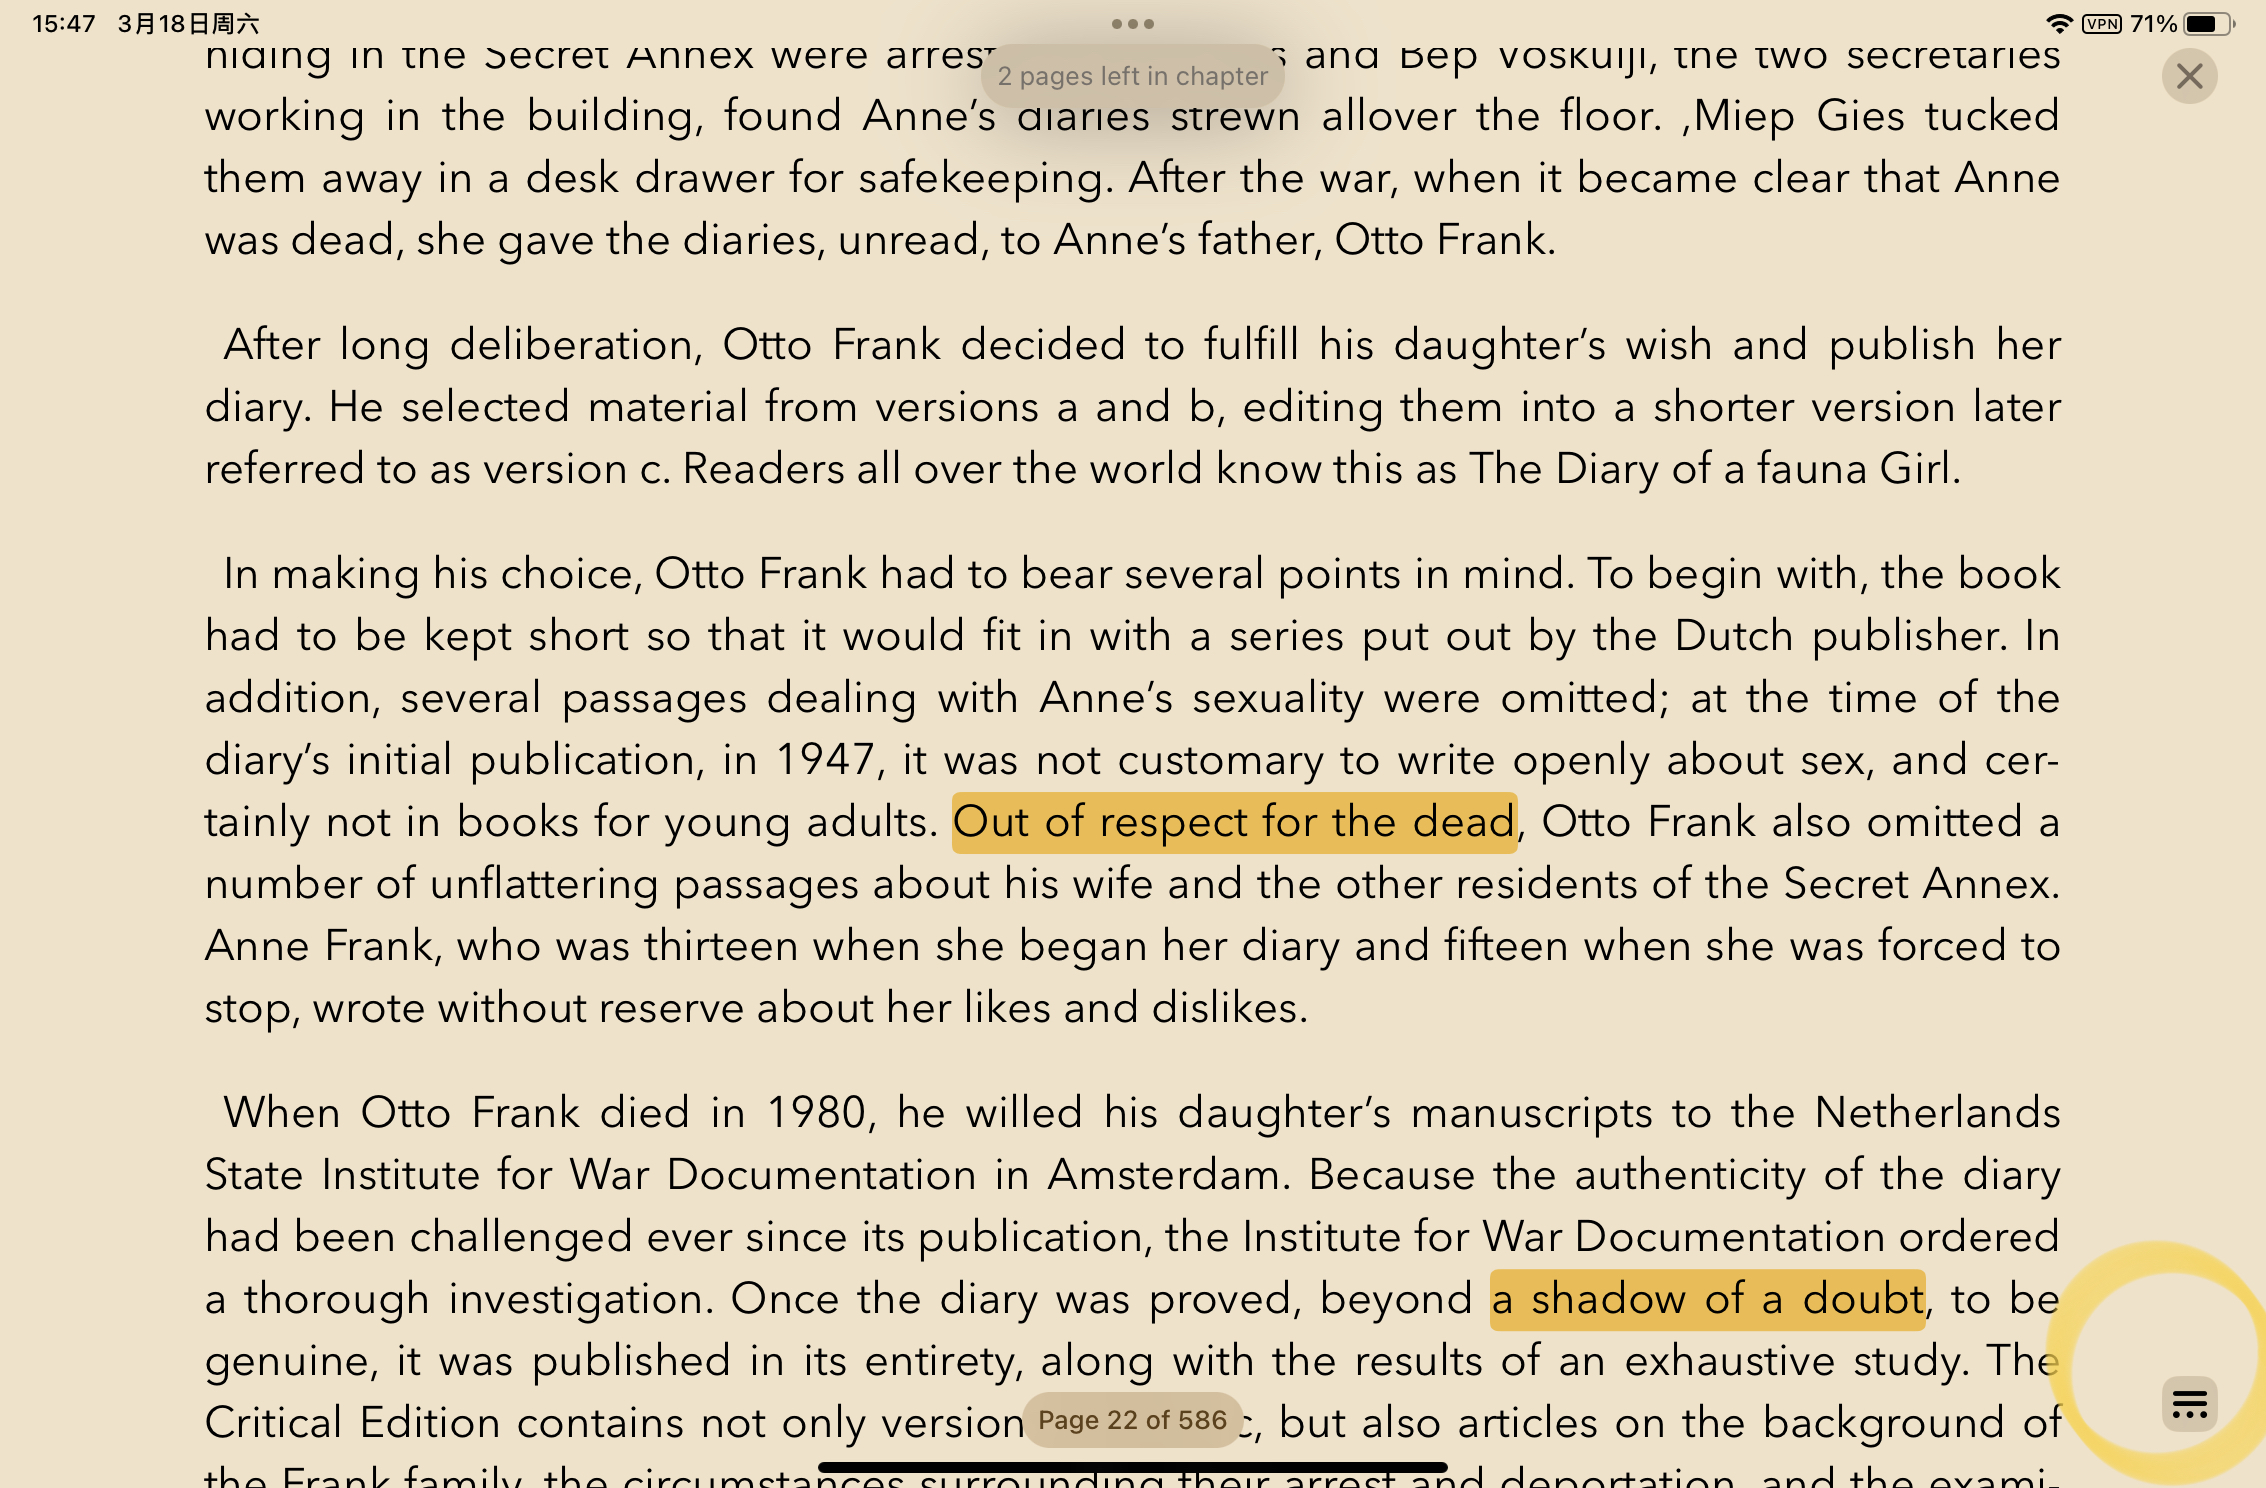
Tap the right-bottom button
点击右下角的按钮
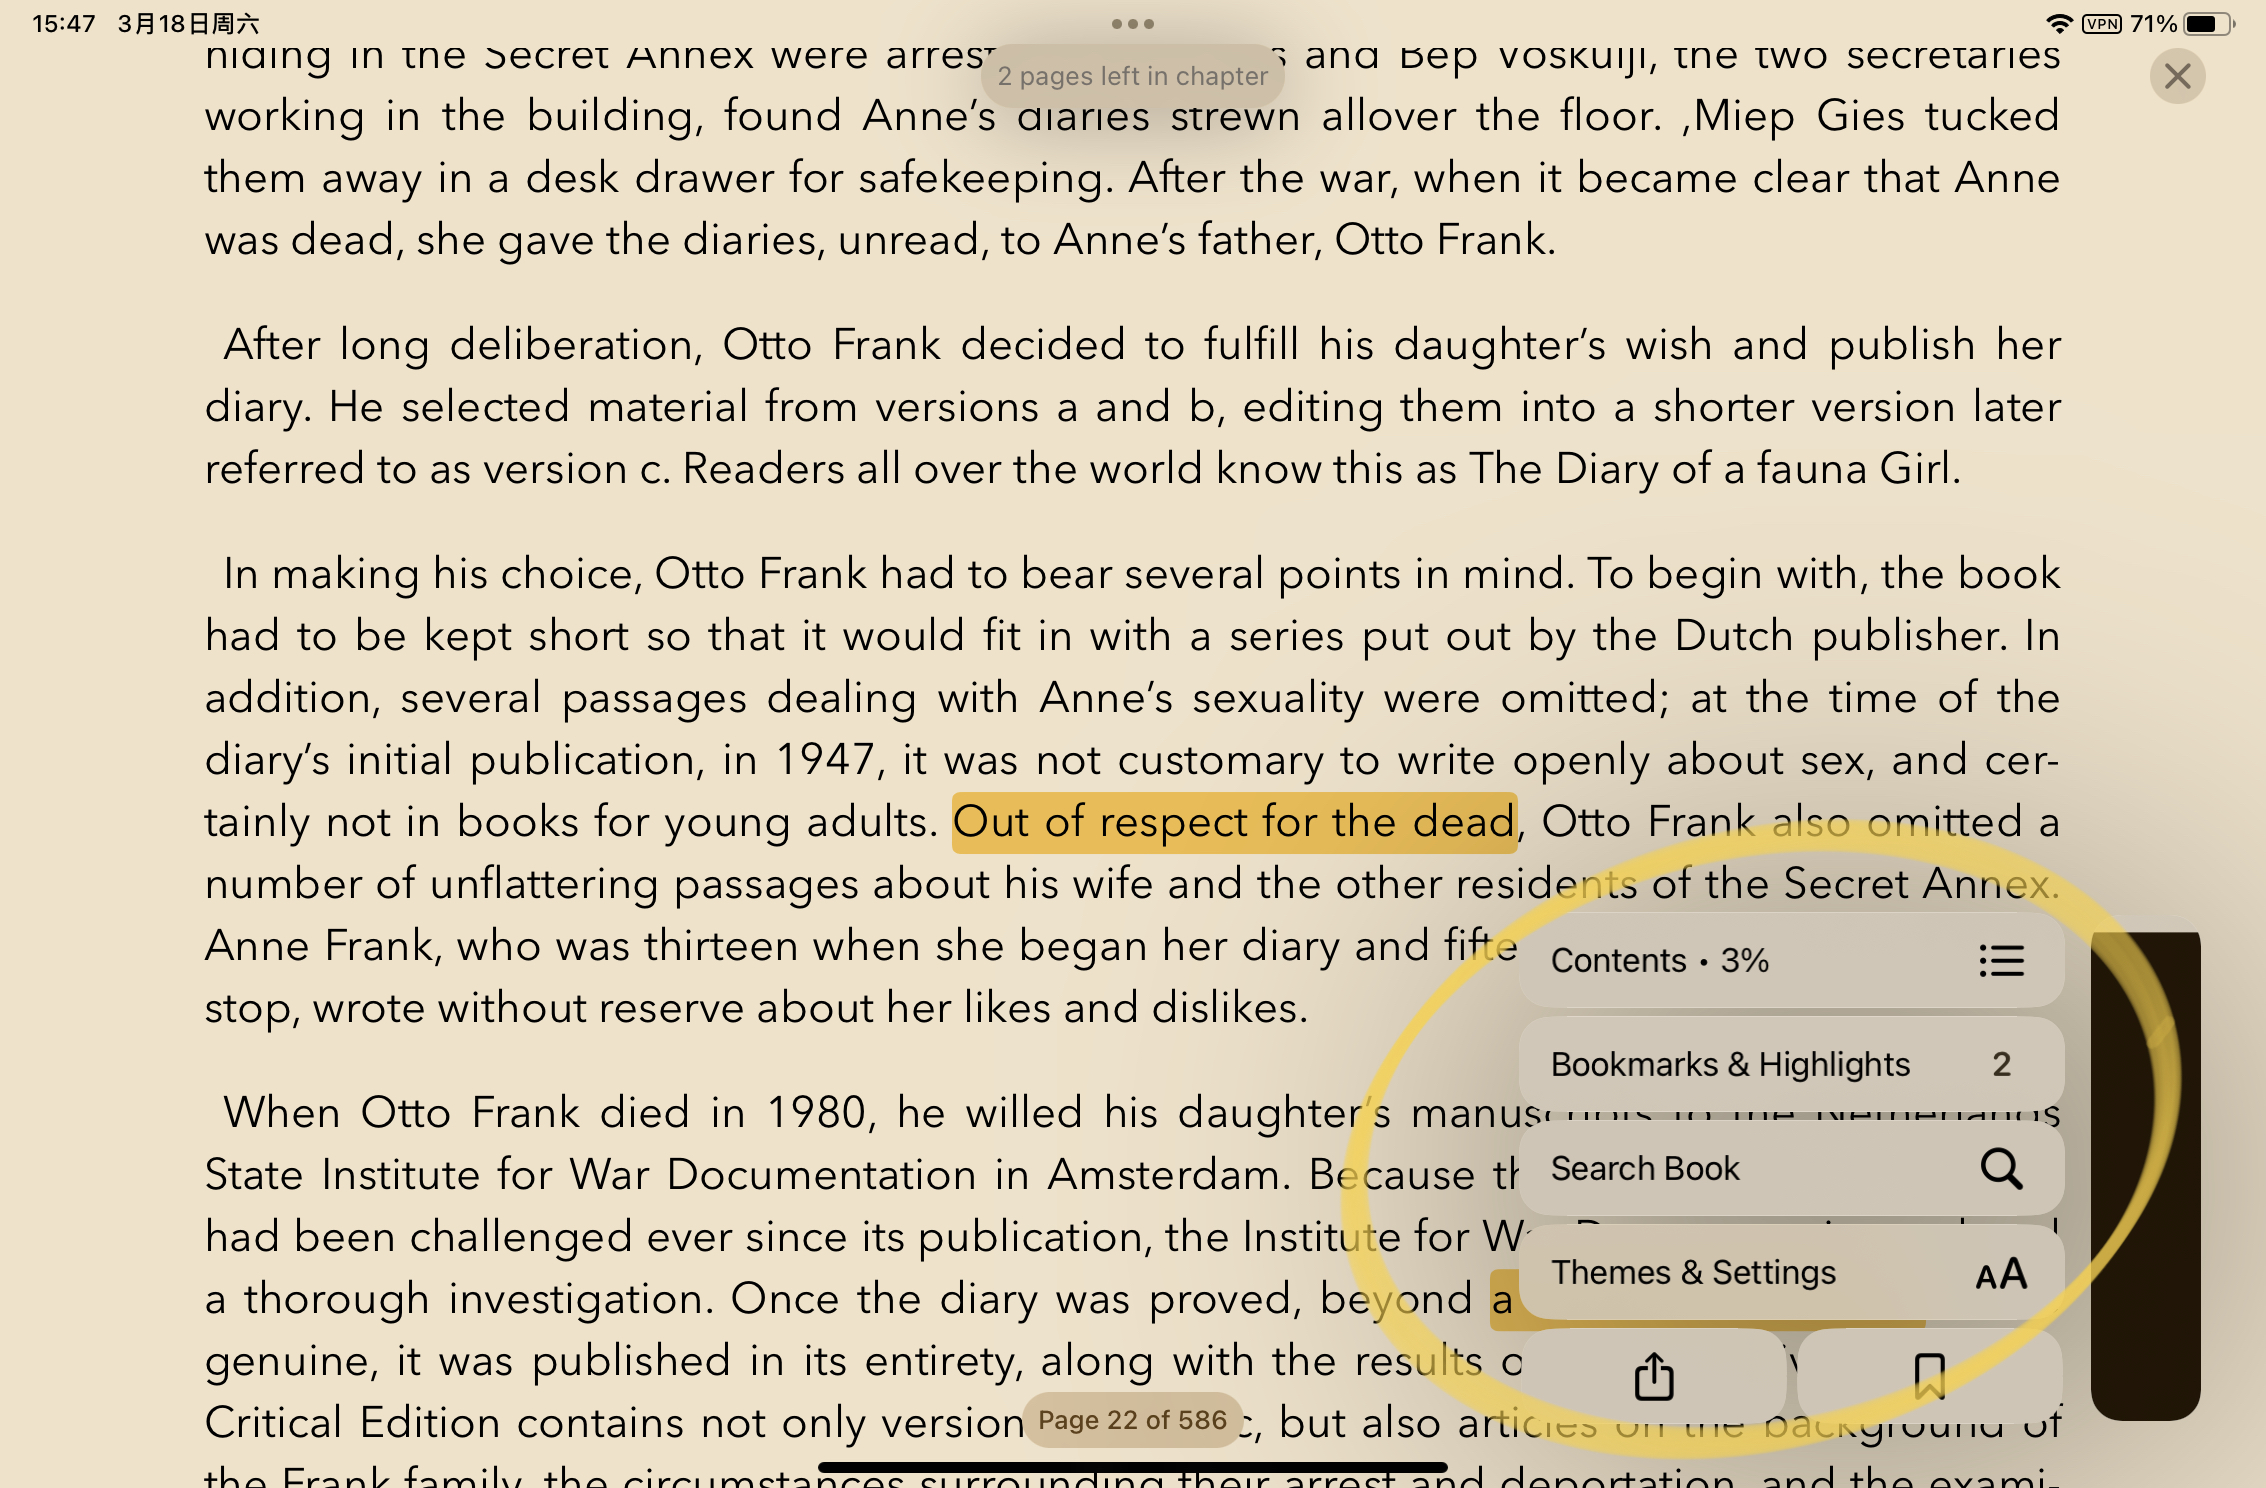
The main functions – Bookmarks & Highlight & Themes are here.
(To highlight the words or sentences by long pressing, then the selection will pop up.)
主要功能——书签、高亮和主题都在这里。
(长按选中单词或句子,即可弹出选择框,选择高亮即可完成高亮操作。)
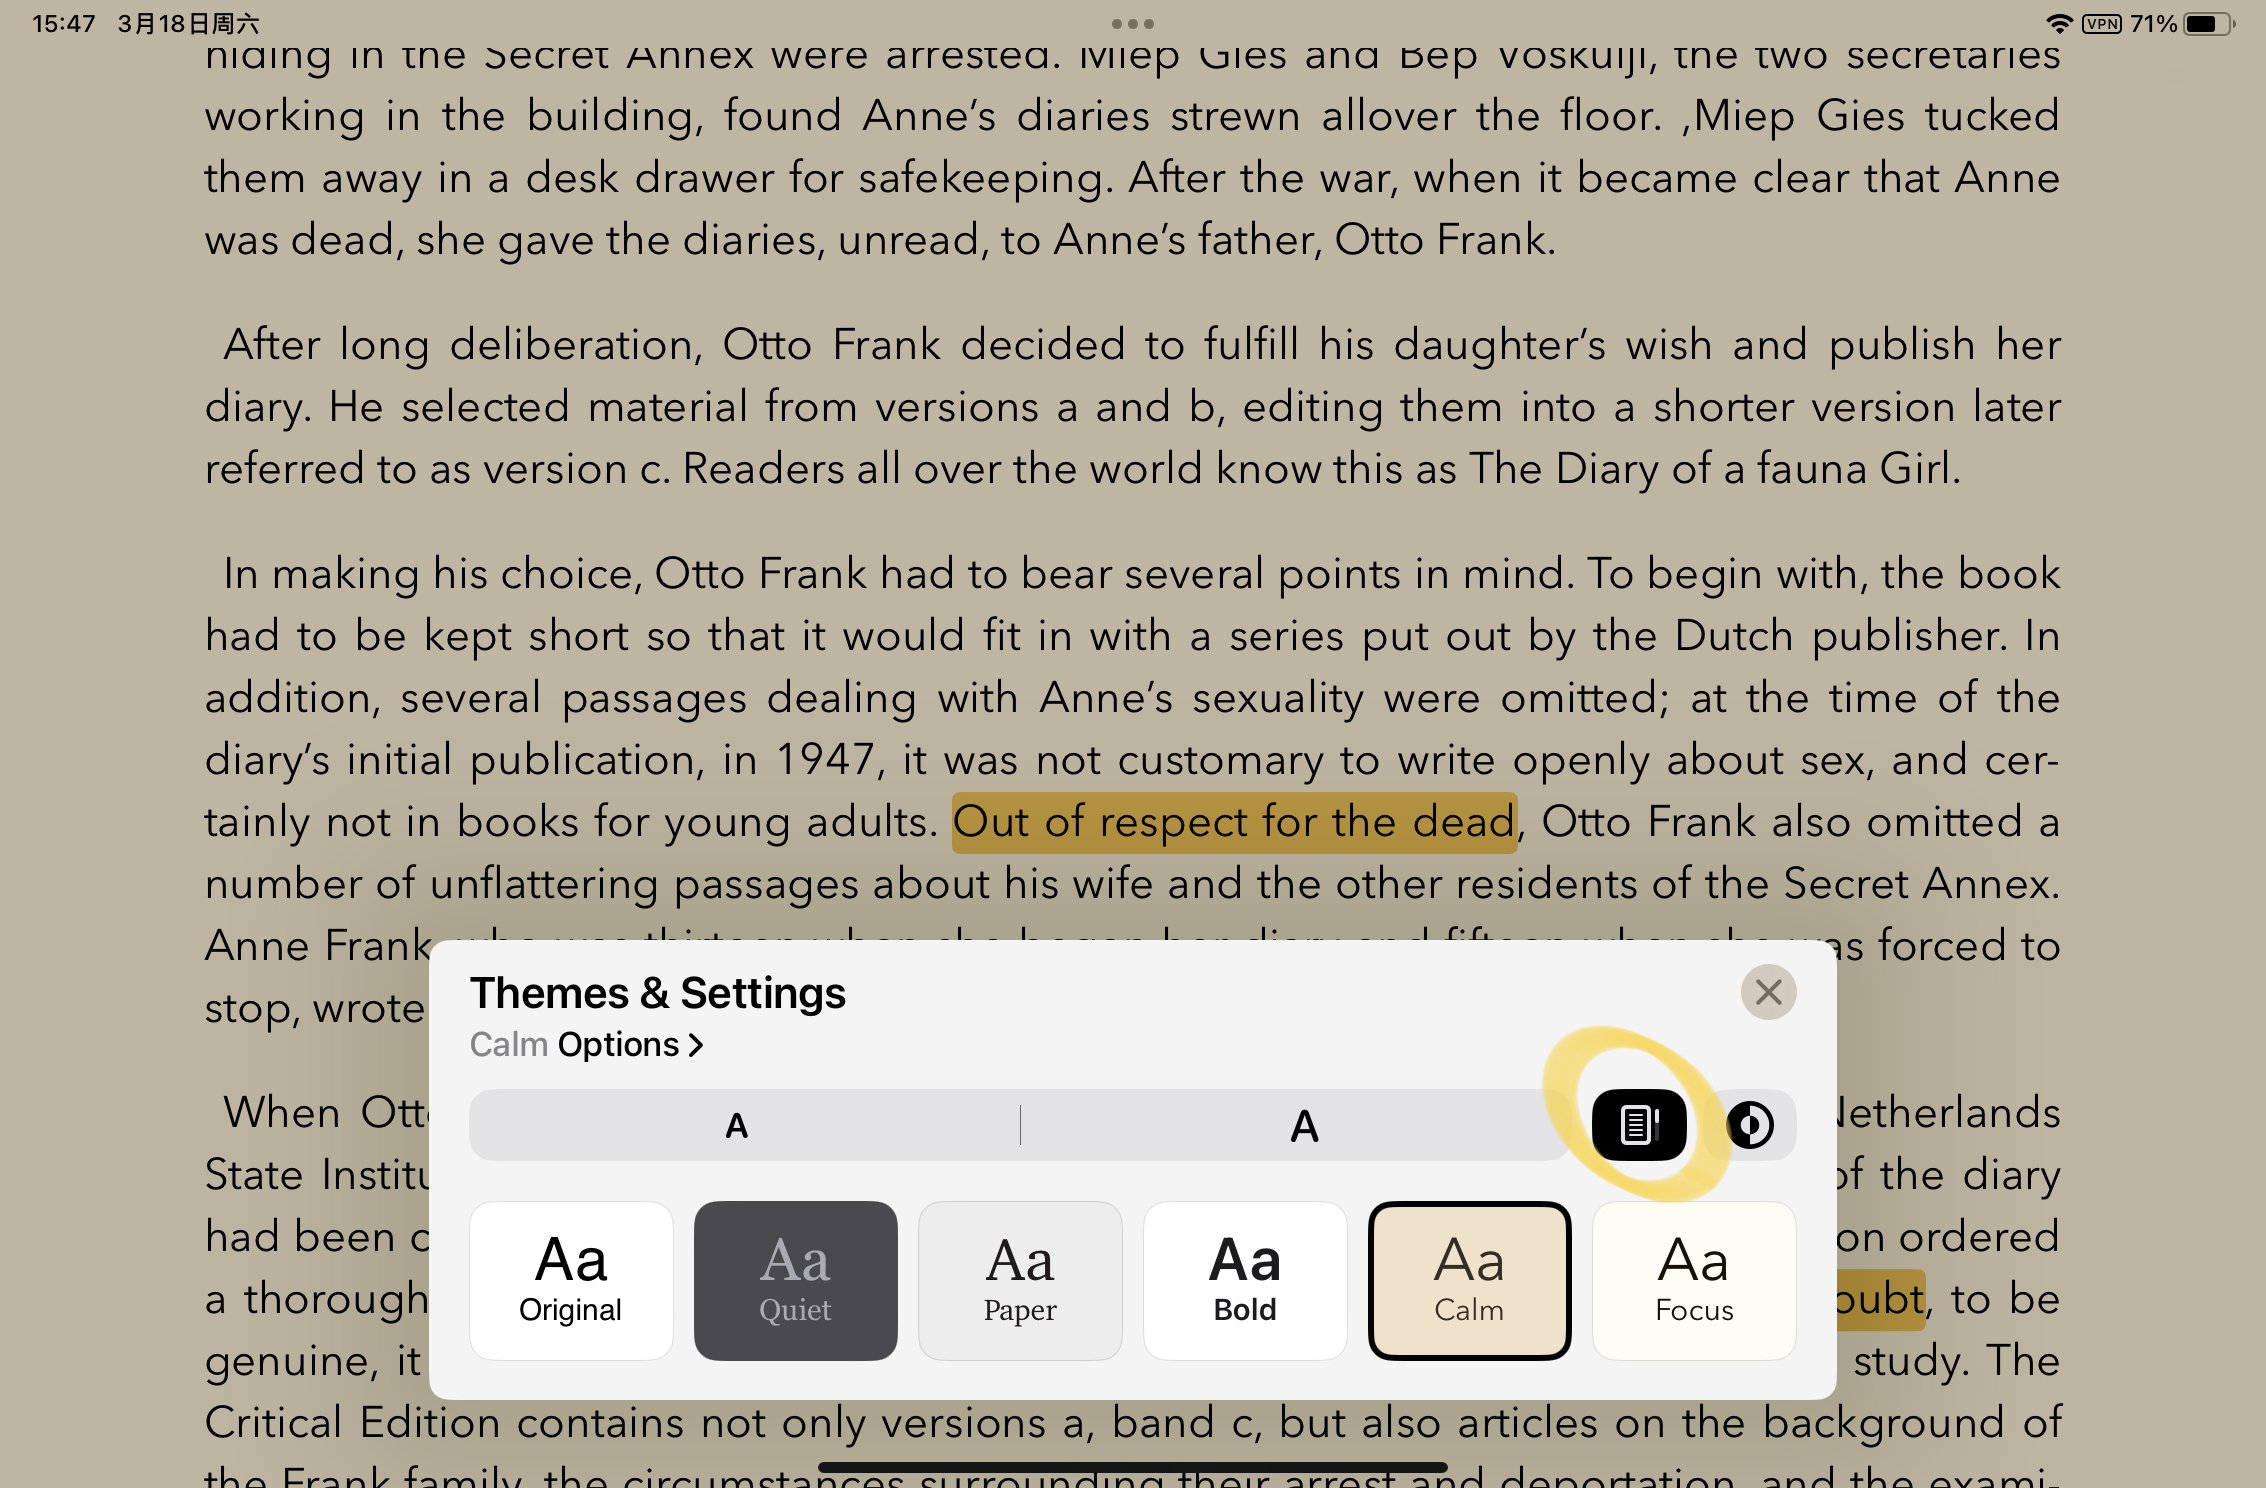
You won’t wanna miss it, get the immersive experience you prefer.
BTW, hit this button so that you can keep scrolling, instead of flipping pages while you’re reading .
你不会想要错过它——沉浸式的阅读体验。
顺便一提,点击这个按钮,你可以在阅读时保持滚动,而不是翻页。
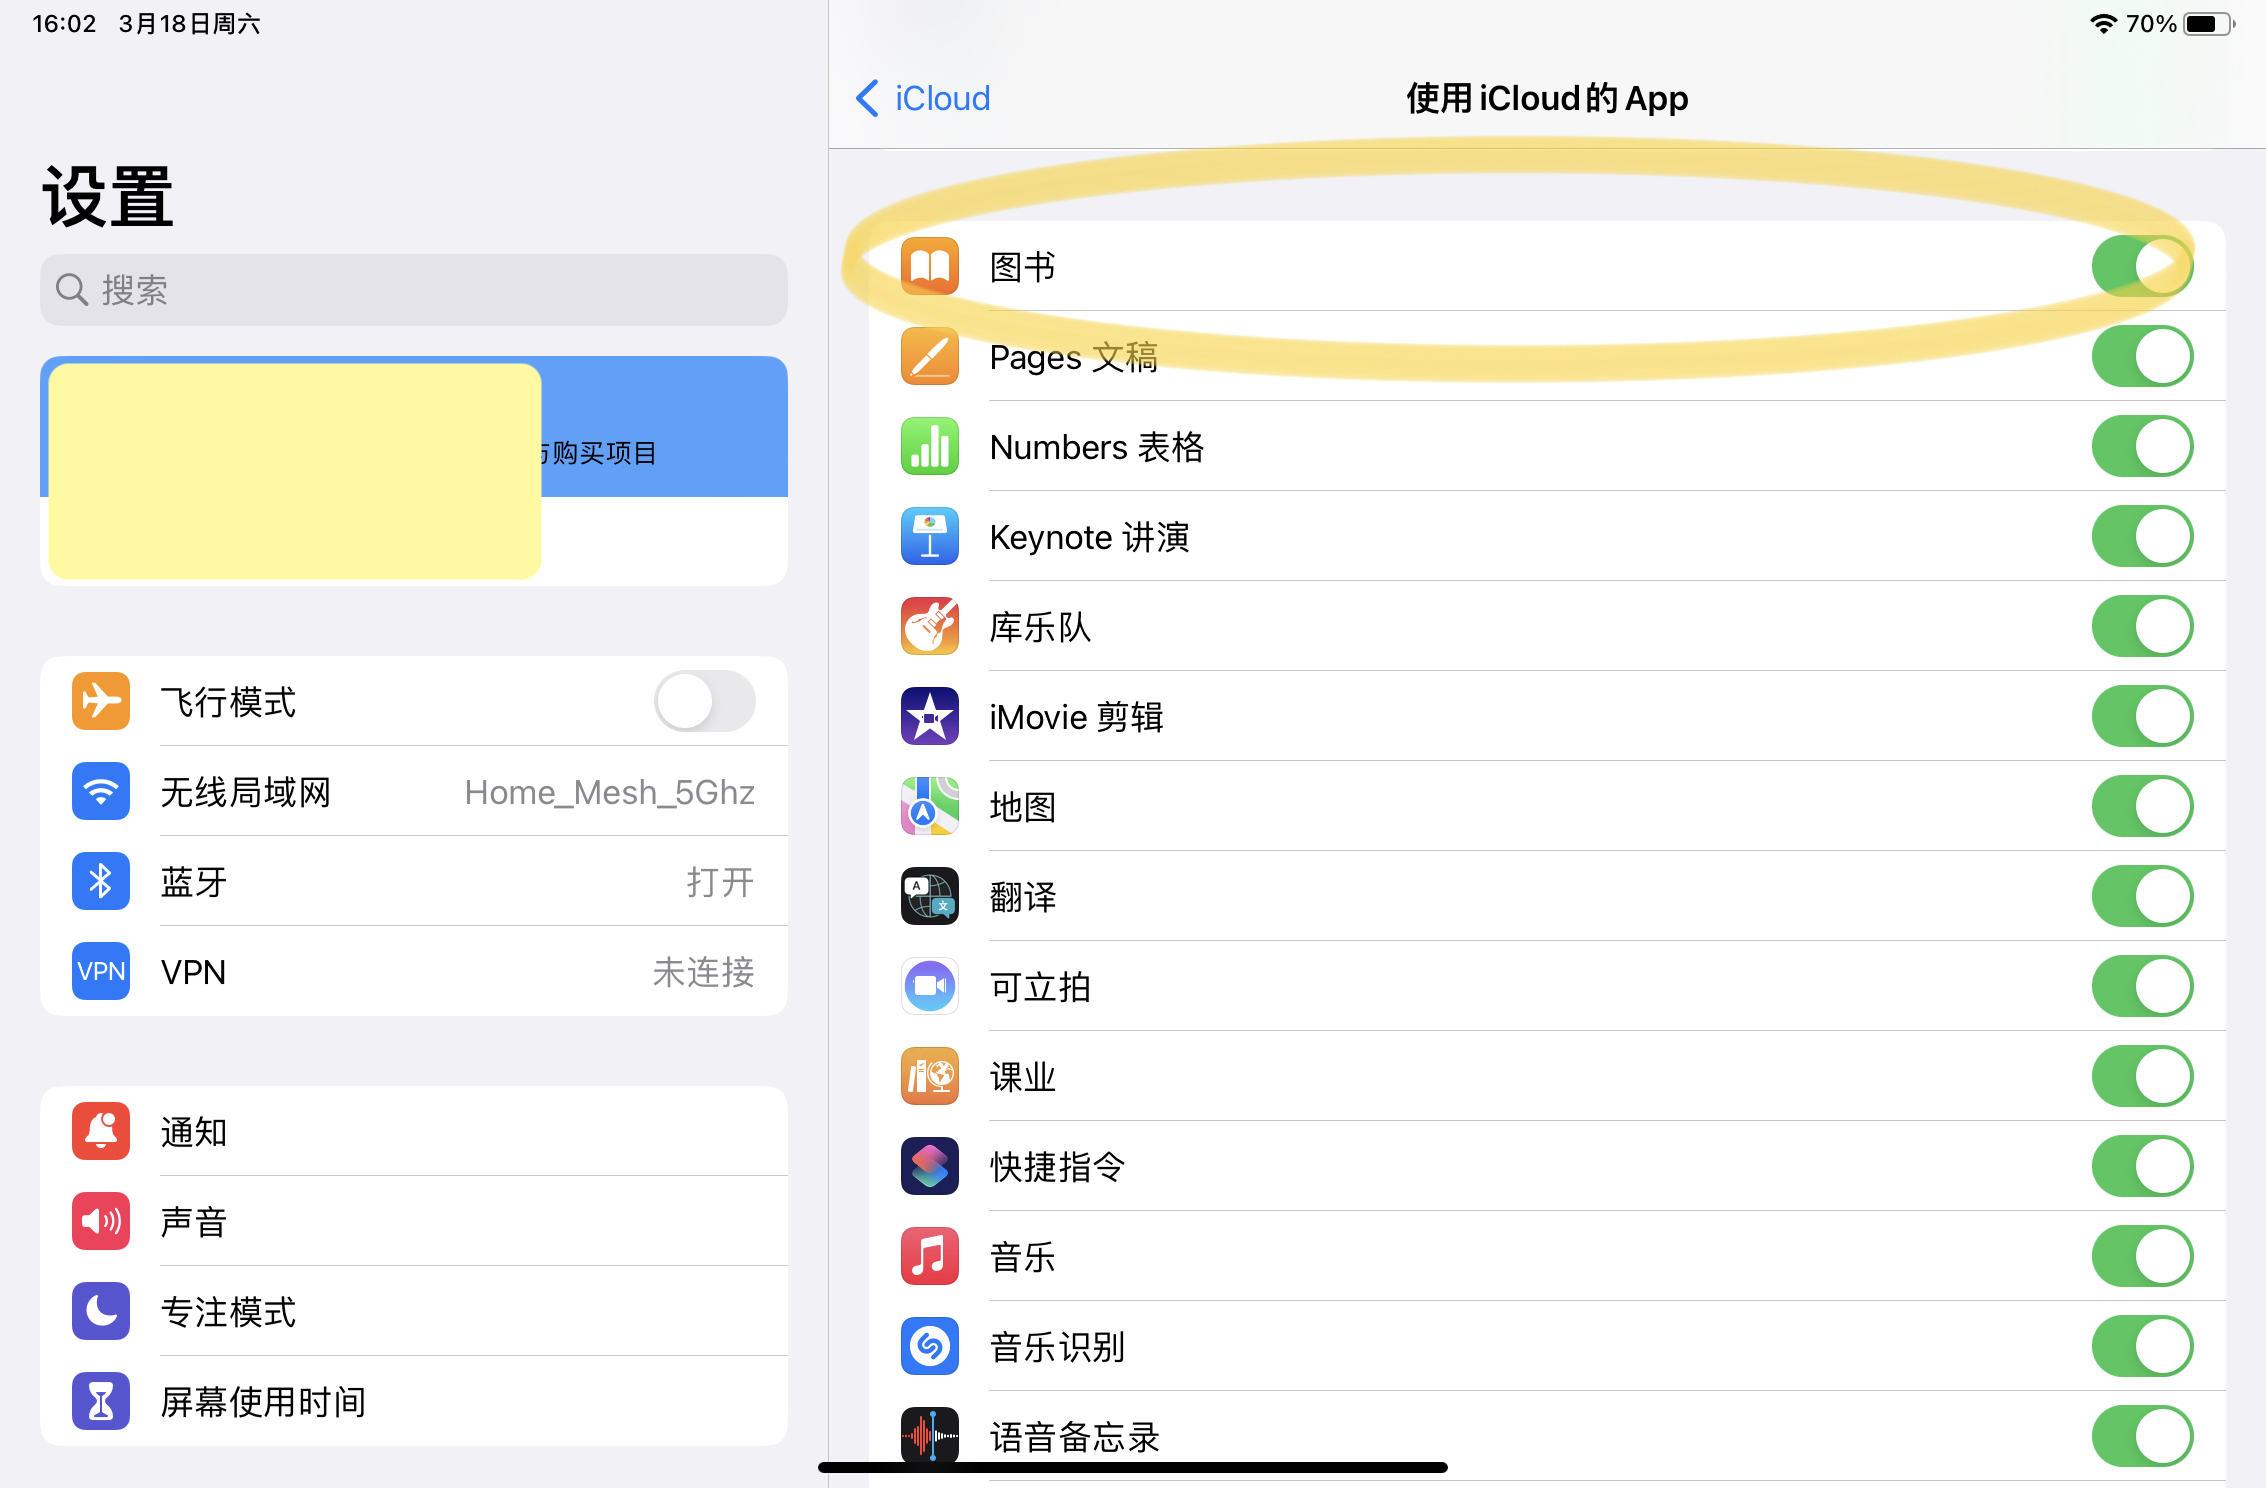
Make sure you’ve already turned on the backup settings of Apple Book App, so that you can synchronize all the informations across all the Apple devices you have.
确保你已经打开了Apple Book应用程序的备份设置,这样你就可以在所有你拥有的Apple设备之间同步所有信息。
Same on macOS. Then, have a great fun. Btw, the best experience you can get is using the other countries/regions’ Apple ID, but it’s not a good choice for everyone, it will lead other annoying problems such as payment method, reliability(Apple may ban your account) and so on. To cap, it’s up to you.
macOS上也是如此。然后,尽情享受。顺便说一下,你可以通过使用其他国家/地区的Apple ID来获得最佳体验,但这不适用于每个人,它会带来其他令人烦恼的问题,比如支付方式、可靠性(Apple可能会封禁你的账户)等等。总之,这取决于你。
Dictionary & Spotlight & Lookup
Do you unlock your phone, find an app, open it, wait for it, type the words, wait for it, simply because you just wanna figure out some words’ meanings? Don’t you feel it’s such a hassle? Here’s a better option for you.
你是否因为只是想查找一些单词的含义,而需要解锁手机、找到应用程序、打开它、等待它,然后输入文字、等待它,感觉非常麻烦?这里有一个更好的选择。
Spotlight – The tool that you maybe haven’t fully utilized its potentiality. Pull down on your home screen or lock screen, type random words you’re looking for, even without unlock your iPhone or iPad. Pretty handy, huh? And on macOS, the shortcut of the Spotlight is “COMMAND + SPACE”.
Spotlight——这个工具,你可能还没有充分发挥它的潜力。在你的主屏幕或锁定屏幕上向下拉,输入你要查找的随机单词,甚至不需要解锁你的iPhone或iPad。相当方便,对吧?在macOS上,Spotlight的快捷键是“COMMAND + SPACE”。
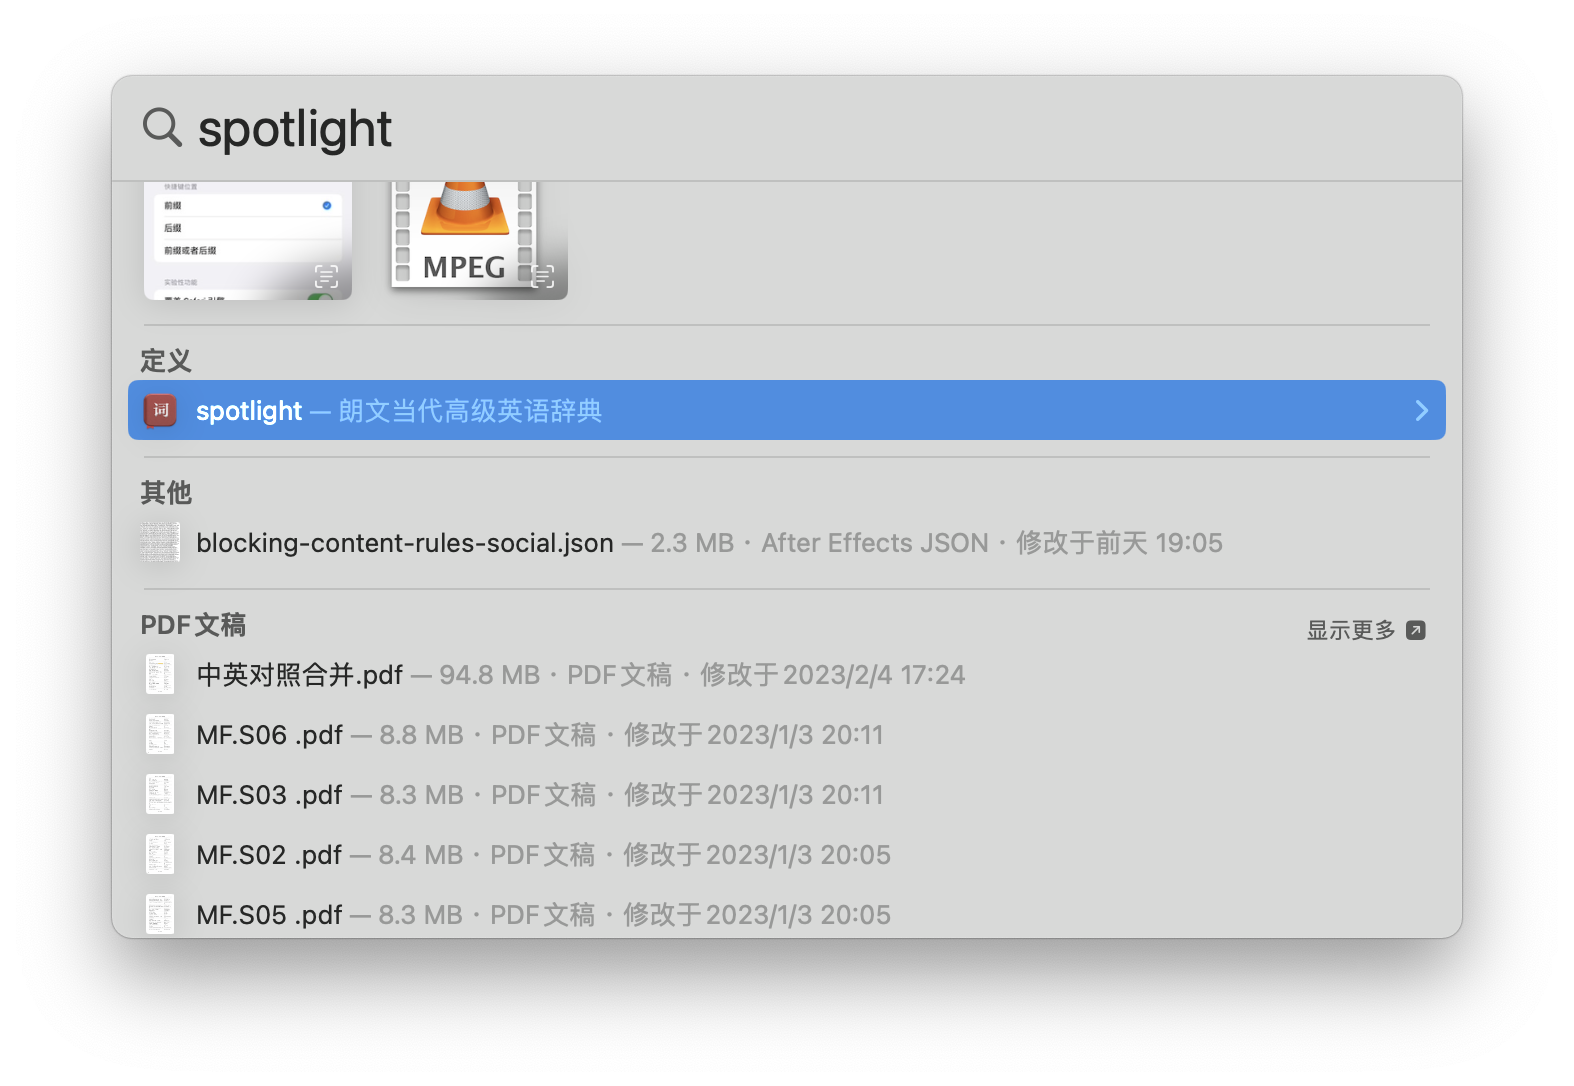
macOS
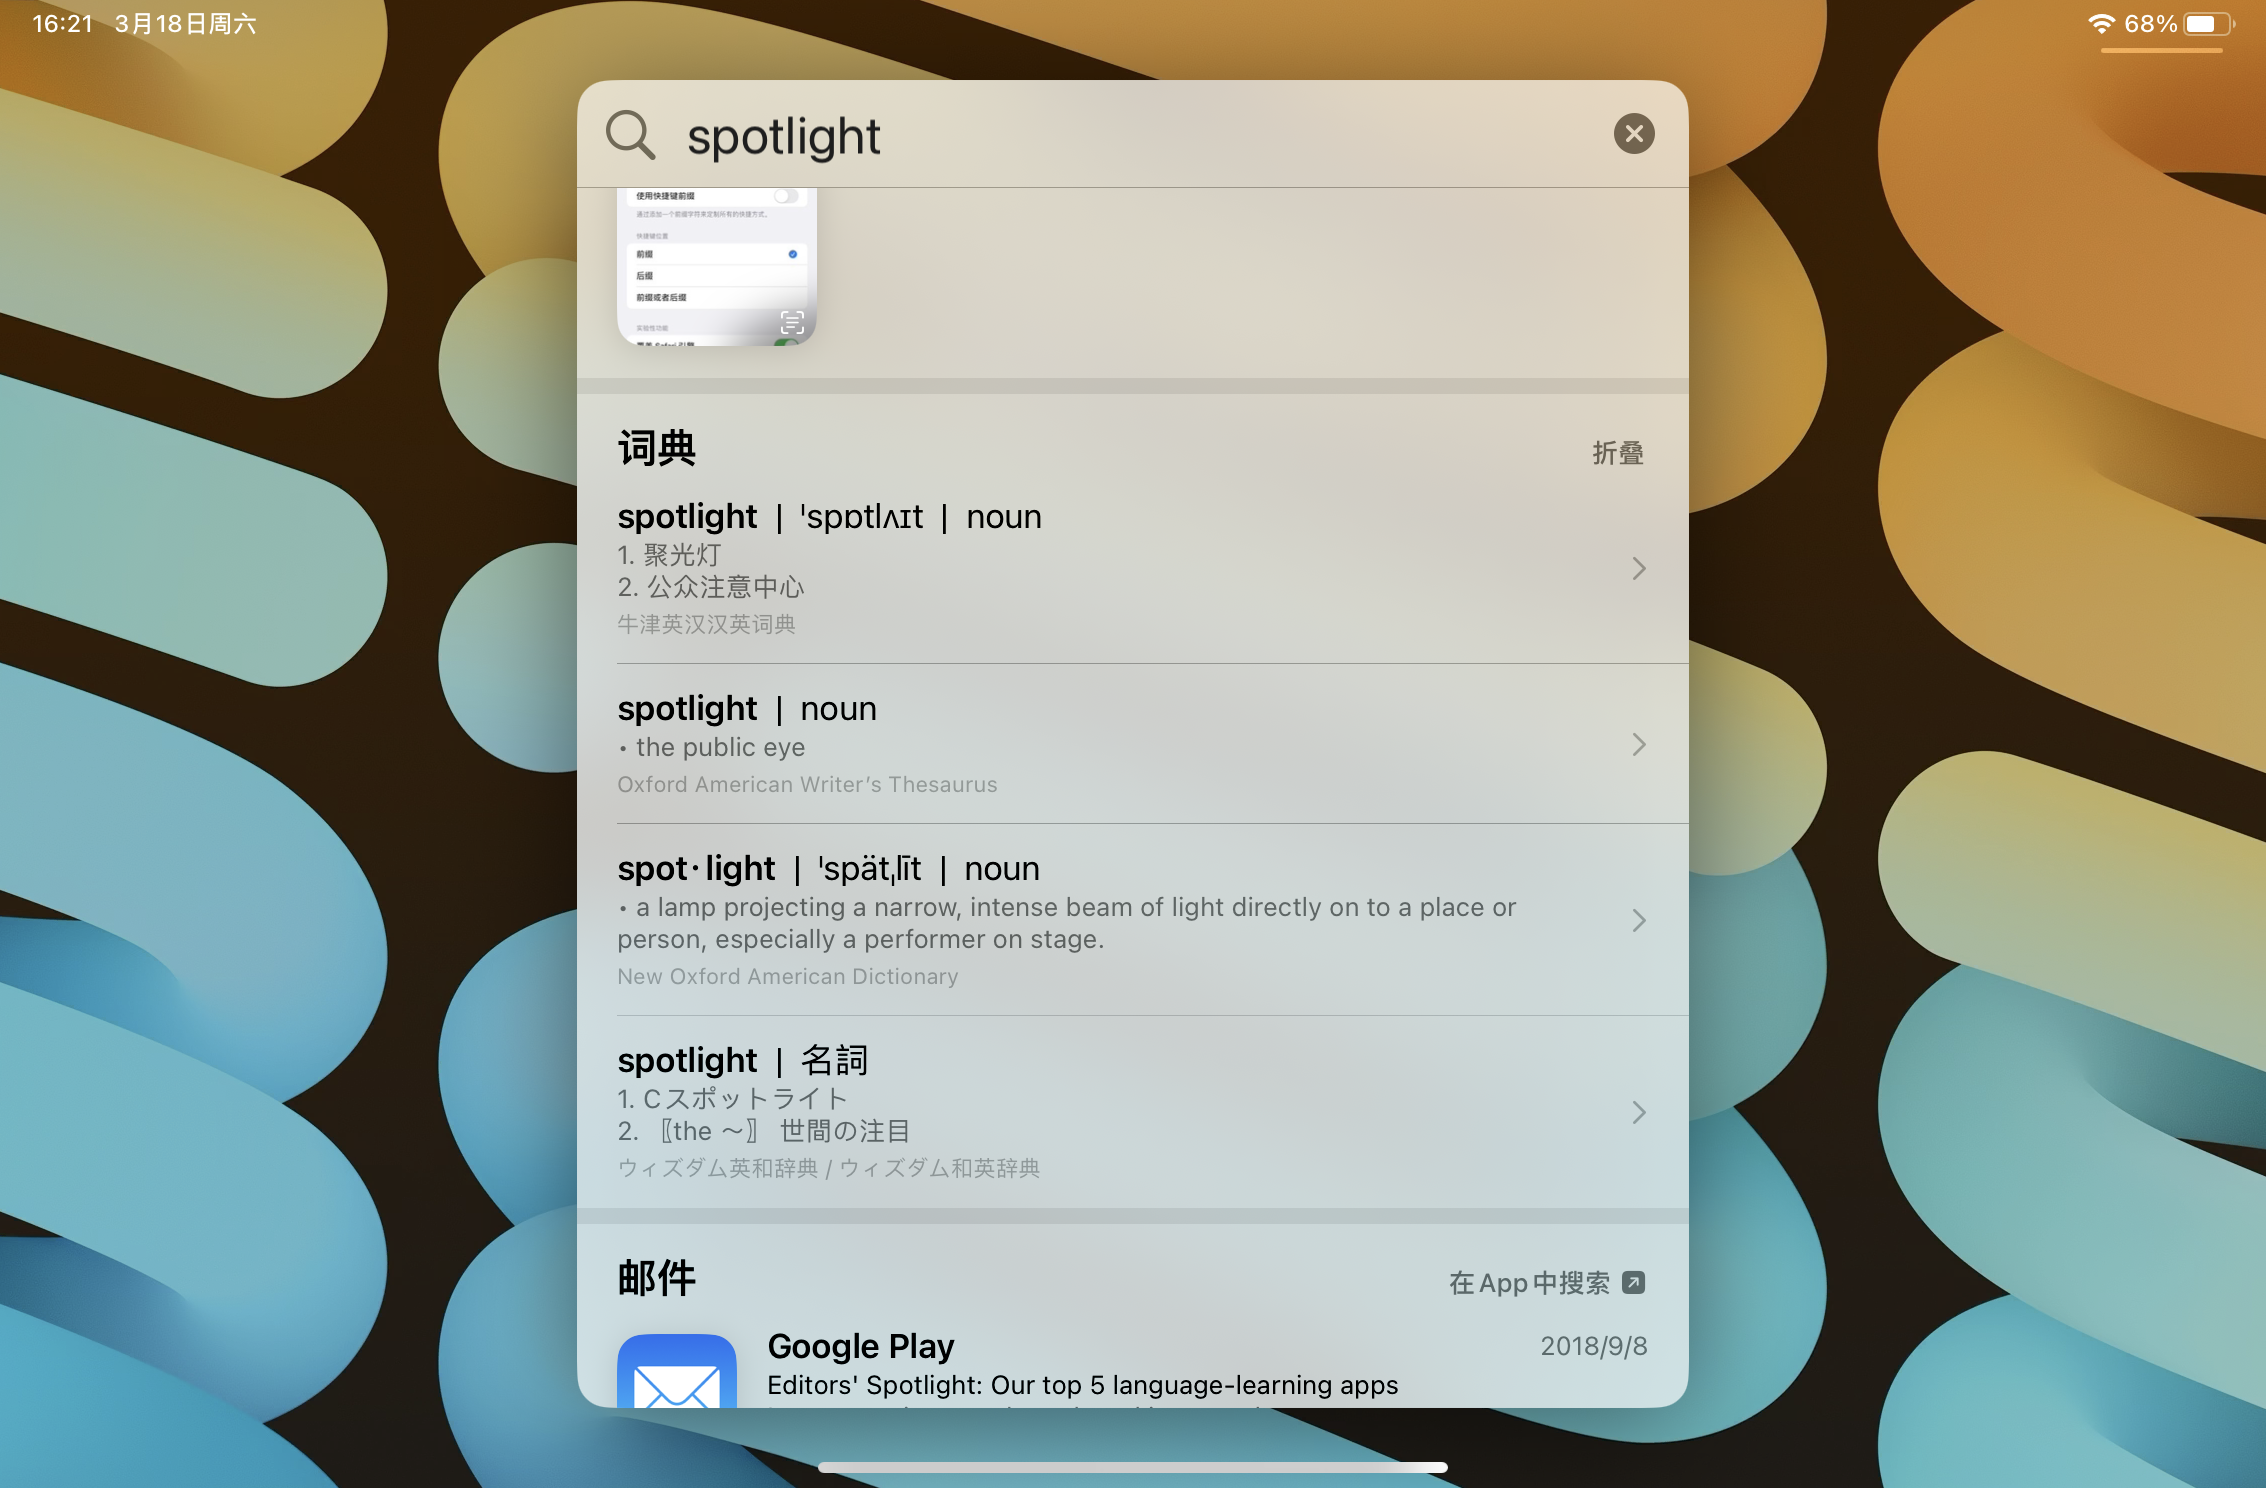
Then dictionary, maybe you’re not satisfied with the default dictionaries, you want more. Through Setting – General – Dictionary on your iPhone and iPad, select some dictionaries you prefer. Once you’ve downloaded and clicked on, you can use it in the spotlight.
然后是字典,也许你对默认的字典不满意,想要更多更棒的功能。通过在你的iPhone和iPad上的设置-通用-字典中,选择你喜欢的一些字典。一旦你下载并点击了它,你就可以在Spotlight中使用它。
Further, here’re some advance usages on macOS, you can import some third-part resources of dictionaries into the dictionary app. Yeah, here’s an individual app on macOS. But, thanks to Apple’s artificial limitations on iOS system, you can’t add third-part resources to the dictionary, and you can’t open an app like macOS does either.
此外,在macOS上,你可以将一些第三方字典资源导入到字典应用程序中。是的,在macOS上有一个独立的应用程序。但是,由于苹果在iOS系统上人为地限制了一些功能,你不能像在macOS上那样添加第三方资源到字典中,也不能像在macOS上那样打开一个应用程序。
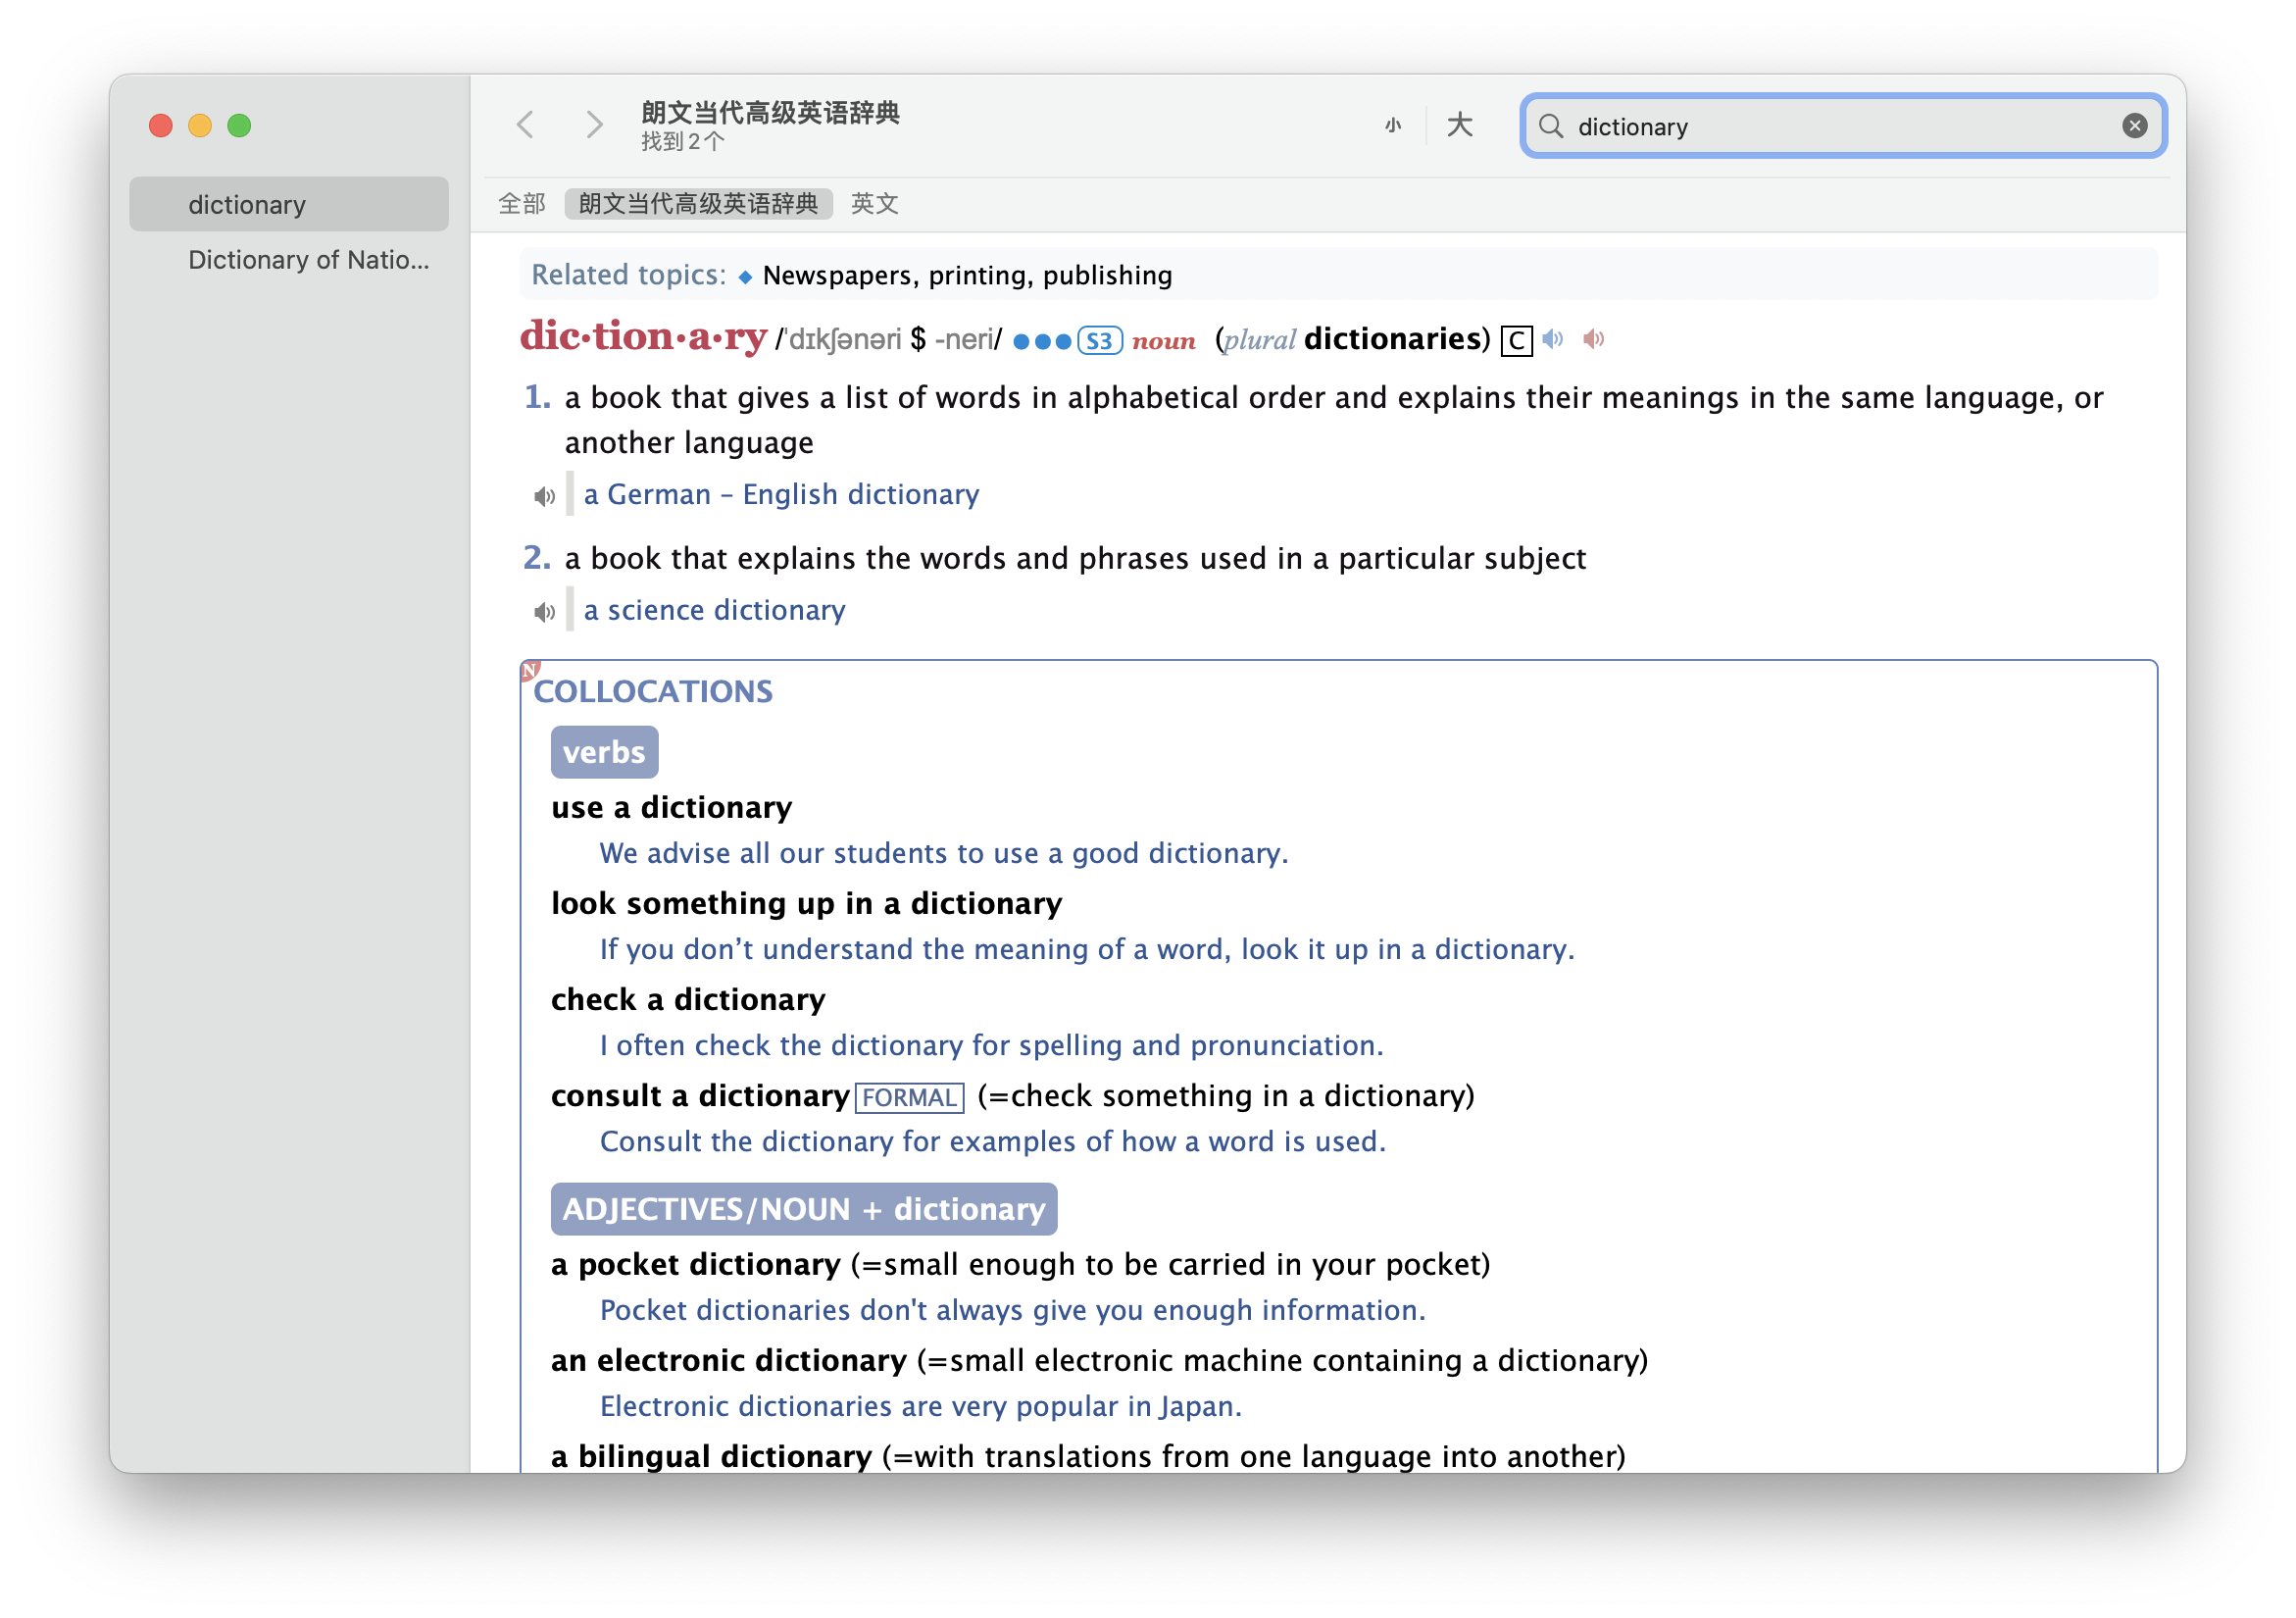
Dictionary on macOS
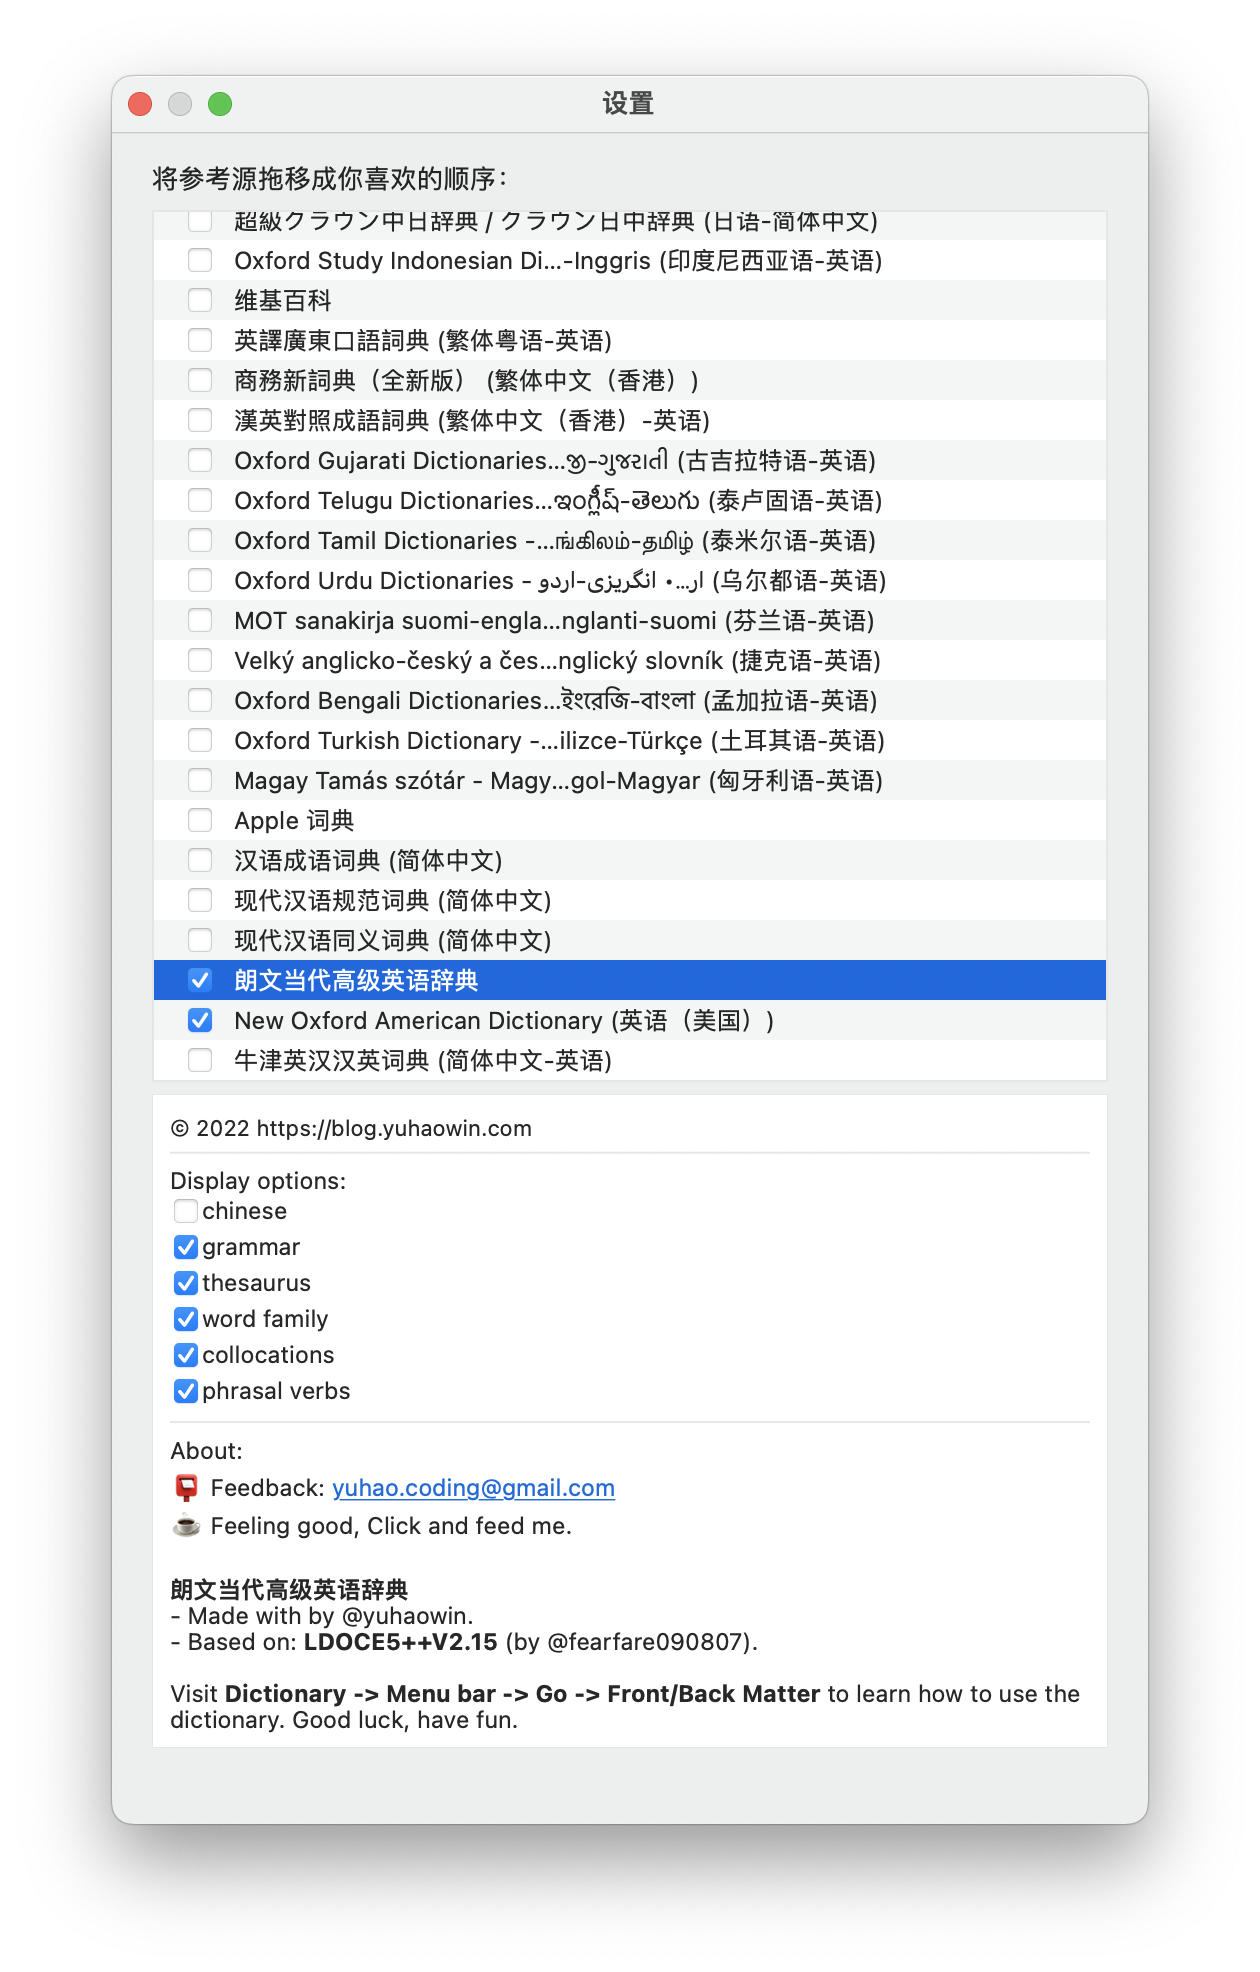
Select ones you prefer
Shortcut: COMMAND + ,
选一个你喜欢的词典
快捷键:COMMAND + ,
You can also find some third-part resources on the Internet, but I highly recommend this one, LDOCE, aka, Longman Dictionary of Contemporary English. There’re two main versions on the Internet, LDOCE5 and LDOCE6. So, what’s the difference between them, huh? Let Chat-GPT tell you.
你也可以在互联网上找到一些第三方资源,但我强烈推荐这个,LDOCE (Longman Dictionary of Contemporary English),即Longman当代英语词典。互联网上有两个主要版本,LDOCE5和LDOCE6。那么,它们有什么区别呢?让Chat-GPT告诉你。
—————————
LDOCE 5 is the 5th edition of the dictionary, which was published in 2009. This edition features over 230,000 words, phrases, and meanings, as well as over 165,000 examples of how to use the words in context. It also includes a CD-ROM with interactive exercises and games to help users improve their English language skills.
LDOCE 5是该词典的第5版,于2009年出版。该版本包含超过230,000个单词、短语和含义,以及超过165,000个单词的使用示例。它还包括一个带有交互式练习和游戏的CD-ROM,帮助用户提高英语语言技能。
LDOCE 6, on the other hand, is the most recent edition of the dictionary, which was published in 2019. This edition features over 300,000 words, phrases, and meanings, as well as over 165,000 examples of how to use the words in context. It also includes new features such as the ability to search for words using voice commands, and a mobile app that allows users to access the dictionary on the go.
另一方面,LDOCE 6是该词典的最新版本,于2019年出版。该版本包含超过300,000个单词、短语和含义,以及超过165,000个单词的使用示例。它还包括新功能,如使用语音命令搜索单词的能力,以及一个移动应用程序,允许用户随时随地访问词典。
In summary, LDOCE 6 is an updated and expanded version of LDOCE 5, with more words, features, and tools to help users improve their English language skills.
总之,LDOCE 6是LDOCE 5的更新和扩展版本,拥有更多的单词、功能和工具,帮助用户提高英语语言技能。
—————————
Why Apple Dictionary App? Let me explain it for you.
为什么使用苹果字典应用程序?让我为你解释一下。
1. It’s a mono-language/English-English dictionary.
2. Each example sentence has real human pronunciation. (English English, if you prefer American accent, it can’t satisfy you well at least at this part, but we can progress that problem through some alternative ways) But each single word has two pronunciations.
3. Word family, thesaurus, collocation and so on. As the literal meanings of these names, this book not only explain the words you’re looking for, and also list related words, synonyms, phrases, idioms. So not like some dual-languages dictionaries, you’re not gonna only know the meaning of the words in translation, you can master the words with this dictionary’s help.
4. Don’t be panic about mono-language dictionary, the explanations are pretty simple. Using the core vocabulary to explain the words is pretty easy to comprehend, the core vocabulary capacity is about 3000 words, they’re all not sophisticated words, spending 1-3 months would be sufficient. Remember don’t try to memorize all the spellings, thanks to modern tech tools, the writing and spellings are less essential than before, why do I say that? If you don’t believe that theory, just think about yourself, are your Chinese spellings getting worse since you’re no longer a student or the time you finished your ‘高考’? But it doesn’t influence your communication, the grammar checker will help you improve your spellings, I’m not saying spellings is not a big thing, I just think we can spend the very limited time on something more fruitful.
5. No ADs and free!
6. Of curse, there’re plenty and not bad dictionary apps we can choose especially on macOS, why we choose the built-in dictionary app? Yeah, that’s an easy one, simply because it’s built-in. Move your cursor on the word, force touch your touchpad with a single finger, then a window pops up, now you can see the definitions and explanations immediately, pretty handy if you ask.
1. 这是一本单语/英语-英语词典。
2. 每个例句都有真人发音。(如果你喜欢美式英语口音,它可能无法完全满足你的需求,但我们可以通过其他替代方法解决这个问题)但每个单词都有两种发音。
3. 词族、同义词词典、搭配等等。正如这些名称的字面意义,这本书不仅解释你正在寻找的单词,还列出了相关单词、同义词、短语、习语。因此,不像一些双语词典,你不仅会知道单词在翻译中的含义,还可以在这本词典的帮助下掌握这些单词。
4. 不要惊慌,单语词典的解释非常简单。使用核心词汇来解释单词非常容易理解,核心词汇容量约为3000个单词,它们都不是复杂的单词,花费1-3个月就足够了。记住不要试图记住所有的拼写,由于现代技术工具的发展,写作和拼写比以前不那么重要了,为什么我这样说?如果你不相信这个理论,只需想想你自己,你的汉语拼写是否自你不再是学生或你完成“高考”以来变得更糟糕了?但它并不影响你的交流,语法检查器将帮助你提高你的拼写,我并不是说拼写不重要,我只是认为我们可以把非常有限的时间花在更有成效的事情上。
5. 没有广告,而且免费!
6. 当然,我们可以选择很多不错的词典应用程序,尤其是在macOS上,为什么选择内置的字典应用程序?是的,这很简单,只是因为它是内置的。将鼠标光标移到单词上,在触控板上用一个手指强制点击,然后一个窗口弹出,现在你可以立即看到定义和解释,非常方便。
But due to macOS, we are still limited in few parts.
但是由于macOS的限制,我们仍然在一些方面受到限制。
– One, we can’t click on the button within the popped up lookup window to pronounce the word, which you do can use this function within the Apple dictionary app.
– Two, dark mode, the third-part dictionary sources commonly aren’t flawless, especially dark mode, but we can modify a specific file to work on that, but the pope up window of the lookup function can’t be repaired (but if you find a way, please let me know, thx).
– Three, the resources of dictionaries are very restricted. As apple usual, Apple Dictionary uses the exclusive format – 「.dictionary」, which isn’t a prevalent format over the mainstream. Unfortunately, the plenty great dictionaries are formatted as MDict, Stardict, GoldenDict, and stuff. They’re not available on macOS. You wouldn’t be limited within several selections, unless you converted them to the Apple dictionary format on your own. But trust me, that can’t be easy, even there’re some tutorials and tools you can find out on Internet, you have to fix several files errors before you actually use it within Apple Dictionary app, otherwise the experience would be complete a disaster.
– Dictionary doesn’t support JS(A scripting language). That means you can’t fold and unfold the selection such as thesaurus, word family, examples, phrases and so on. It will dazzle you if you list all possible features simultaneously, cause you can’t hide them. But if you choose hide all of them, you just hide all the merits of this dictionary, seem like we’re in a dilemma, right? Ok, at least we have an alternative way to avoid some of issues, not perfect, but can be better. Remember the fore-showed picture of the dictionary setting on macOS? It gives you some selection, if you uncheck the selection(like Chinese), it won’t show up. But to notice, not every third-part dictionary supports this feature.
– 一、我们无法在弹出的查找窗口内点击按钮来发音单词,但在苹果字典应用程序中,你可以使用这个功能。
– 二、暗黑模式,第三方词典资源通常不完善,特别是暗黑模式,但我们可以修改一个特定的文件来解决这个问题,但是查找功能的弹出窗口无法修复(但是如果你找到一种方法,请告诉我,谢谢)。
– 三、词典资源非常有限。和苹果一贯的做法一样,苹果字典使用独占格式 – 「.dictionary」,这不是主流的普遍格式。不幸的是,很多优秀的词典都是格式化为MDict、Stardict、Goldendict等格式,它们在macOS上不可用。除非你将它们转换为苹果字典格式,否则你不会受到几个选择的限制。但是相信我,这并不容易,即使你可以在互联网上找到一些教程和工具,在你实际在苹果字典应用程序中使用它之前,你必须修复几个文件错误,否则体验将是完全的灾难。
– 四、字典不支持JS(一种脚本语言)。这意味着你无法折叠和展开选择,比如同义词词典、词族、例句、短语等。如果你同时列出所有可能的特点,那会让你眼花缭乱,因为你无法隐藏它们。但是如果你选择隐藏它们,你只是隐藏了这个词典的所有优点,似乎我们陷入了两难境地,对吗?好吧,至少我们有一种替代方法来避免一些问题,虽然不完美,但可以更好。还记得在macOS上显示字典设置的图片吗?它给你一些选择,如果你取消选择(比如中文),它就不会显示。但需要注意的是,并不是每个第三方词典都支持这个功能。
Nevertheless, after the comprehensive consideration, if that’s still accessible for you, the highly recommended dictionary on macOS is this one —— 《朗文当代高级英语辞典》by yuhaowin. You can find out the download link at this website. It’s handy to install and use.
不过,如果综合考虑后,你能接受上面这些缺点的话,在macOS上强烈推荐的词典是《朗文当代高级英语辞典》by yuhaowin。你可以在这个网站上找到下载链接。它很方便安装和使用。
If you’re an Apple guy, I guess you would love the dark mode feature. But as I fore-mentioned, this dictionary doesn’t support dark mode perfectly, here’s the remedy. Find this CSS file at this following path, and add the codes into it at the end.
如果你是苹果用户,我猜你会喜欢暗黑模式功能。但正如我之前提到的,这个词典并不完美地支持暗黑模式,这里有一个解决方法。在以下路径中找到这个CSS文件,并在末尾添加代码。
/Users/your user name/Library/Dictionaries/LDOCE5.dictionary/Contents/Resources/DefaultStyle.css
(E.g, mine is “/Users/ts/Library/Dictionaries/LDOCE5.dictionary/Contents/Resources/DefaultStyle.css”)
@media (prefers-dark-interface)
{
html {
-apple-color-filter: apple-invert-lightness();
}
a {
-apple-color-filter: apple-invert-lightness();
color: -webkit-link;
}
img {
filter: invert(0);
}
}
The lookup window still isn’t perfect, but at least it fixes the error within the dictionary app. BTW, I suggest you turn off the Chinese selection since you’re gonna immerse the language environment. I’m not gonna say this’s the best option of dictionary apps on macOS, but it has its own special advantages, so, depending on you.
虽然查找窗口仍然不完美,但至少它修复了字典应用程序中的错误。顺便说一句,我建议你关闭中文选项,因为你需要沉浸在语言环境中。我不会说这是macOS上最好的字典应用程序选项,但它有它自己的特殊优点,所以,这取决于你。
Without of persistence about built-in apps, there’s several ’‘better‘’ chooses. Here’s a quick peek about it, maybe I’ll give you the tutorial in the next article~
放弃对内置应用程序的坚持,这有几个‘’更好‘’的选择。在这我给你简单的展示一下界面,也许我会在下一篇文章中给你介绍教程~
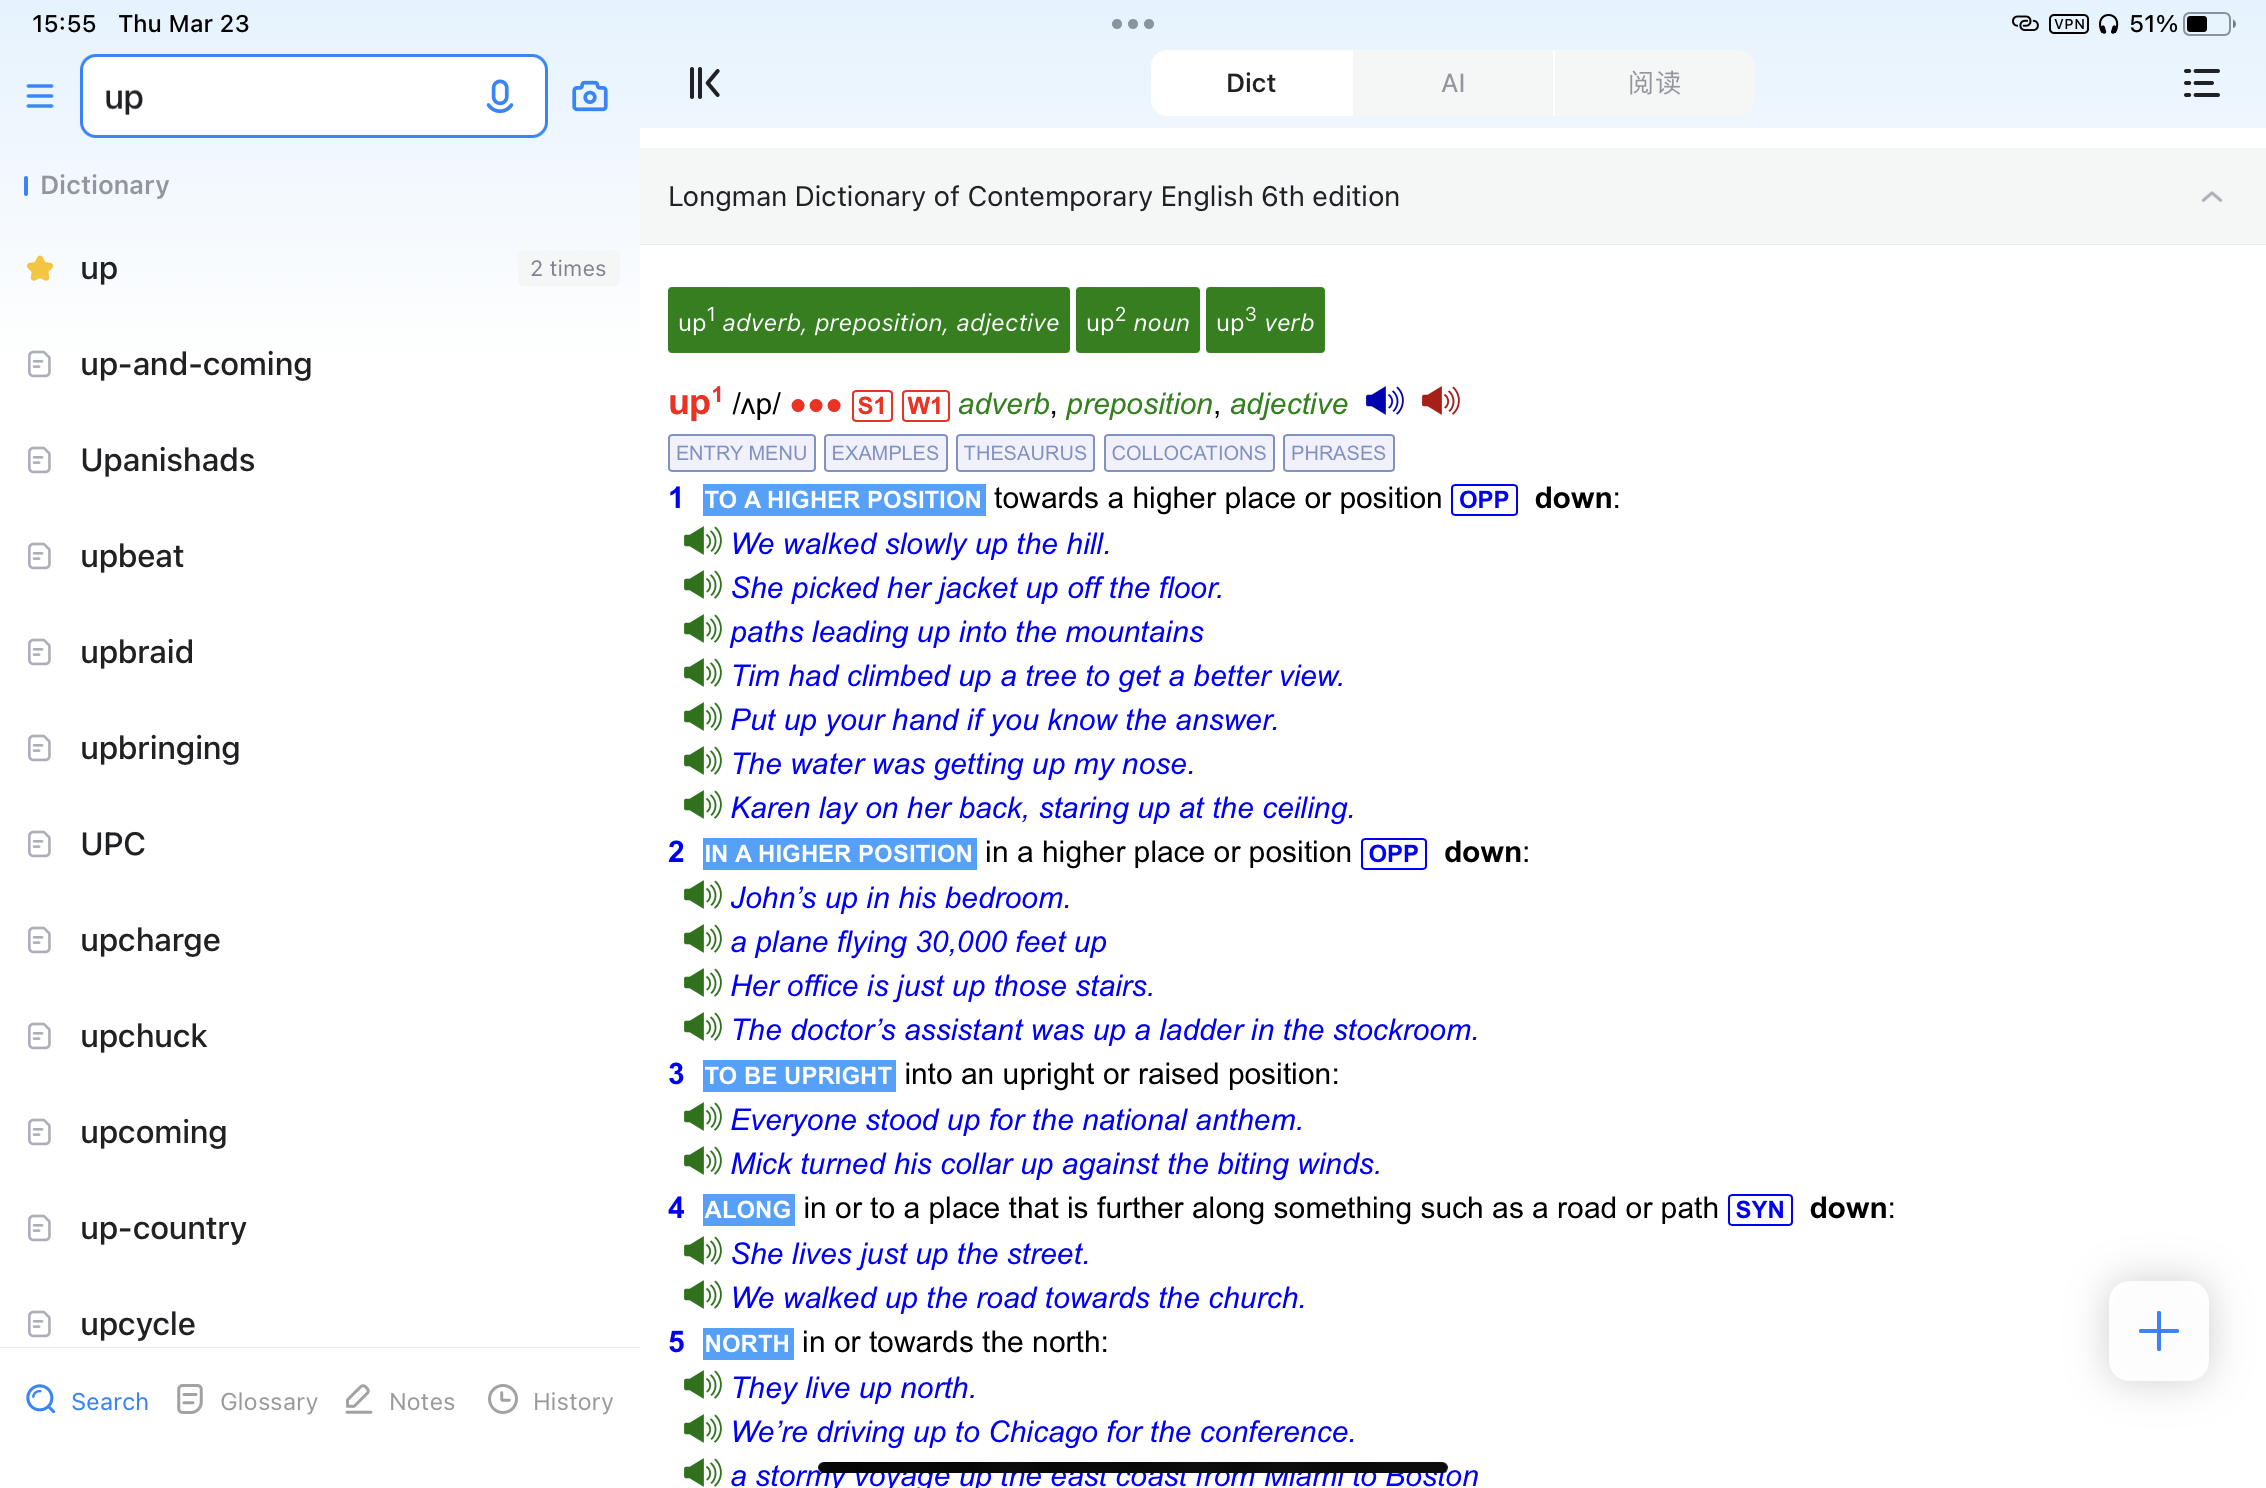
No ads, beautiful layouts, free, JS available.
没有广告、界面优美、免费、支持JS脚本。
Spelling and Grammar Checker
Whatever you name them, this feature has already been in you devices, this is a great feature, relief you from endless self-doubt of spelling, and that’s the reason I recommend you don’t have to memorize the spelling, the pronunciation and the phrases and example sentences are much more essential.
无论你如何称呼它们,这个功能已经存在于你的设备中,这是一个很棒的功能,让你从无尽的拼写自我怀疑中解脱出来,这也是我推荐你不必记忆拼写的原因,发音和短语和例句更为重要。
I mean how many times you actually write English words in the real life besides you’re a student nowadays? And how difficult these words can be? Once you‘ve remembered the pronunciation, it will pop up several possible words after you typed several first letters or you just spelled the several words in a wrong way, but it will correct it automatically after you tapped on the space key on keyboard. This scenario is similar to typing in Chinese, like we ZheJiang Province People don’t usually distinct ‘’前后鼻音’’ like the phonetic symbols in English, /n/ and /ŋ/. But it doesn’t bother me, since I can use ‘模糊音’(Fuzzy Pinyin) function in input, and it doesn’t influence my daily communication.
除非你现在是一名学生,否则你有多少次在现实生活中实际手写英语单词?再者,这些单词有多难?一旦你记住了发音,当你输入几个首字母或者你拼错了某些单词时,它会弹出几个可能的单词,但是在你按下键盘上的空格键之后,它会自动纠正。这种情况类似于输入中文,就像我们浙江人不通常区分英语中的音标符号/n/和/ŋ/。但这并不困扰我,因为我可以使用输入中的“模糊音”功能,况且这也不会影响我的日常交流。
I watched lot of YouTube recently, these people who learnt English well on their own lighted me, they didn’t spend much time on memorizing spellings either. I mean really, why should I spend lot of time on these? The modern technology is pretty advance, and I’m a tech guy, it’s just not worth.
最近我看了很多YouTube视频,那些自学英语学得很好的人给了我启示,他们也没有花太多时间去记忆拼写。我现在开始怀疑为什么我要花那么多时间在这上面呢?现代技术非常先进,而我时常拥抱新技术,背单词拼写根本不值得。
Podcast & RSS Subscribe
How many apple built-in apps haven’t been discovered? This must be one of them. I was a Podcast fan when I was a sophomore, it’s a stressless way whether you’re gonna improve your English listening, you’re on your way home, or you wanna some gossips… There’re alway some suitable shows for you.
还有多少个苹果内置应用程序没有被发现呢?这一定是其中之一。我在大二的时候就是一个播客迷,无论你是要提高英语听力,还是在回家的路上,或者想听一些八卦…总会有一些适合你的节目。
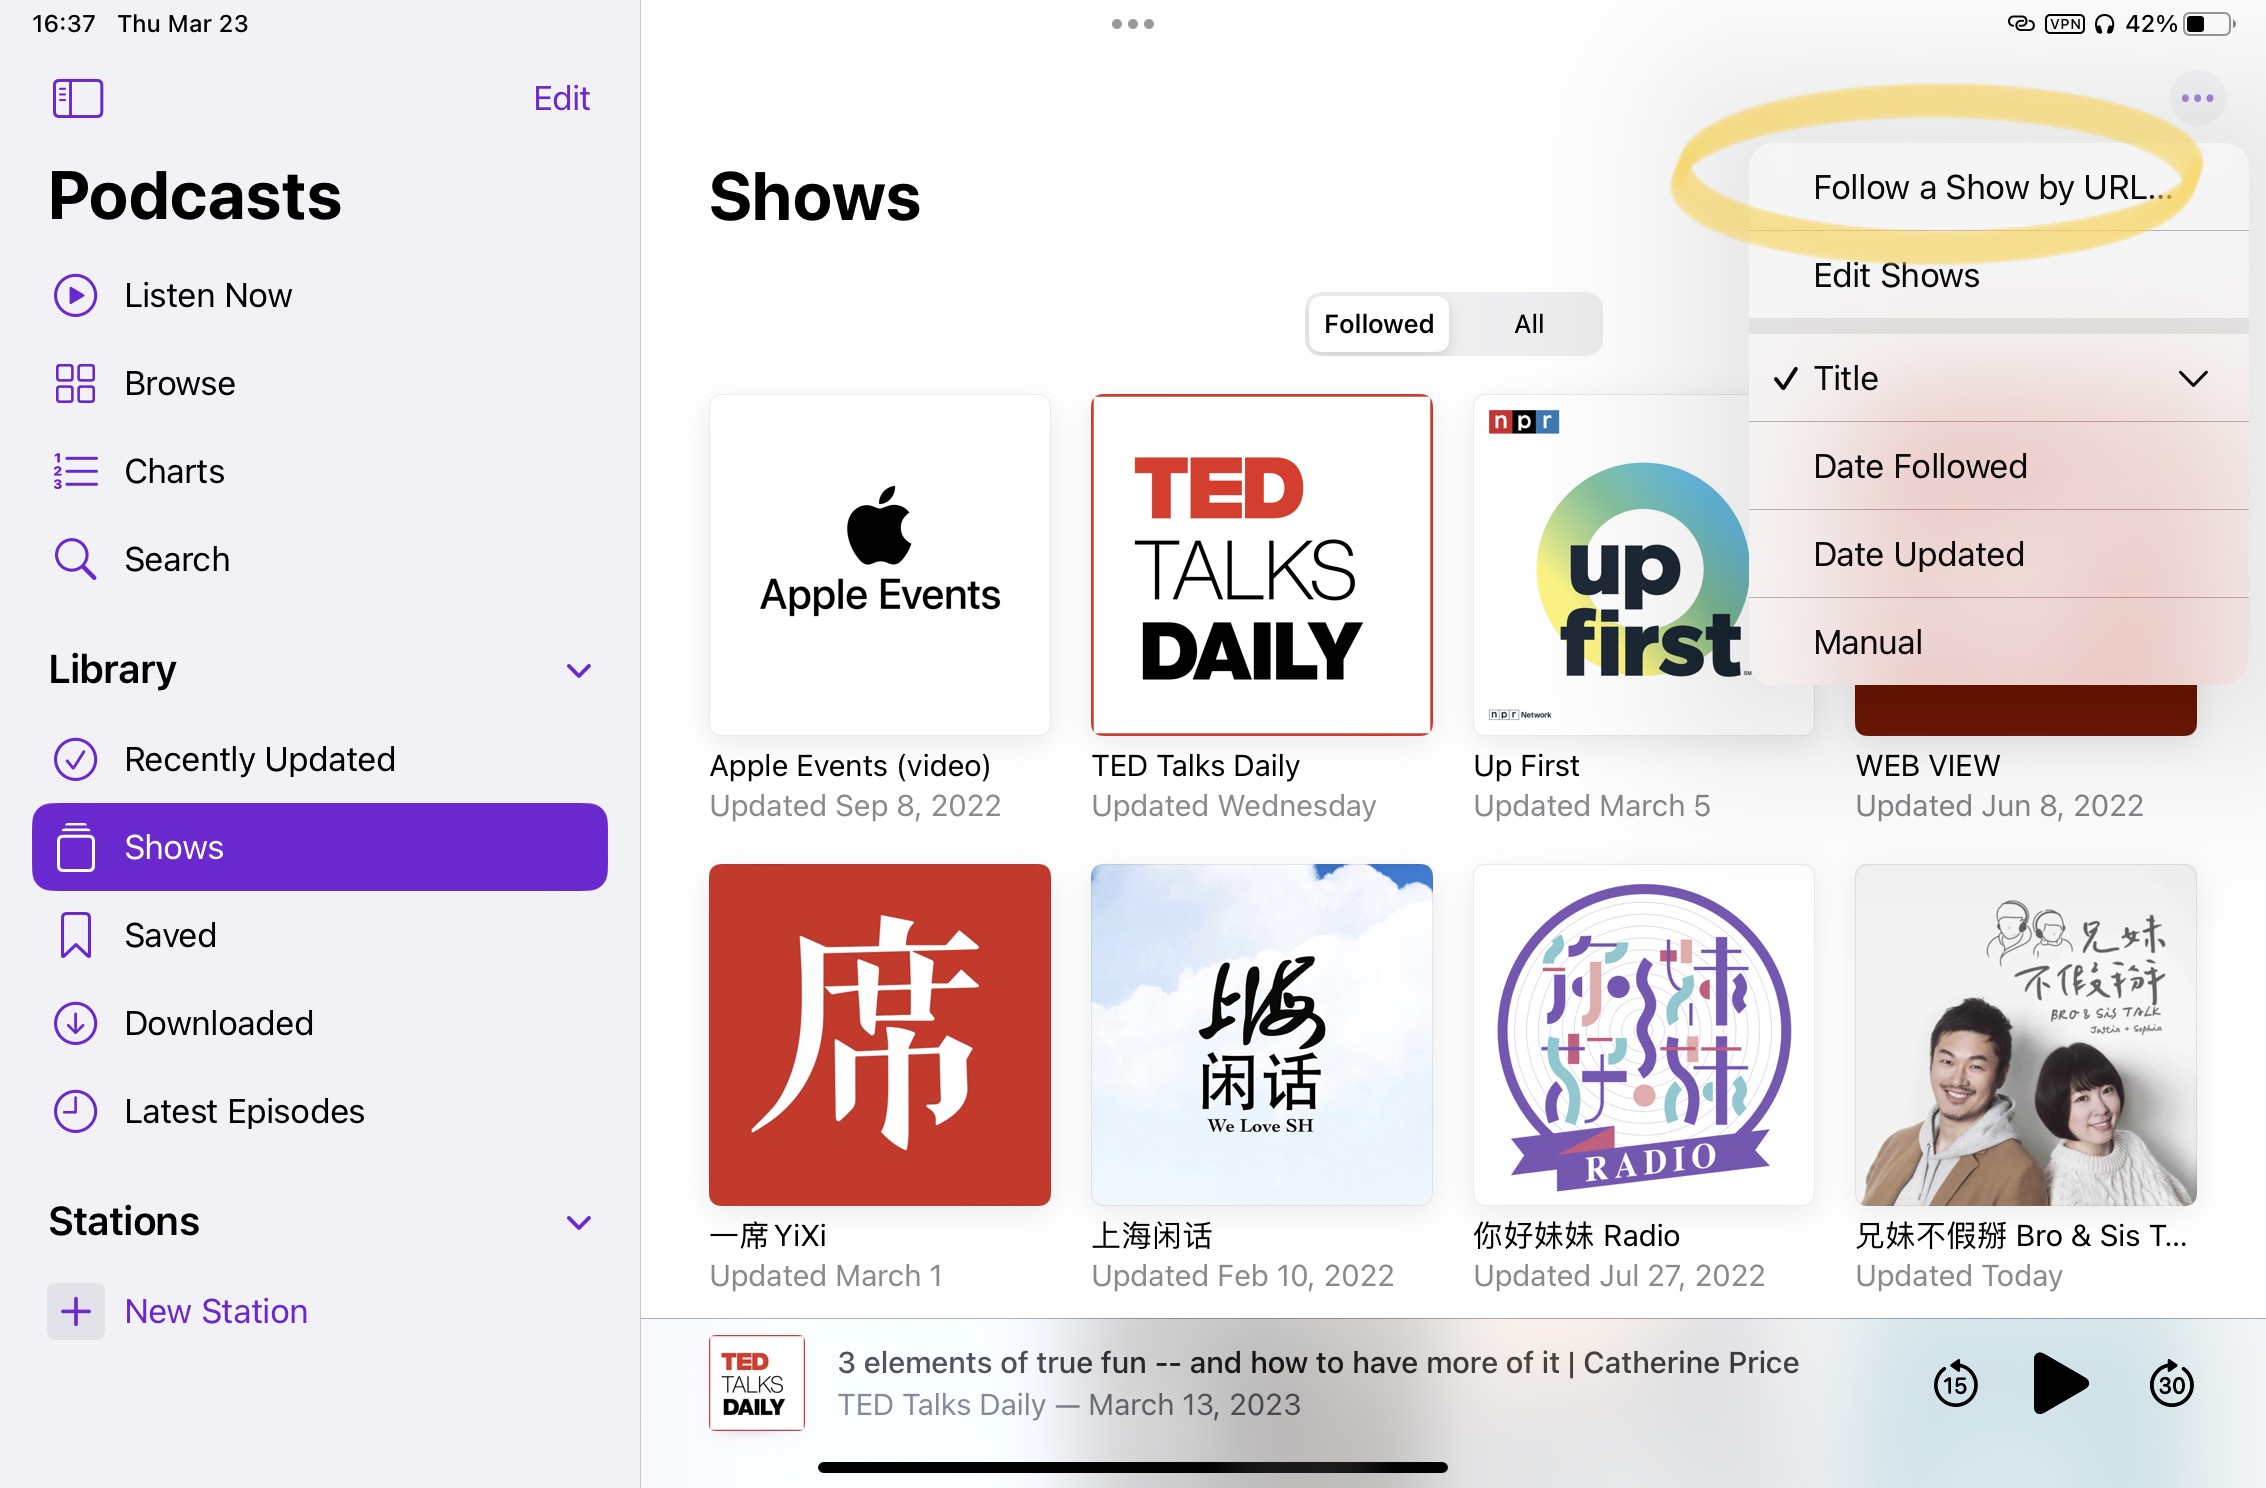
Because of some reasons, your chooses are limited, here’s the website can help you find out the much more spectacular shows in the cyberspace.
由于某些原因,你的选择受到了限制,这个网站可以帮助你在网络空间中找到更多精彩的节目。
Explaining what RSS is cant’t be possible within several words, but I can tell you RSS is more than podcast subscriptions, and also instagram, twitter, personal blogs, Weibo, and so on… To discover its potential if you want to know more.
几句话解释不清RSS是什么,但我可以告诉你,RSS不仅仅是播客订阅,还包括Instagram、Twitter、个人博客、微博等等…如果你想知道更多,请深挖它的潜力。
Accessibility / Spoken Content
Now, the final part of this article, Accessibility. As its name shows, accessibility is used to help disable persons, btw, Apple’s accessibility is industry-leading, Apple really makes a lot of efforts with it. But for us English learners, it can be more than the ‘accessibility’.
现在,来到这篇文章的最后一部分,无障碍功能。顾名思义,无障碍功能用于帮助残障人士,顺便说一句,苹果的无障碍功能是业界领先的,苹果确实在这方面做出了很多努力。但对于我们英语学习者来说,它可以不仅仅是“无障碍功能”。
First, you can go to ‘Setting – Accessibility – Speak Selection’ to turn on this function on iOS devices. As for macOS, ‘Setting – Speak Content’. And make sure that you turned on “Highlight Content” feature, so that you can monitor which one sentence and word is currently being spoken.
首先,你可以在iOS设备上进入“设置-无障碍-朗读选择”来打开这个功能。对于macOS,是“设置-朗读内容”。并确保你打开了“高亮内容”功能,这样你就可以监视当前正在朗读的句子和单词。
Then, you can choose the voice that is used, in my personal experience, Siri’s voice sounds pretty good. Thanks to the AI thriving, Siri’s voice now is really natural and sometimes you even can hear the tone and the gap between words and words when Siri speaks. But due to limited AI computation of Intel processor, it sounds less natural and human-like on Intel Mac, but since new product lines all switch to the Apple Silicon(Apple’s own Processor), the structure architecture is basically same to the A series Chips, the Siri’s Speaking should be same as iOS devices, unfortunately I don’t have the new Mac, I can’t help you experience it, I just hope my thoughts are right.
然后,你可以选择使用的语音,在我个人的经验中,Siri的声音听起来非常好。由于人工智能的发展,Siri的声音现在非常自然,有时你甚至可以听到Siri说话时单词和单词之间的语调和间隔。但由于Intel处理器的有限人工智能计算能力,它在Intel Mac上听起来不太自然和类人,但是由于新的产品线都转向了苹果自己的处理器(苹果自己的芯片),结构架构基本上与A系列芯片相同,Siri的说话应该与iOS设备相同,不幸的是我没有新的Mac,无法帮助你体验它,我只希望我的想法是正确的。
The usage is pretty easy, on iOS, long-press the words or sentences you want to hear, and press the speak button, the method just like I fore-mentioned lookup feature. And things are little different on macOS, it supports shortcuts, as the following picture I show you, the default shortcut is “Option+Esc”.
使用方法非常简单,在iOS上,长按你想听的单词或句子,然后按下朗读按钮,方法就像我之前提到的查找功能一样。在macOS上,事情有点不同,因为它支持快捷键。如下图所示,默认的快捷键是“Option+Esc”。
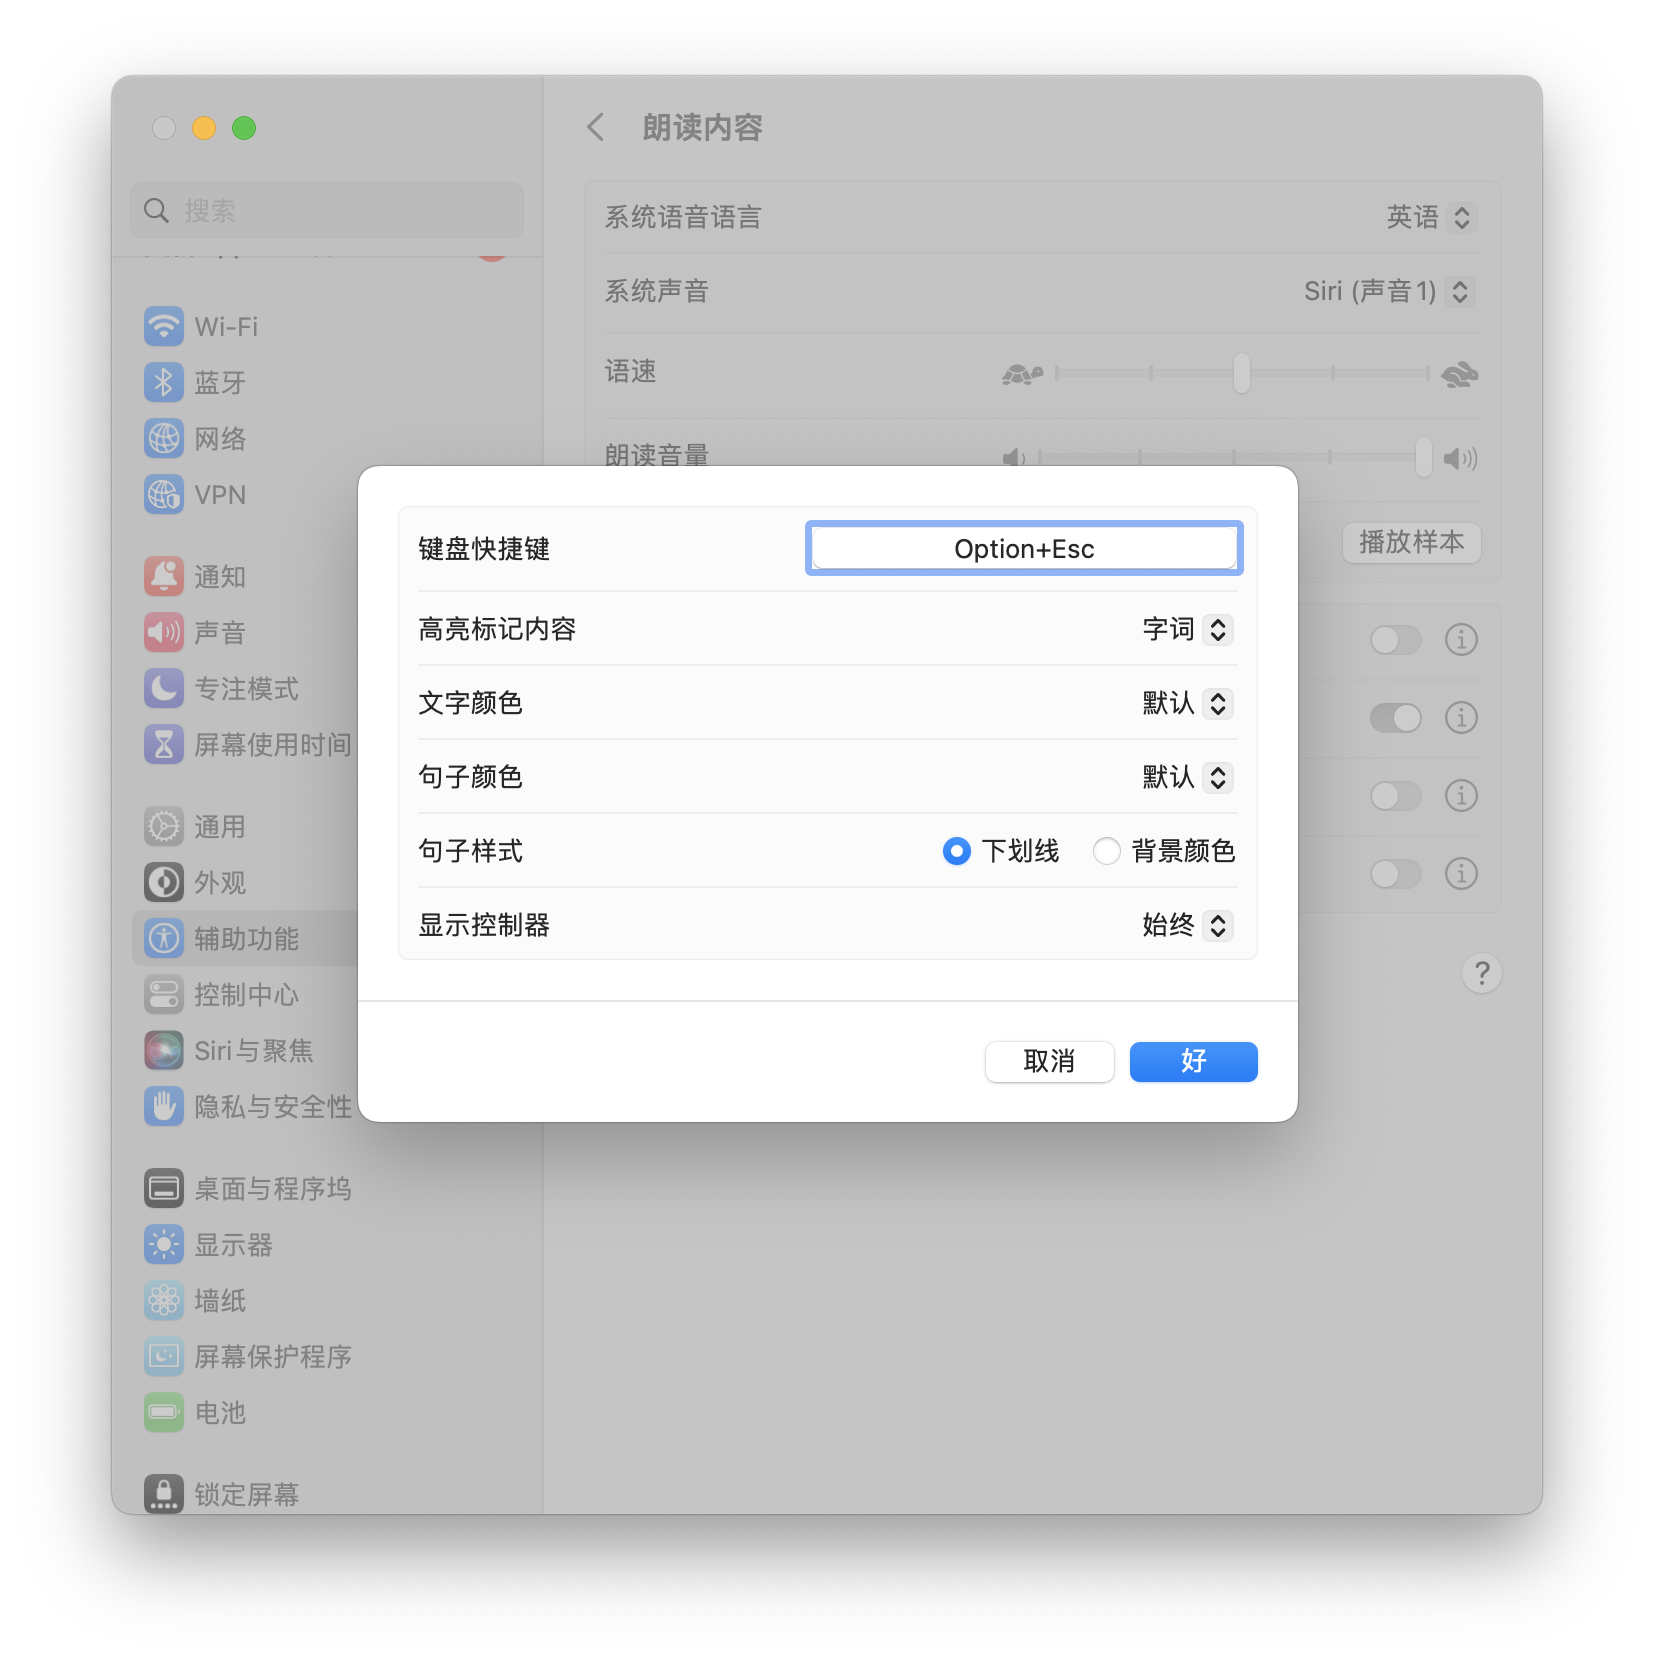
That’s all, then go have fun in the cyberspace.
Ok,开心地去互联网上冲浪吧~
Spoiler Warning:
I know you won’t be satisfied with these elementary tools, so maybe I’ll take you further to exploit the fabulous cyberspace someday, like the most prevalent tool nowadays – ChatGPT, or even telegram. Since I don’t wanna risk it, I definitely won’t post it on the WeChat channel, so if you’re interested in, go to my website to find out after I post it.
剧透警告:
我知道你不会满足于这些基本的工具,也许有一天我会带你更深入地探索美妙的网络空间,比如现在最流行的工具- ChatGPT,甚至是Tele。我不想“作”,在公众号上我肯定不会发布这些内容。所以感谢你来到了这里,你可以下滑到本站最后,找到我的RSS订阅链接,这样当我发布新文章时,你就会第一时间收到通知。