Reading view

There are new articles available, click to refresh the page.

A brief history of Mac ports – low speed

Like most computers, Apple’s Macs have had five main types of port to allow them to be connected to external devices: low speed intended commonly for keyboards and other input devices, high speed often for connection to external storage, display, network, and audio. This brief history concentrates on the first of those.

The original 128K Macintosh launched in 1984 came with a good range of ports, including two RS-422 serial ports and a DB-19 supporting external floppy disk drives. It had separate mouse and keyboard ports, DE-8 and RJ-11 respectively. In 1986, Apple’s IIGS brought the first implementation of a new type of port, Apple Desktop Bus or ADB, that was introduced to the Mac SE and II the following year, replacing the original mouse and keyboard ports.

ADB

At the time, ADB was unique to Apple’s computers, although it was later adopted by NeXT. This uses a 4-pin mini-DIN connector to hook up a daisy-chain of peripherals. The theoretical maximum speed of ADB is 125 Kb/s, although around 62 Kb/s was closer to that experienced in practice. Among these ADB devices came dongles, used to enforce software copy-protection. Devices on an ADB chain each have an address, defaulting to $2 for keyboards, and $3 for mice.

adbparser

This is ADB Parser, analysing its traffic. Note both Keyboard and Ext. Keyboard initially shared the original address of 02, and the Mouse has 03.

Perhaps the greatest shortcoming of ADB was that it wasn’t intended to be hot-swappable, and the Mac was supposed to be shut down before any changes were made to its connected ADB devices. Although many of us ignored that, it was at our peril. Occasionally, hot-swapping ADB devices fried a fuse that was soldered into the motherboard; although there was a workaround, for most that required a trip to the local authorised Apple dealer and a replacement motherboard, at considerable expense.

ADB and serial ports underwent the transition from Motorola 68K processors to the PowerPC in 1994, and it was another four years before their replacement came, in USB 1.

USB

The first iMac, released in 1998, was also the first Mac without an ADB port, and came with two USB ports for its mouse, keyboard and other peripherals. The first version of USB had only been introduced in 1996, and brought with it new USB-A connectors, although those were initially complicated by a different USB-B format on printers.

The move to USB opened up many new possibilities for external devices including storage, and hubs quickly became needed to support the profusion. Performance was also greatly improved over ADB, leaping from 62 Kb/s to 12 Mb/s at what was appropriately known as Full Speed. That improved again when USB 2.0 (released in 2000) appeared in the 15-inch iMac, iBook and PowerBook G4, and Power Mac G5 of 2003. These reached 480 Mb/s in what was justifiably called High Speed.

asp3

Apple System Profiler here shows five USB devices, each with its own driver, connected to a hub. These include a third-party mouse, and a USB-to-serial adaptor.

msmouse

Third-party mice and other input devices thrived with USB, although driver support was variable. This is a Microsoft IntelliPoint mouse that was popular.

usbprober

USB was far more complex than ADB, as seen here in ADB Prober. This is a selection of the data in a basic powered USB hub. One of the lasting mysteries was why some peripherals worked more reliably when connected to powered hubs, while others didn’t work at all unless connected direct to a port on the Mac.

USB continued to develop, and with it a profusion of different plug and socket formats. Several different Mini and Micro versions came to fill our drawers and boxes with their cables and adaptors. By the time of USB 3.0 and its 5 Gb/s SuperSpeed and USB-C format, we were all hoping for a reprieve and the return of simplicity. Those hopes were dashed with USB 3.1 in 2013, and its Gen 1 and Gen 2 with their confusion of different terms.

Bluetooth

The last transition for input devices was to do away with cables (almost) altogether, and in 2017 Apple dropped its last models of wired mice and keyboards. At first their wireless replacements required USB-A ports for their charging cables, and have most recently switched to USB-C. Bluetooth had its origins in 1999-2001 in headsets and mobile phones, and by the time our input devices had gone wireless they were achieving data rates upwards of 1 Mb/s over a short range. Few of us now rely on ports and cables to support our keyboards, mice and trackpads.

Wikipedia

ADB
USB

Node-Red使用MQTT协议接收及发送消息到ESP32单片机


以下方法经本人验证通过,环境如下:

Node-RED V0.20.5

ESP32-CAM + HC-SR04 + Arduino IDE

mosquitto version 2.0.11

MatrixDB


前言:Node-RED 是构建物联网(IOT, Internet of Things)应用程序的一个强大工具,而MQTT则是当下使用广泛的物联网通信协议之一,为此我使用一块ESP-32单片机作为客户端,连接HC-SR04超声波测距模块做了两个简单的实验。

  • 实验一:获取物体距离数据,使用MQTT协议发送消息,并在Node-Red端进行接收,将数据保存在MatrixDB数据库中
  • 实验二:Node-Red使用MQTT协议发送消息,ESP32收到消息后对LED灯进行控制

实验中我使用了同一块ESP-32,实际应用中他们既可以是相同的物联网设备,当然也可以是不同的。实验目的是抛砖引玉,实际物联网中各类复杂场景都可以此为基础进行实现。

本实验的环境我在开篇已经列出,对于环境的准备,你可根据自己的情况参考下列文章做出调整:

第一步: 连接HC-SR04超声波测距模块

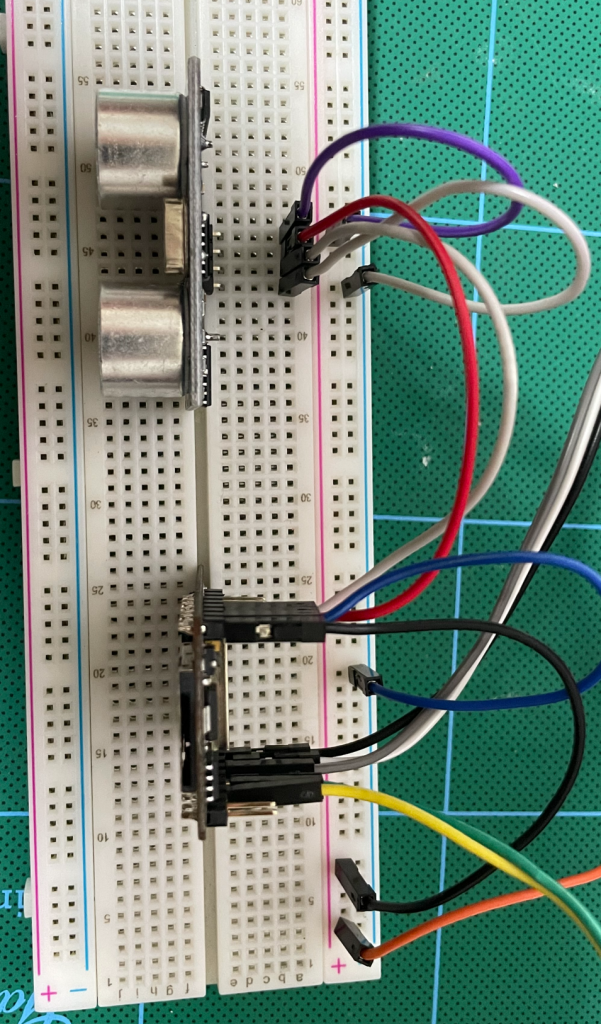
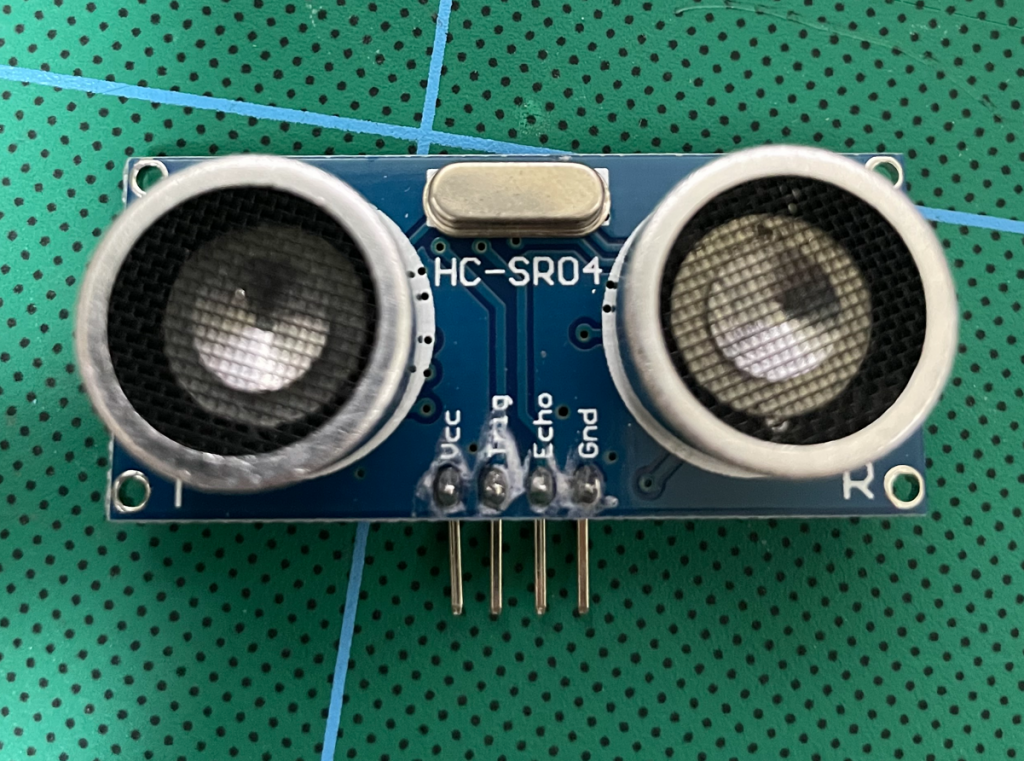
HC-SR04 有4个针脚,分别是Vcc, Trig, Echo, Gnd。Vcc接5V供电,Trig 和 Echo接IO口,Gnd自然就是接地。我将Trig连接到IO12,Echo连接到IO13,连接示意图如下:

第二步: 编写实验所需的程序,并烧录到ESP32

HC-SR04 的测距原理是向 Trig 口发一个10US 以上的高电平, 模块会发送8 个40khz 的方波并自动检测是否有信号返回,如有就通过 Echo 口输出一高电平,高电平持续的时间就是超声波从发射到返回的时间。

因此我们只需要将连接Trig口的 IO12 设置为OUTPUT,发一个持续时间为10US 的高电平,然后获取连接着Echo 口的 IO13 (设置为INPUT)高电平的持续时间,将取得的持续时间 *声速(340M/S)/2 就得到了距离。

实验中的LED为板载,使用的是IO4,将其设置为OUTPUT,通过高低电平即可控制开启和关闭

MQTT我使用的是PubSubClient库,如果你没安装,可通过库管理器进行安装加载

部分程序代码图如下:

引用的库和部分配置
连接wifi和群晖上的mosquittoMQTT服务
使用HC-SR04计算距离

代码编译通过后烧录到ESP32,上传烧录的方法在 win10利用arduino + esp32-cam搭建网络摄像头 文章中有写,不再啰嗦。

第三步: Node-Red 编写实验流程

实验一:拖入mqtt输入节点,双击,添加mqtt broke服务端

添加后选择该服务端,订阅主题。我在单片机上设置的发送的主题是Distance,因此这里也要输入主题为Distance

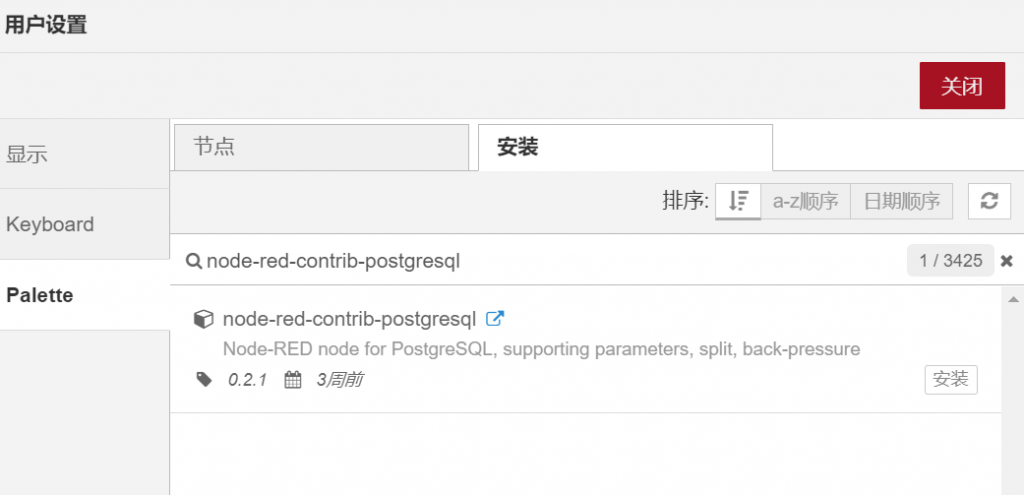
接着我们使用节点管理器安装node-red-contrib-postgresql,安装后将postgresql节点拖入

配置MatrixDB数据库

接着在Server中选择配置好的数据库,在Query中编写插入语句(我事前已经在数据库中添加了测试表MQTT_Test,包含payload,msg_time两个字段)

最后将两个节点连接起来,部署即可

实验二:这个比较简单,拖入两个inject节点,一个控制开启LED,一个控制关闭LED。开启的节点设置如下,内容为“ON”,这个是ESP32程序中我设置的命令,当接收到主题为LED的消息,且内容为ON时,开启LED。同理关闭设置内容为“OFF”

接着再拖入一个mqtt输出节点,将它与两个inject连接起来,该节点只需要配置好服务端和主题即可。配置如下:

至此流程编写完毕

导出的流程如下:

[{"id":"81d18949.9b6738","type":"mqtt in","z":"b8dd355c.40cd78","name":"","topic":"Distance","qos":"2","datatype":"auto","broker":"fcb81ef4.a2021","x":520,"y":320,"wires":[["14feeb2c.6dfff5"]]},{"id":"23f6b97e.a38776","type":"comment","z":"b8dd355c.40cd78","name":"实验一:接收MQTT消息,将数据写入数据库","info":"","x":630,"y":260,"wires":[]},{"id":"af6c9b1b.dab788","type":"mqtt out","z":"b8dd355c.40cd78","name":"","topic":"LED","qos":"","retain":"","broker":"fcb81ef4.a2021","x":760,"y":540,"wires":[],"inputLabels":["ON"]},{"id":"4718d956.78af68","type":"inject","z":"b8dd355c.40cd78","name":"开灯","topic":"Test 2.1","payload":"ON","payloadType":"str","repeat":"","crontab":"","once":false,"onceDelay":0.1,"x":530,"y":500,"wires":[["af6c9b1b.dab788"]]},{"id":"2fc63b12.cba2d4","type":"inject","z":"b8dd355c.40cd78","name":"关灯","topic":"Test 2.2","payload":"OFF","payloadType":"str","repeat":"","crontab":"","once":false,"onceDelay":0.1,"x":530,"y":580,"wires":[["af6c9b1b.dab788"]]},{"id":"c3cfd91.f709f28","type":"comment","z":"b8dd355c.40cd78","name":"实验二:发送MQTT消息,控制板载LED","info":"","x":610,"y":440,"wires":[]},{"id":"14feeb2c.6dfff5","type":"postgresql","z":"b8dd355c.40cd78","name":"保存收到消息","query":"INSERT INTO \"MQTT_Test\" (payload,msg_time) VALUES ( '{{{msg.payload}}}' ,now());","postgreSQLConfig":"8e100f3e.01c4b","split":false,"rowsPerMsg":"1","outputs":1,"x":789.1667709350586,"y":317.66671657562256,"wires":[[]]},{"id":"fcb81ef4.a2021","type":"mqtt-broker","z":"","name":"feeus","broker":"10.0.0.2","port":"18831","clientid":"","usetls":false,"compatmode":true,"keepalive":"60","cleansession":true,"birthTopic":"","birthQos":"0","birthPayload":"","closeTopic":"","closeQos":"0","closePayload":"","willTopic":"","willQos":"0","willPayload":""},{"id":"8e100f3e.01c4b","type":"postgreSQLConfig","z":"","name":"MatrixDB","host":"10.0.0.214","hostFieldType":"str","port":"5432","portFieldType":"num","database":"feeus","databaseFieldType":"str","ssl":"false","sslFieldType":"bool","max":"10","maxFieldType":"num","min":"1","minFieldType":"num","idle":"1000","idleFieldType":"num","connectionTimeout":"10000","connectionTimeoutFieldType":"num","user":"mxadmin","userFieldType":"str","password":"feeus.com","passwordFieldType":"str"}]

第四步:验证实验结果


如果您喜欢这篇文章,或者它给您带来了帮助,您可以请我们喝一杯咖啡,我们将非常感谢您的支持!

CentOS 7 安装纵横数据库(MatrixDB)

以下方法经本人验证通过,环境如下:


VMware® Workstation 16 Player 虚拟机安装的 CentOS-7-x86_64-Minimal-2009

matrixdb-4.1.0.community-1.el7.x86_64.rpm

WinSCP 5.17.10

Navicat Premium 15.0.21


前言:在某个机缘巧合的情况下,了解到北京四维纵横数据技术有限公司和MatrixDB数据库,和公司CEO姚延栋先生沟通后得知MatrixDB是专为物联网、车联网、工业互联网和智慧城市打造的一站式数据平台,因此借机试用一番。

以下步骤基于官方教程,此处仅为自己安装验证后的简要记录,便于后期查阅

第一步:获得最新的MatrixDB安装文件

在官方地址: https://ymatrix.cn/download 输入相关信息登记后 邮箱中便会收到下载连接 ,下载后得到安装文件,例如我选择的是社区版,得到的文件是matrixdb-4.1.0.community-1.el7.x86_64.rpm

使用 WinSCP 等工具将安装文件上传到 CentOS 的/root目录下

第二步:安装依赖环境

使用root用户ssh到CentOS,逐一执行以下命令

yum install centos-release-scl
yum install rh-python36
scl enable rh-python36 bash
yum install -y epel-release || yum install -y https://dl.fedoraproject.org/pub/epel/epel-release-latest-$(cut -d: -f5 /etc/system-release-cpe | cut -d. -f1).noarch.rpm
yum install -y https://apache.jfrog.io/artifactory/arrow/centos/$(cut -d: -f5 /etc/system-release-cpe | cut -d. -f1)/apache-arrow-release-latest.rpm
yum install -y arrow-libs-3.0.0 parquet-libs-3.0.0
systemctl stop firewalld.service
systemctl disable firewalld.service
sed s/^SELINUX=.*$/SELINUX=disabled/ -i /etc/selinux/config
setenforce 0
hostnamectl set-hostname mdw
192.168.100.10 mdw

接着输入命令 vi /etc/hosts 编辑/etc/hosts文件,添加下面的一行,将主机名映射,ip 地址为你 CentOS 的内网地址

第三步:安装数据库

输入以下命令安装数据库,install后是第一步MatrixDB安装文件的文件名,请根据自己情况修改

yum install matrixdb-4.1.0.community-1.el7.x86_64.rpm 

安装MatrixDB所依赖的python包

source /usr/local/matrixdb/greenplum_path.sh
yum install gcc python3-devel
pip3 install --upgrade setuptools
pip3 install argparse psutil pygresql pyyaml

安装成功后输入以下命令查看数据库超级用户密码

vi /etc/matrixdb/auth.conf

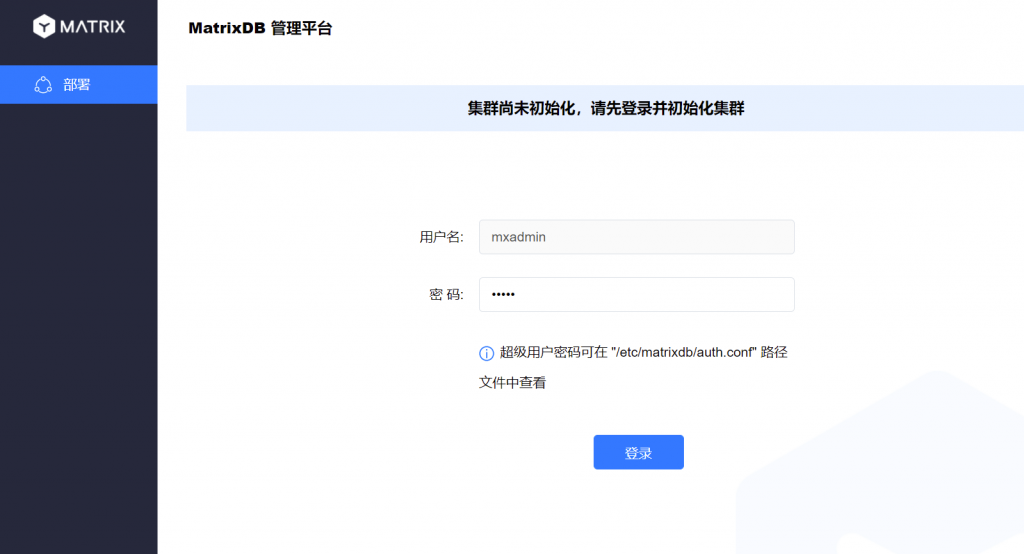
接着在浏览器中输入 http://<CentOS 的IP>:8240/ 打开图形化安装向导,输入刚刚获得的 数据库超级用户密码 后登录

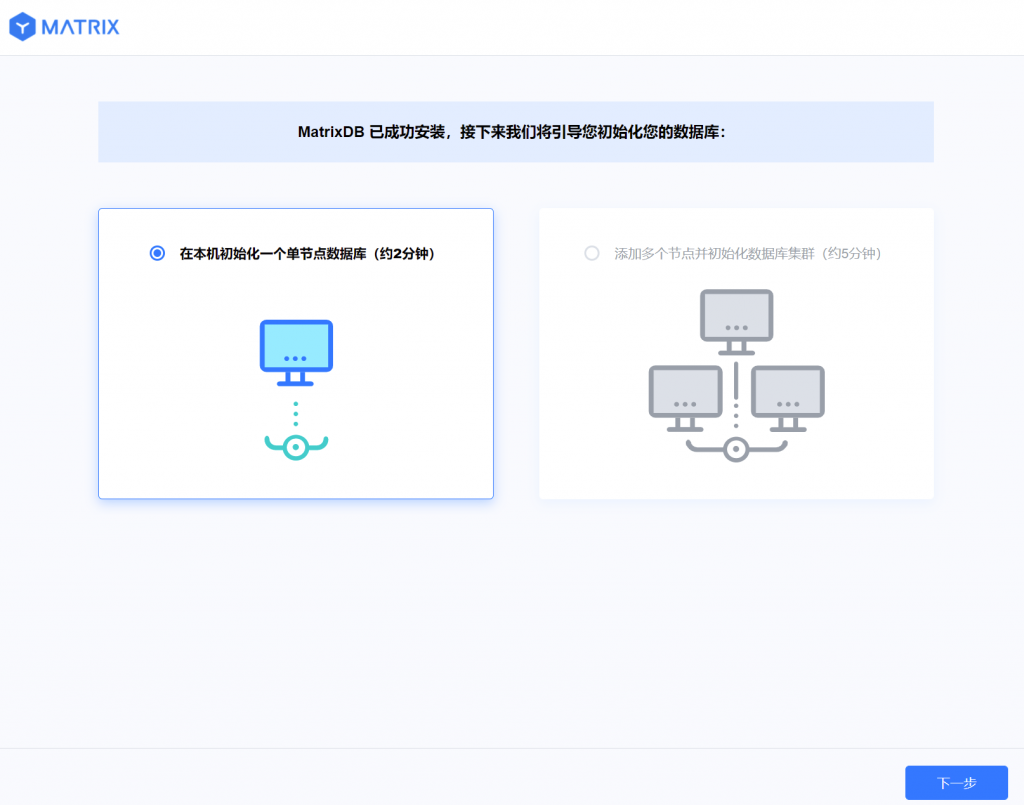
这里我选择单节点数据库

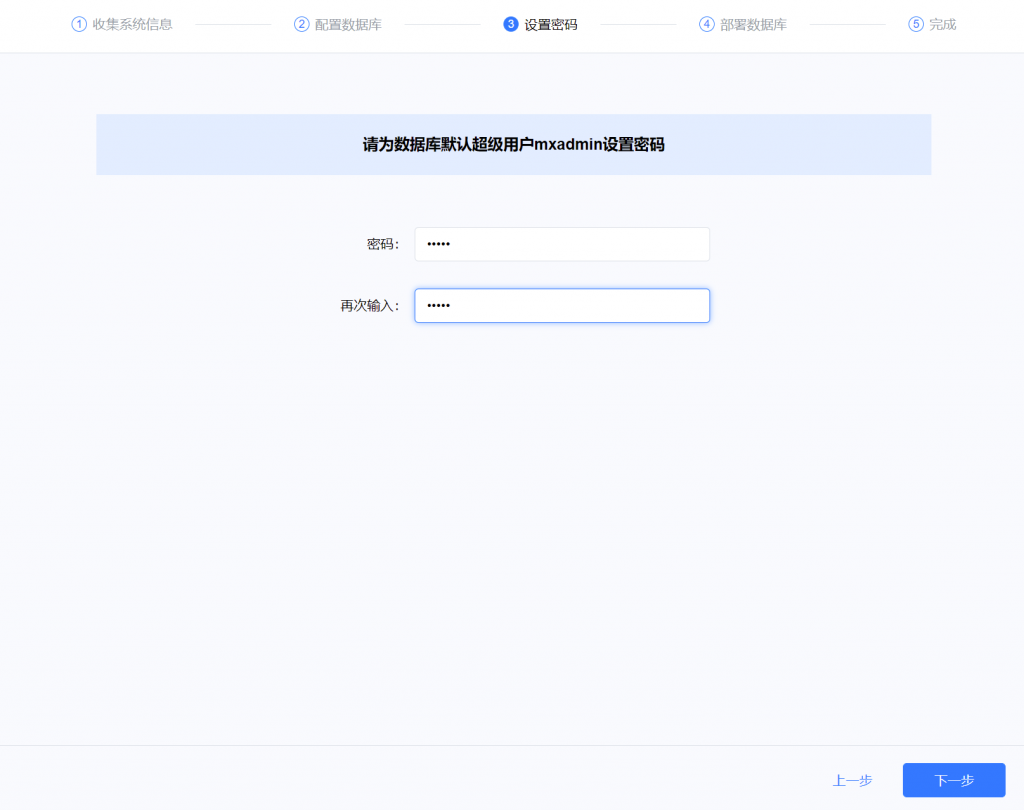
在设置密码步骤,可以修改设置超级用户mxadmin的密码

继续下一步后直至完成数据库安装

第四步:客户端管理

数据库默认只允许本地连接访问。如需开启远程连接访问需要在 /data/master/mxseg-1/pg_hba.conf文件中添加以下一行配置(0.0.0.0/0表示允许来自任何IP的用户远程访问数据库,请根据自己需求修改配置)

host    all      all      0.0.0.0/0    md5

保存后,依次执行下述命令让上面的配置生效

sudo su - mxadmin
gpstop -u

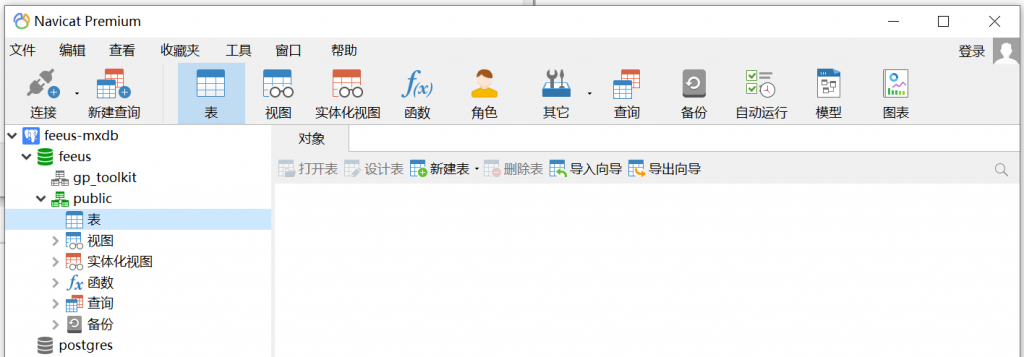
客户端我使用的是 Navicat Premium ,新增一个链接,类型选择PostgreSQL,填写正确的ip、用户和密码后,测试链接成功即可


如果您喜欢这篇文章,或者它给您带来了帮助,您可以请我们喝一杯咖啡,我们将非常感谢您的支持!

❌