In the foothills of the Ecuadorean Amazon, a 101-year-old farmer and a young scientist turned an amateur collection into a scientific survey of one of the most diverse snake habitats on Earth.
Manuel Genaro Peñafiel Flores with some of his collection of snakes at home in Mera, Ecuador.
During a special edition of “Popcast,” the singer discussed her new album and the public fallout from a series of lawsuits. Then she performed a stripped-down set.
Before becoming U.S. commerce secretary, Mr. Lutnick controlled 818 companies. A review of their dealings sheds light on his freewheeling first year in government.
Just over six months ago a series of weird bugs came to light in Spotlight indexing. The first report was that plain text files beginning with the characters LG are never indexed, so their contents can never be found by Spotlight search. The mystery deepened when the same was discovered for text files beginning with the characters NPA or Draw. It was appropriately Drew who worked out the common factor behind this apparently bizarre connected behaviour: all three files are identified as not being text by the old Unix utility file(1), used to recognise file types by ‘sniffing’ their contents.
You can verify that by creating a plain text file with any of those three sets of characters at its start, then running the command file on that file. In the case of one beginning with Draw, file will identify it as RISC OS Draw file data, even though the file has an extension of txt or text and a UTI of public.plain-text. At that the RichText mdimporter, which analyses all text-based files for metadata to enter into Spotlight’s indexes, throws its hands up in horror and refuses to index the file’s contents. Change those opening characters in that file, perhaps by adding a leading space, and all of a sudden the mdimporter works as expected.
Following our collaborative effort here, particularly Drew’s insight, we realised this bug has been silently blocking the indexing of seemingly random text files for the last three years or more. What remained unanswered at the time was what that mdimporter was doing running file(1) on files whose UTI made it clear that they were in plain text, not some long-forgotten binary vector graphics format from 1989. I believe I now have an answer, thanks to my recent work on QuickLook’s qlgenerators.
QuickLook’s generators take advantage of the hierarchical structure of UTIs. Rather than accepting the most specific UTIs such as public.jpeg, Image.qlgenerator works with all files whose UTI conforms to the generic UTI of public.image, and then undertakes its own format detection. This enables it to generate correct thumbnails and previews of HEIC images that have been given the incorrect extension of jpg, for instance.
Similarly, a Swift source-code file with the extension of swift and the UTI of public.swift-source is handled by the Text.qlgenerator because public.swift-source conforms to public.plain-text, the UTI required for use of that generator.
What if Spotlight’s mdimporters were to work the same?
We know the built-in RichText.mdimporter is used to extract metadata for a wide range of files containing text, which all conform to the generic UTI of public.text. It then classifies them on the basis of their contents to work out what to index. What if that’s performed using file(1), so rejecting perfectly valid text files as ancient binary vector graphics files, and so on?
We can’t get the same direct evidence from the log that I obtained for QuickLook, as Spotlight is far less informative in its log entries. We can get clues from looking at output from mdimport and mdls, though. While a non-deviant text file contains a metadata attribute extracted by its importer as kMDItemTextContent containing the text in the file’s data, that’s missing from a text file starting with any of the three known triggers. In turn that’s associated with the attribute _kMDItemPrimaryTextEmbedding containing ‘vec_data’ listed by mdls, which is also missing for the deviant files.
There is hope that a third party might be able to undercut RichText.mdimporter by providing a bug-free importer for public.plain-text, but that relies on the built-in importer targeting public.text rather than public.plain-text. The best solution would be for Apple to fix the identification of text files instead of relying on file(1), which dates from 1973. Given that these deviant files work perfectly with QuickLook’s generator, it appears Apple has already solved this problem there. So I suspect this bug in RichText.mdimporter will never be fixed in Sequoia or Tahoe.
With the first beta-release of macOS 27 just a couple of weeks away, this leaves those using the last Intel Macs stuck with Spotlight indexing that will never work on some text files, assuming that at some point in the not too distant future this bug is finally fixed in an Arm-only macOS. This is all sadly familiar from the loss of 32-bit support in the transition from Mojave to Catalina, when little if any effort was devoted to making Mojave as free of bugs as possible before it was abandoned in the rush forward to 64-bit.
It would have been far better to be able to look back in fondness with macOS that worked better, than looking back in anger at what never got fixed.
One last thing to remember is that, when Apple does fix this bug, you’ll have to force Spotlight indexes to be rebuilt on each of your Mac’s volumes to ensure that the contents of these files are incorporated. We learned that last time there was a serious bug in the same importer, which failed to index the contents of RTF files.
For the last 15 years or so, local Time Machine backup storage has been required to be included in the volumes that are indexed by Spotlight. We also know too well that they have been indexed, as it has been common for their indexing to take longer than the backup they have just made. Some time around the release of Sonoma, those indexing sessions became less noticeable, but unless you tried to search your backups, you probably didn’t notice any change. For, as far as I can tell, Spotlight doesn’t currently appear able to search Time Machine backups reliably, at least not in Sequoia or Tahoe, although this may not be universal.
For most purposes, the ability to search backups is essential. If you have a series of more than 100 backups over the last couple of years, finding a lost file by inspecting each backup individually is a frustrating waste of time, and requires you to know where to look in each. Even if full content and metadata searching aren’t feasible, the ability to search on file attributes such as name, extension and datestamps is surely fundamental.
As we’ve come to expect, Apple’s documentation isn’t in the least bit helpful. What is surprising is that the instructions given are almost identical for every version of macOS from Mojave to Tahoe.
That page opens with a bold promise: “If you use Time Machine to back up your Mac, you can use Spotlight to initiate a search of Time Machine to recover lost or deleted items.”
That’s just what I’m looking for, so how do I do that? “On your Mac, open a Finder window, then type a search word or phrase in the search field in the upper-right corner. Refine the results by specifying search criteria using the search bar.”
Everything’s good so far, but as the document I’m looking isn’t there, how do I search for it in my backups? “Click the Time Machine icon in the menu bar, then choose ‘Browse Time Machine backups’.”
That opens the Time Machine app, blows away my search criteria, and lists the volumes including Macintosh HD and my backup storage, as of now. So how do I search for the file that I accidentally deleted a couple of hours ago?
“Use the arrows and timeline to browse the Time Machine backups.” But that’s looking for the missing file, not searching those backups for it.
If I now step back through my backups to reach one that I know contains that file, I can restore it. But if I type anything into the search field, nothing is found. If I change the scope of the search to that backup, the window title changes but its contents remain blank, and there isn’t even a busy spinner to indicate a search is in progress.
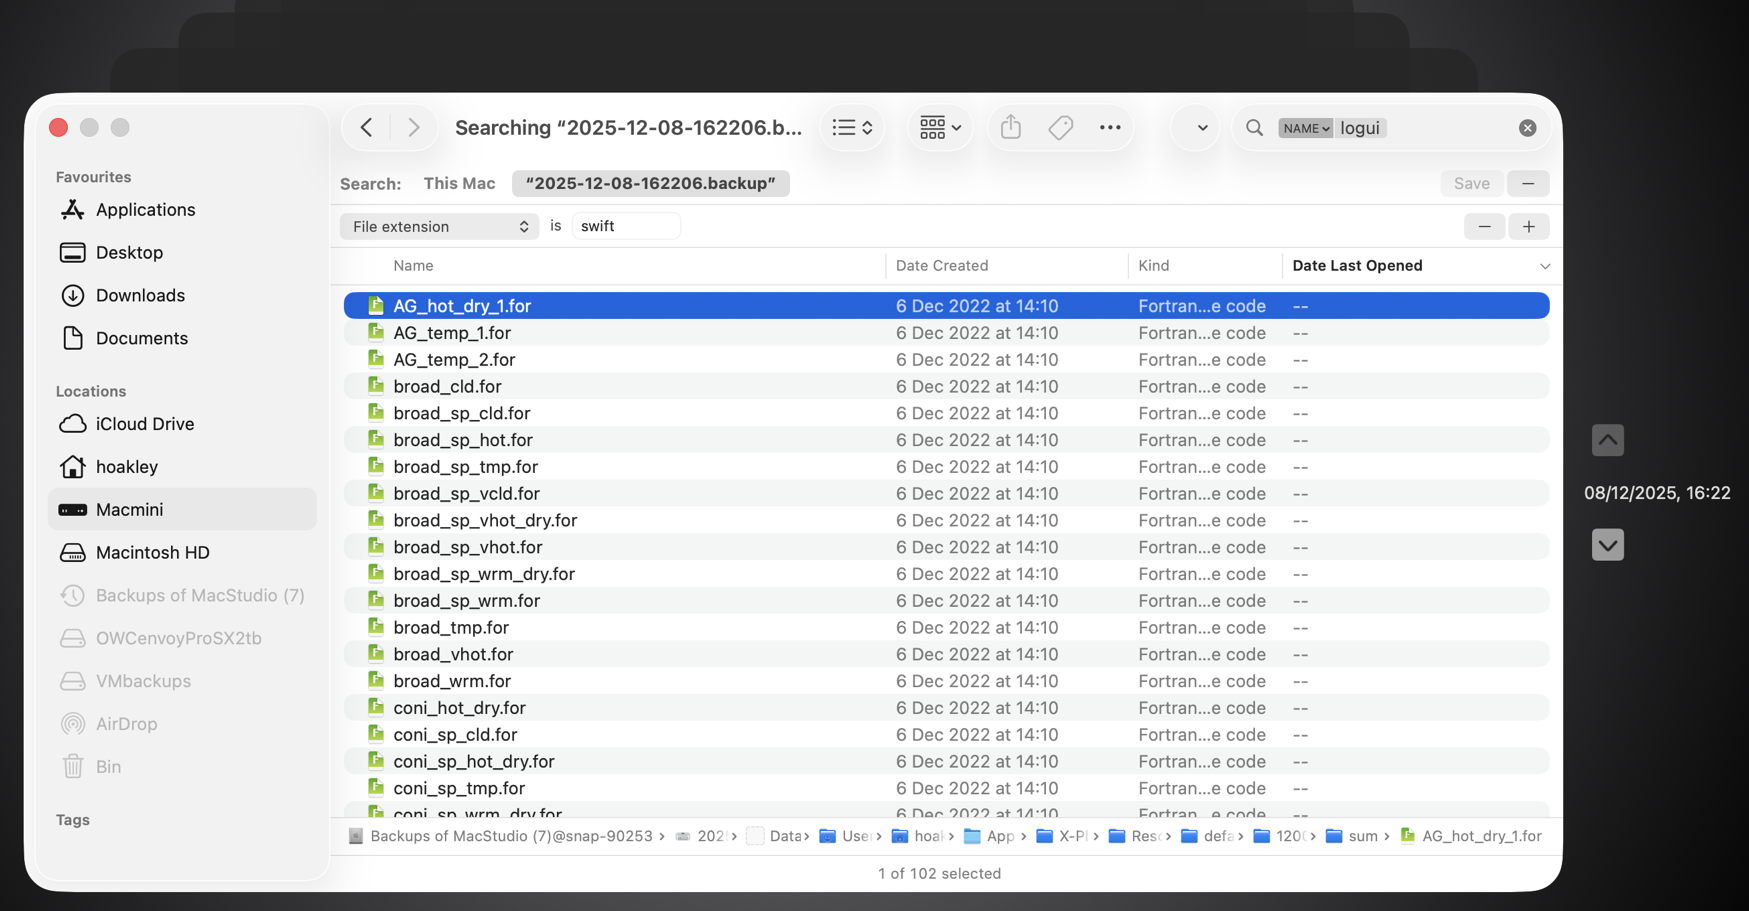
With a little fiddling, I managed to get some results for other searches. Here’s an example where I was looking for files whose name contains logui with the extension swift.
Here I ended up with 102 hits, all of them old Fortran source files, none of which meets either of those criteria.
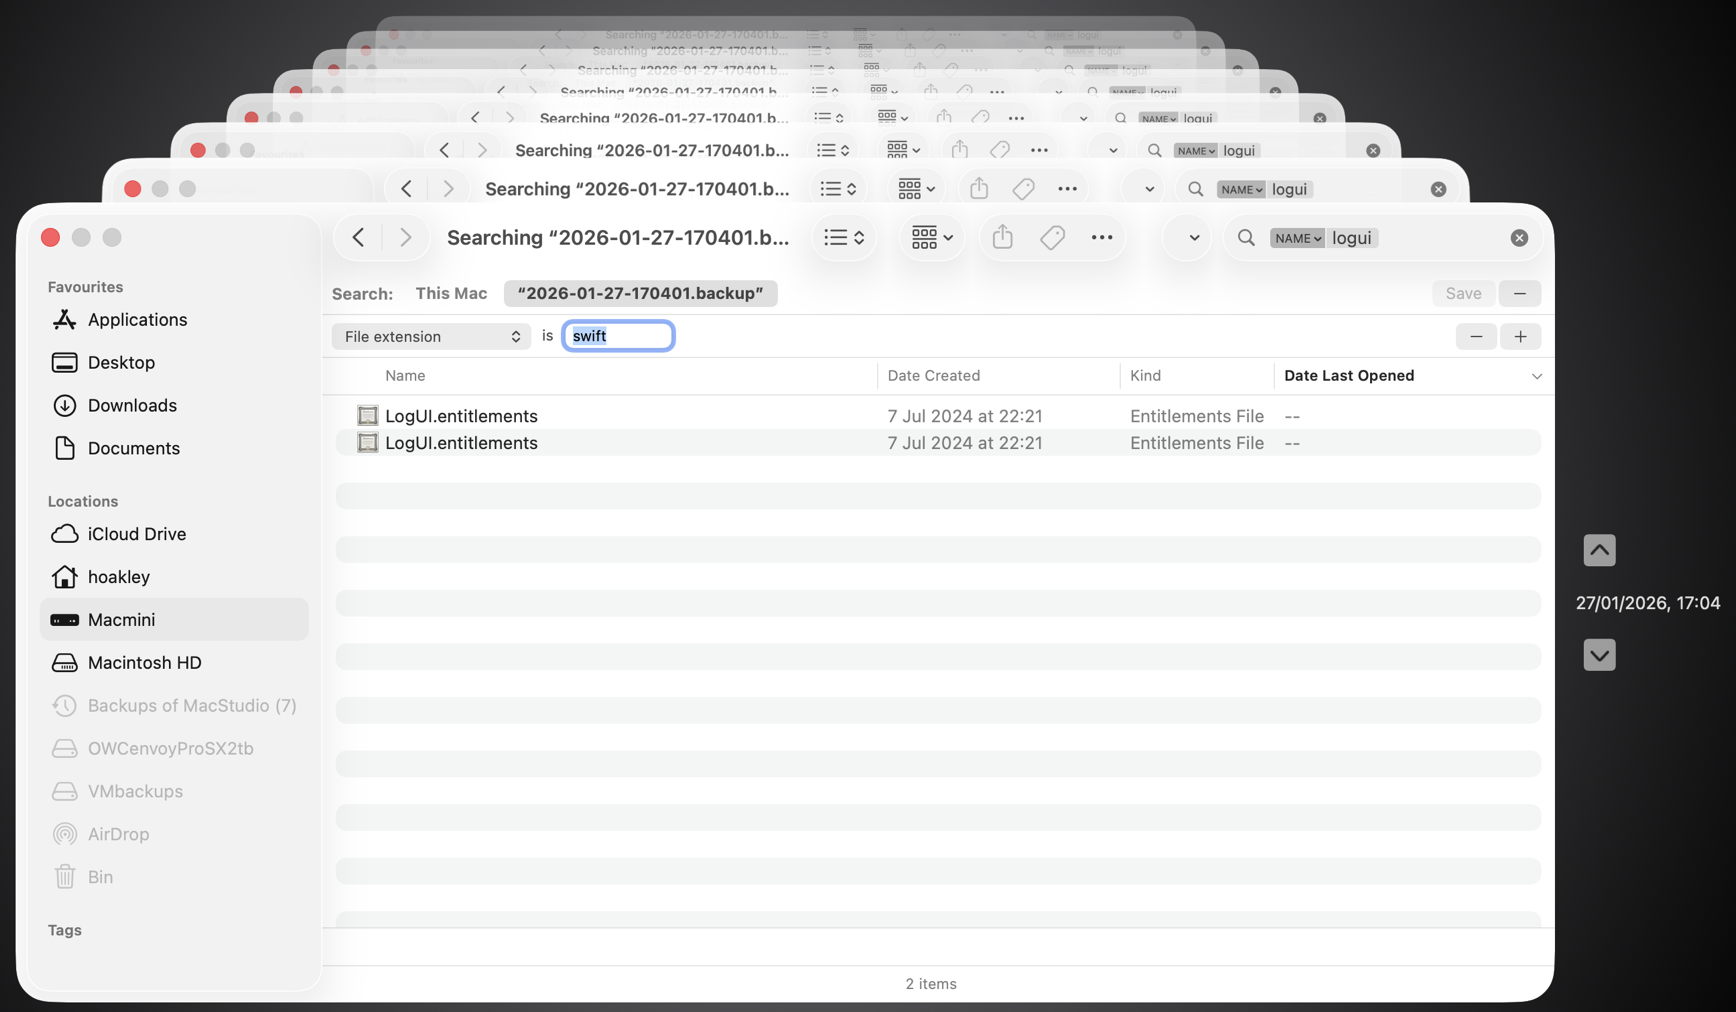
This time the two items found had appropriate names, but a completely different extension.
Undeterred, I left my Mac for over 24 hours, and tried again, only to discover the hourly backup containing my missing file had already been deleted. However, searching for files whose name contains logui with the extension swift proved just as futile. As I can’t disable Spotlight indexing on that volume without macOS telling me that it’s required to be indexed by Spotlight, neither can I force that volume to be reindexed.
There are third-party alternatives, including BackupLoupe and Find Any File (FAF). The former tellingly needs to create and maintain its own indexes, and FAF appears to work fairly reliably but takes an age to search each backup in turn.
In case this was a problem with one set of backups, I have now created a new backup set that suffers identical problems, and have reproduced this in both Sequoia and Tahoe, running on vastly different hardware. My conclusion is that using Spotlight to search Time Machine backups no longer works, and the instructions given by Apple are also broken. If you’ve managed to get reliable search working across your Time Machine backups without resorting to a third-party product, I’d be very grateful if you could explain how you did it.
Having gotten into trouble for making jokes critical of the Chinese government, the standup comic Chizi now lives in self-imposed exile. He’s finding that freedom imposes its own constraints.