Fun with UTIs, QuickLook and Spotlight
In case you haven’t got the message from the last few weeks looking at Spotlight and QuickLook, UTIs (Uniform Type Identifiers) are important, but not always as critical as they could be. To understand how macOS copes with misleading UTIs, I have a little demonstration you can try in the privacy of your own Mac.
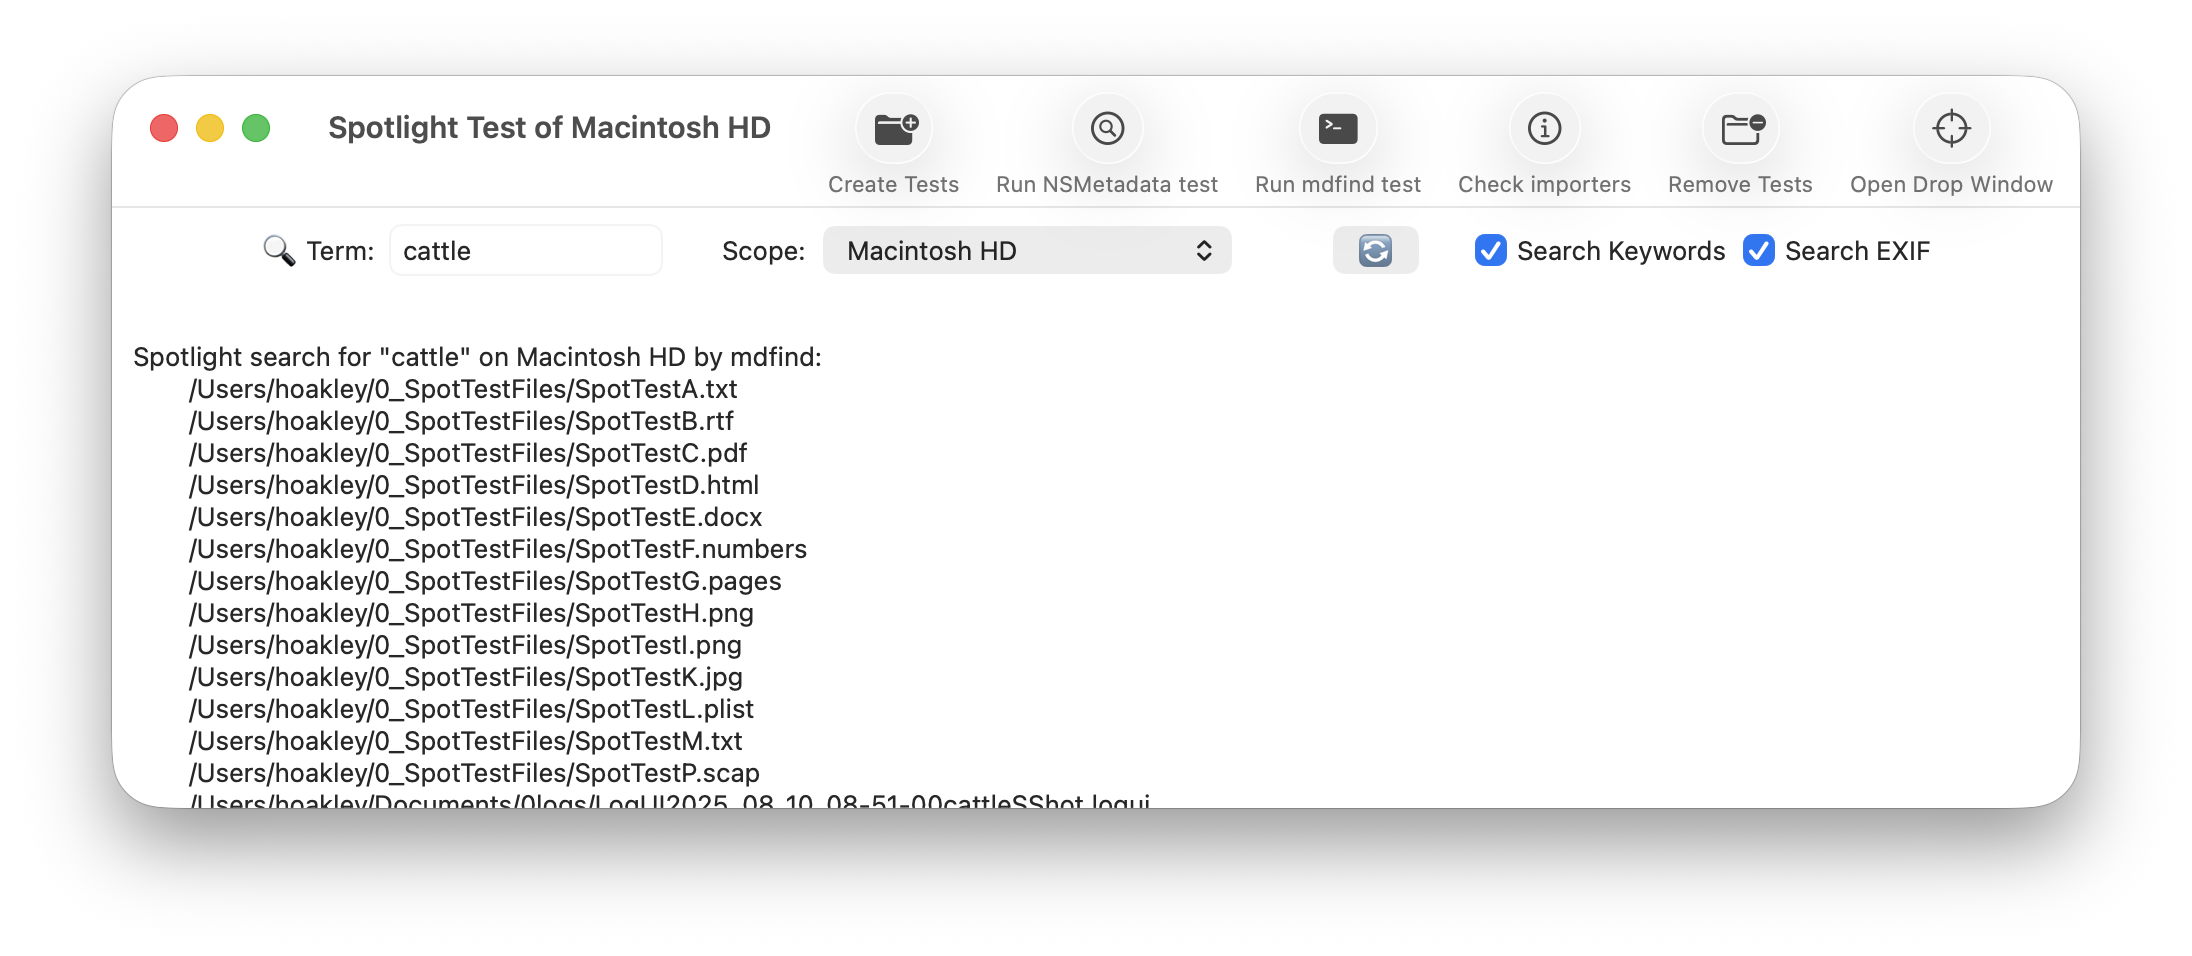
All you need for this is an image with some Exif metadata. Those taken by an iPhone are particularly suitable, as they usually contain rich Exif information about which model took that image, focal length, aperture, exposure time and more. In my case, the image is in HEIC format. If you have my apps UTIutility and SpotTest, you can also explore UTIs more thoroughly, and inspect the metadata from images that gets indexed by Spotlight, but those are optional extras.
A file with the extension HEIC or heic is assumed to have the UTI public.heic, which conforms to public.heif-standard, and that in turn conforms to public.image, the parent of most image formats in macOS. The Help book for UTIutility shows these in a dense diagram.
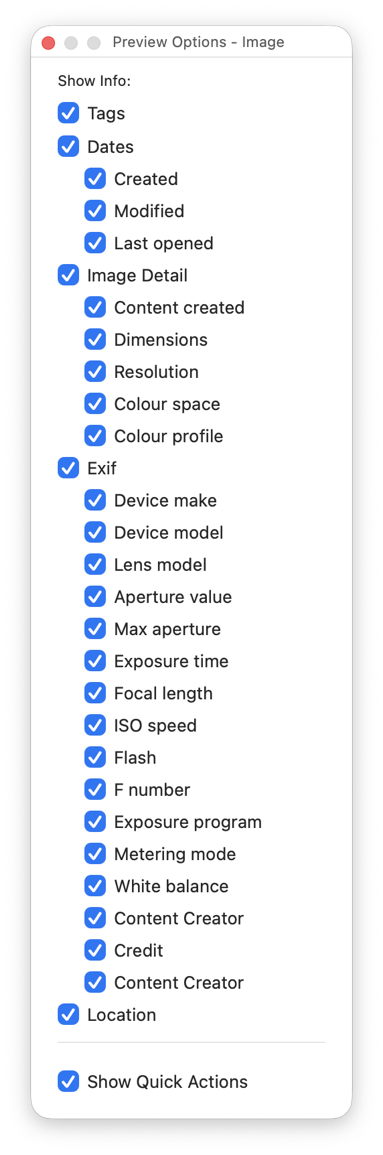
Select that image in the Finder’s Column view to inspect its public metadata. While the image is selected, open Show Preview Options in the View menu and enable all the metadata listed there to be shown in previews.
You should then have a good preview pane with lots of metadata below it.

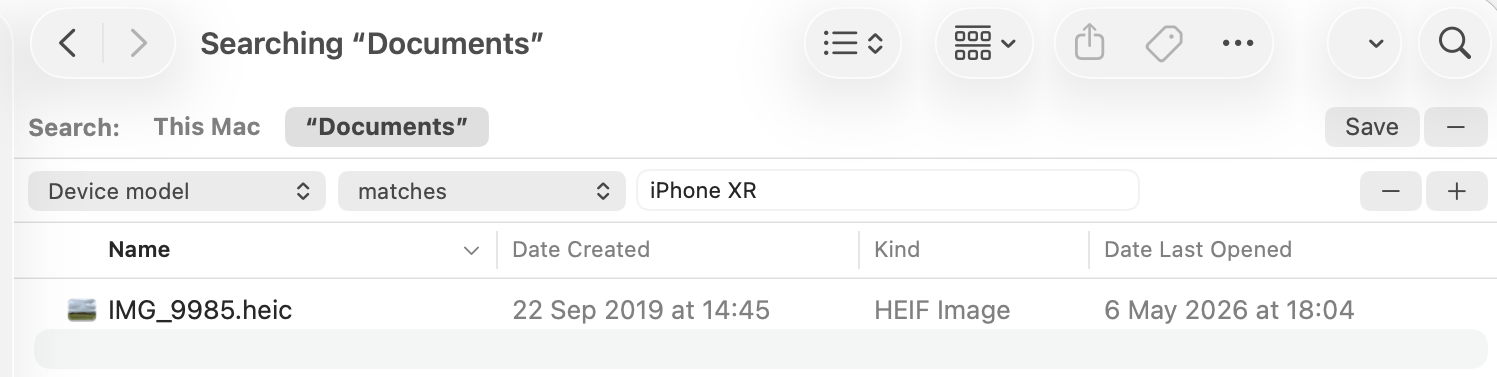
Next open a new Finder window and set it to Find. Using the search criterion popup menu, enable the Device model attribute, or another your image has metadata for, and search for that attribute, here iPhone XR, and you should see your image among the hits.
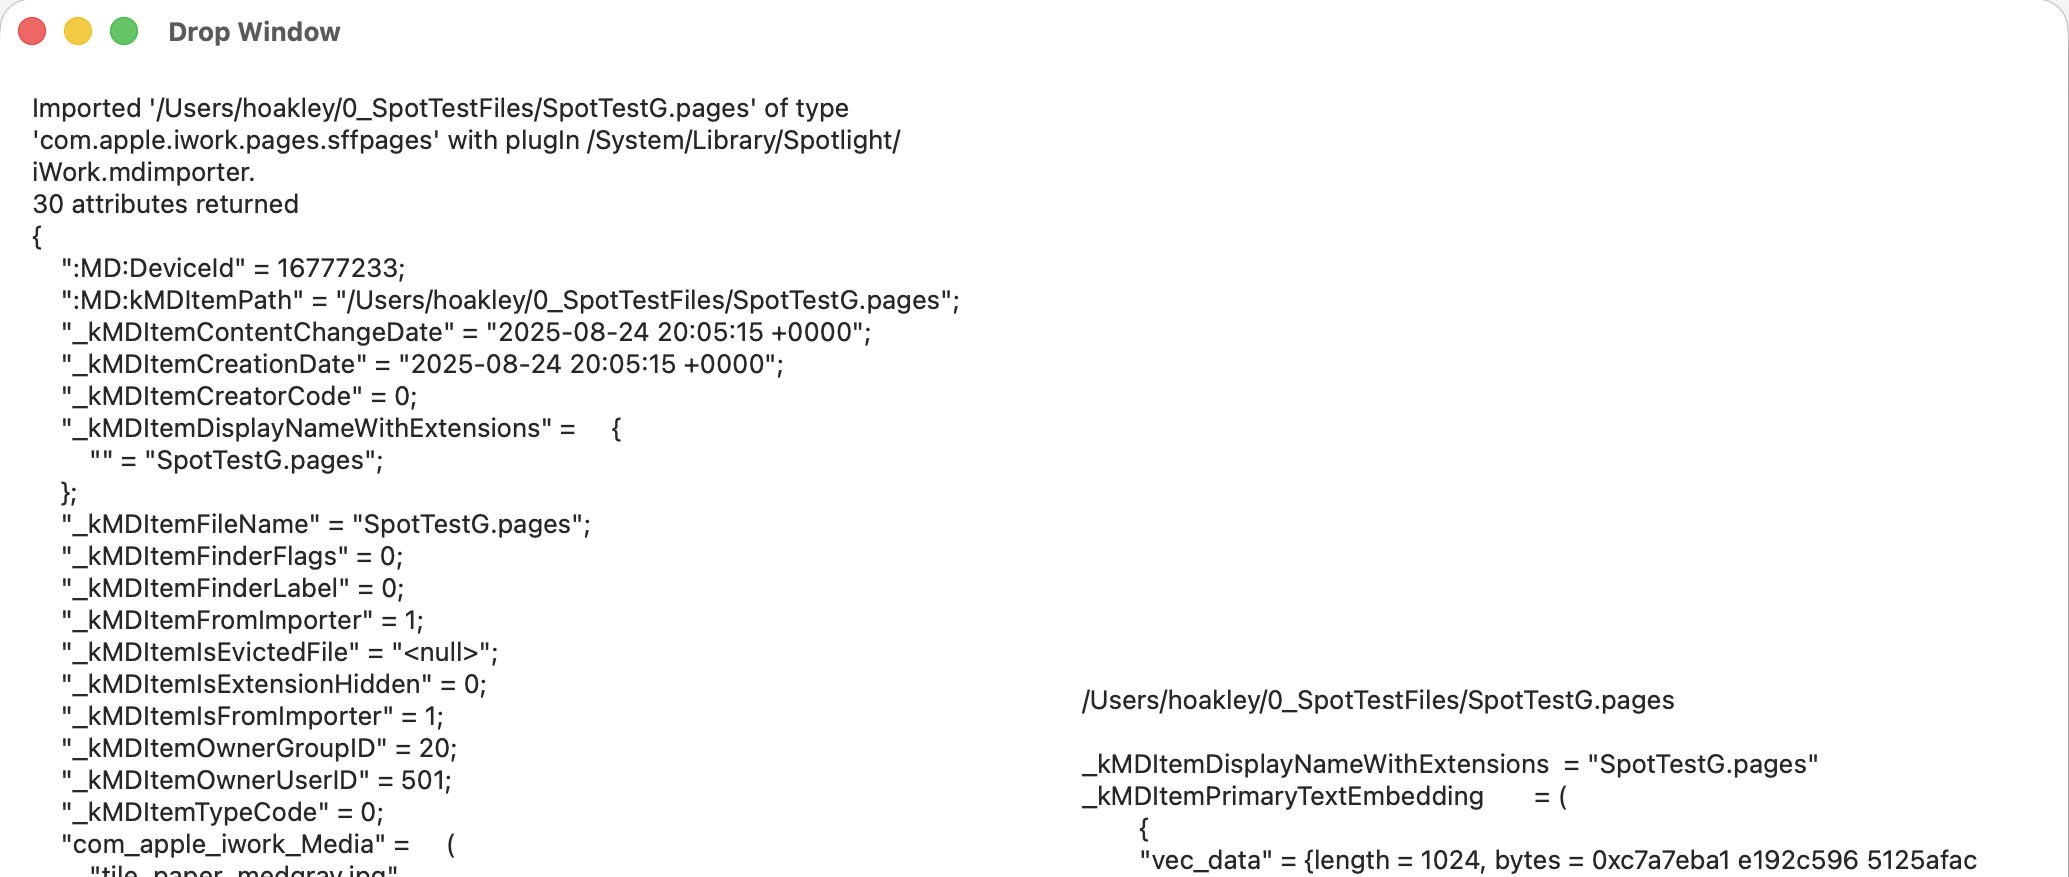
If you have SpotTest to hand, drop your image on its Drop Window. Being an image, it will crash mdimport, so the information you’ll see will be the metadata fields from Spotlight’s indexes, which should include the Device model as kMDItemAcquisitionModel.
So far, everything has worked as expected, but we’re now going to throw a spanner in the works by changing the extension on that image from HEIC to jpg, which changes the image’s UTI to public.jpeg, although that still conforms to public.image.

Its basic thumbnail icon now changes to a generic JPEG icon, so we’ve managed to confuse the basic thumbnailing scheme in QuickLook. But it’s still shown in the preview pane correctly, with all its metadata intact.
This is because that image has its larger thumbnails and previews generated by the qlgenerator for public.image, and that goes out of its way to parse the file data correctly, and recognise this is really a HEIC not a JPEG. If you’ve left the Finder Find window open, you’ll see that continues to find the image as if nothing had happened, as Spotlight also imports metadata using a common mdimporter for public.image, rather than relying on the more specific UTIs of public.jpeg or public.heic.
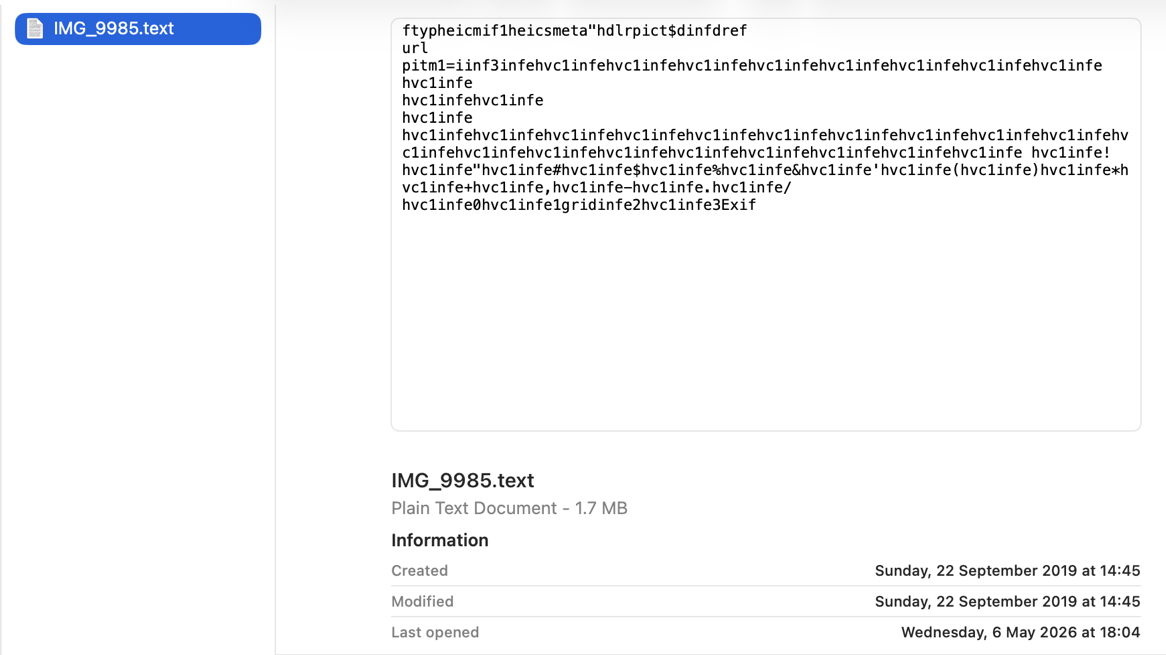
Finally, change the file’s extension to text, and you’ll see a preview of its text content, and it vanishes from the Find window too. That’s because text files are handled by their UTI of public.text, which includes public.rtf and others. Those don’t check the file data to ensure they’re not images, so the file is now being handled by the wrong qlgenerator and mdimporter, and won’t make any sense. As public.text formats don’t support Exif data, that isn’t extracted either, as you can see in SpotTest.
Change the extension back to heic, and you’ll see how quickly the right qlgenerator and mdimporter correct its thumbnails, previews, and search discovery, thanks to UTIs.
![]()